Showing posts with label gift idea. Show all posts

Thursday, June 18, 2015

Easy DIY Wedding signs (15 minute Craft) #CraftLighting

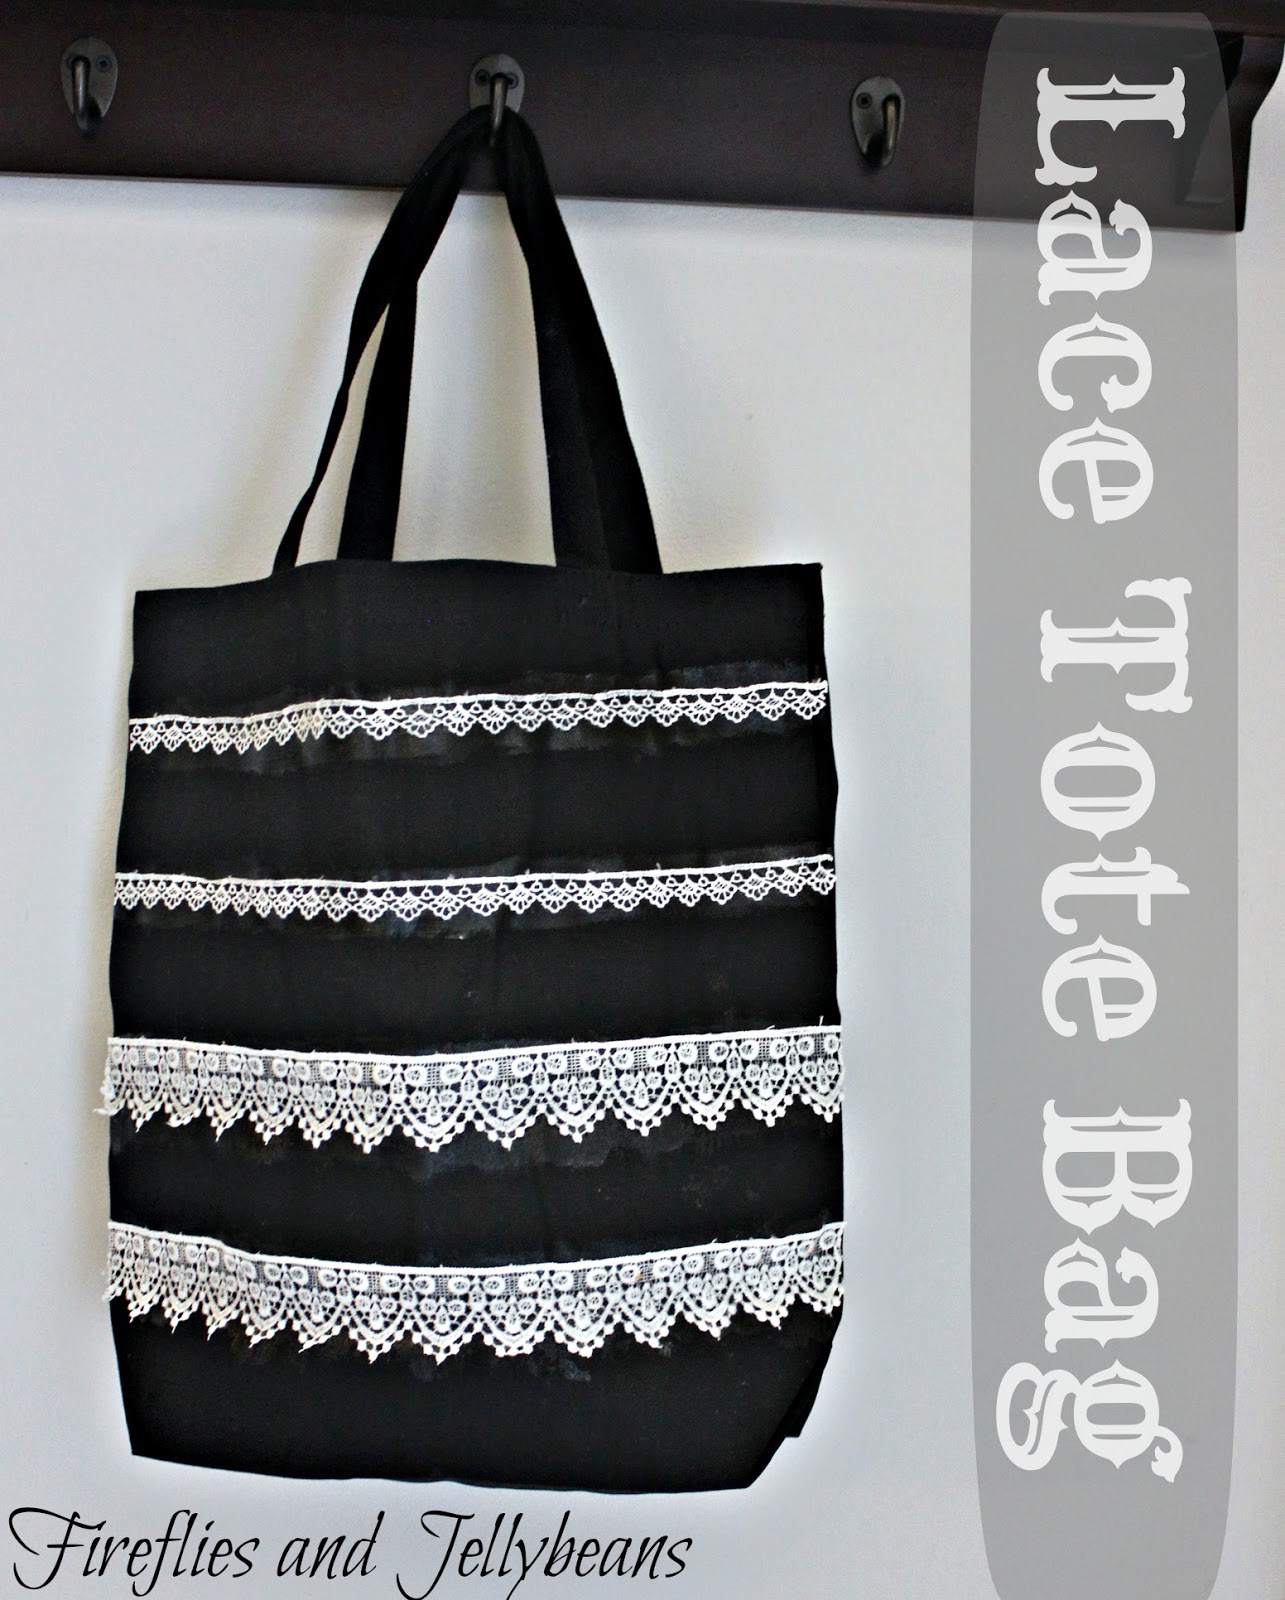
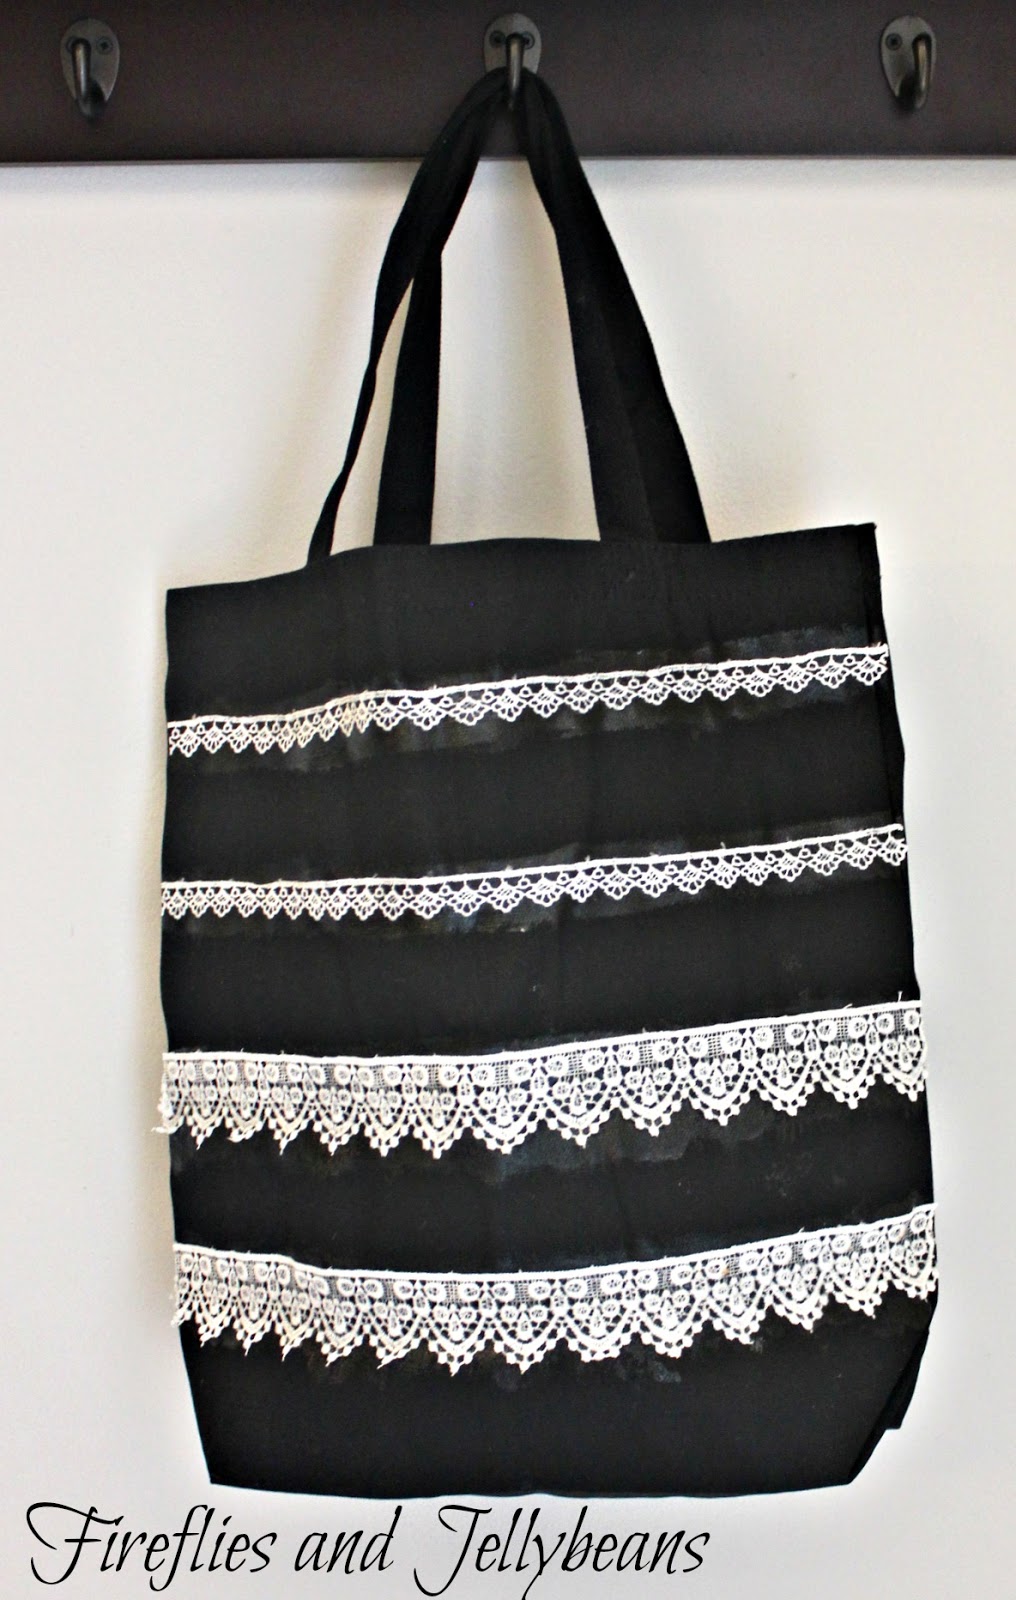
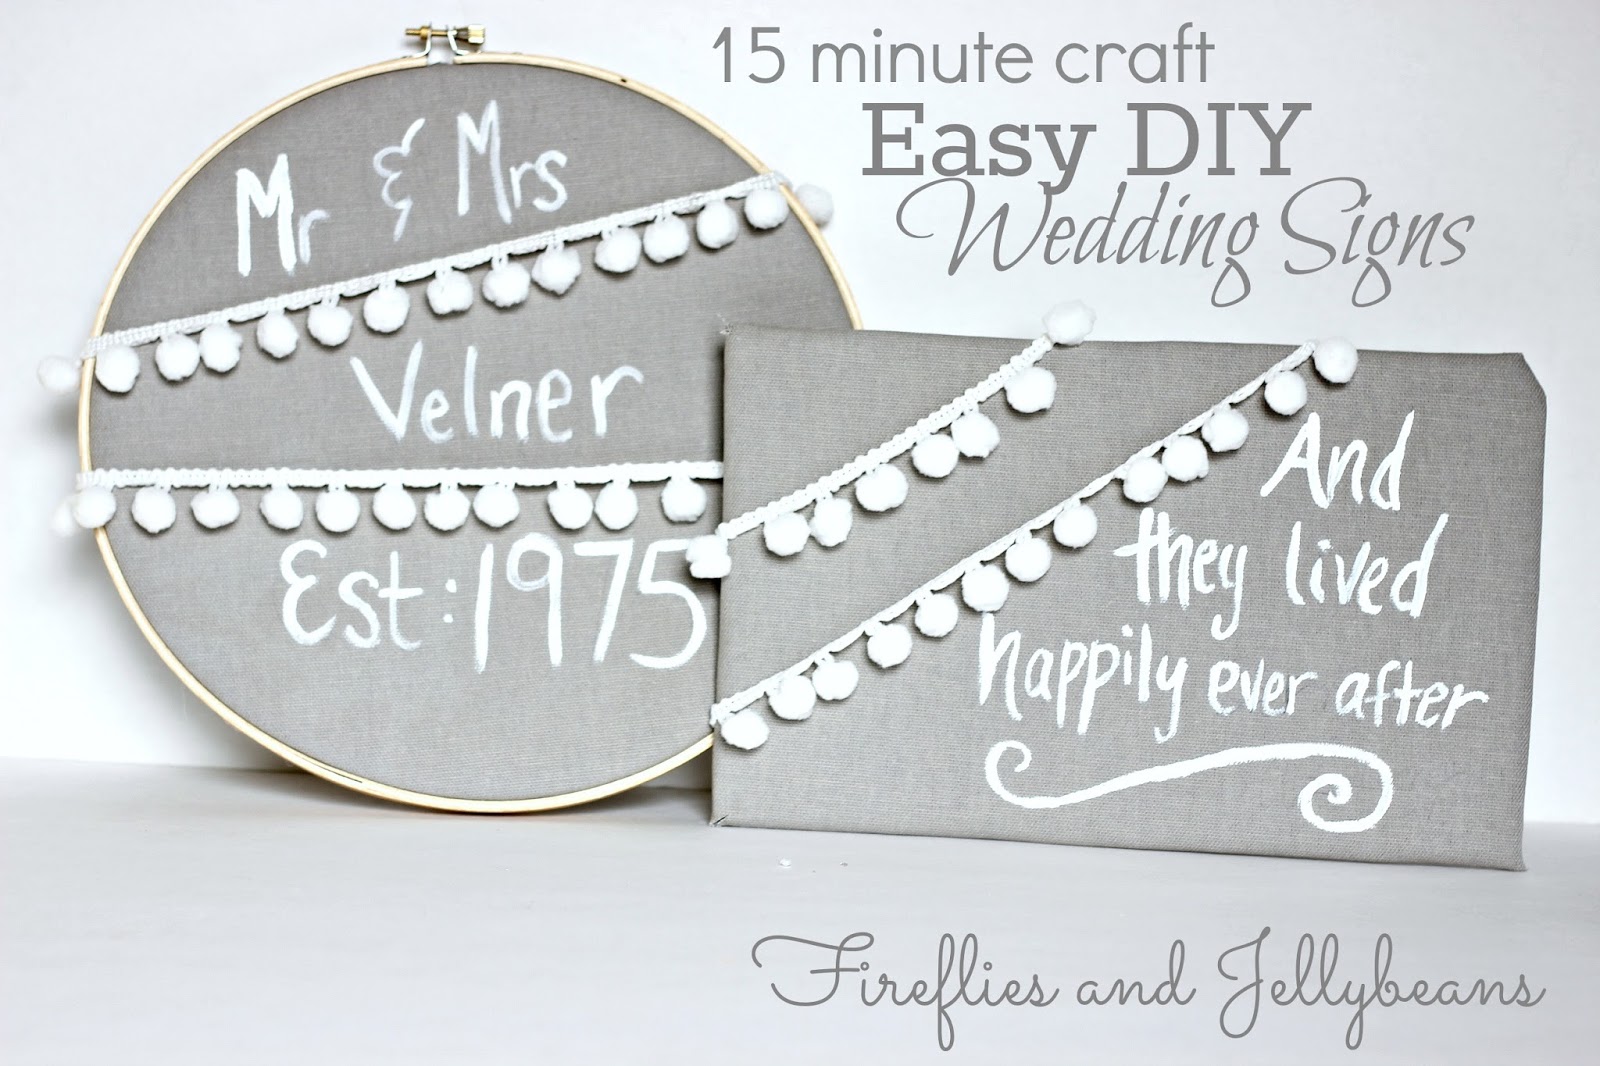
I love being a part of craft lighting every month!  I like being challenged to think of an easy craft for each theme! This month's theme is weddings.  Since i don't have any weddings that I am going to this year I created something for my parent's 40th wedding anniversary. But this could easily be used as wedding or bridal shower decor.

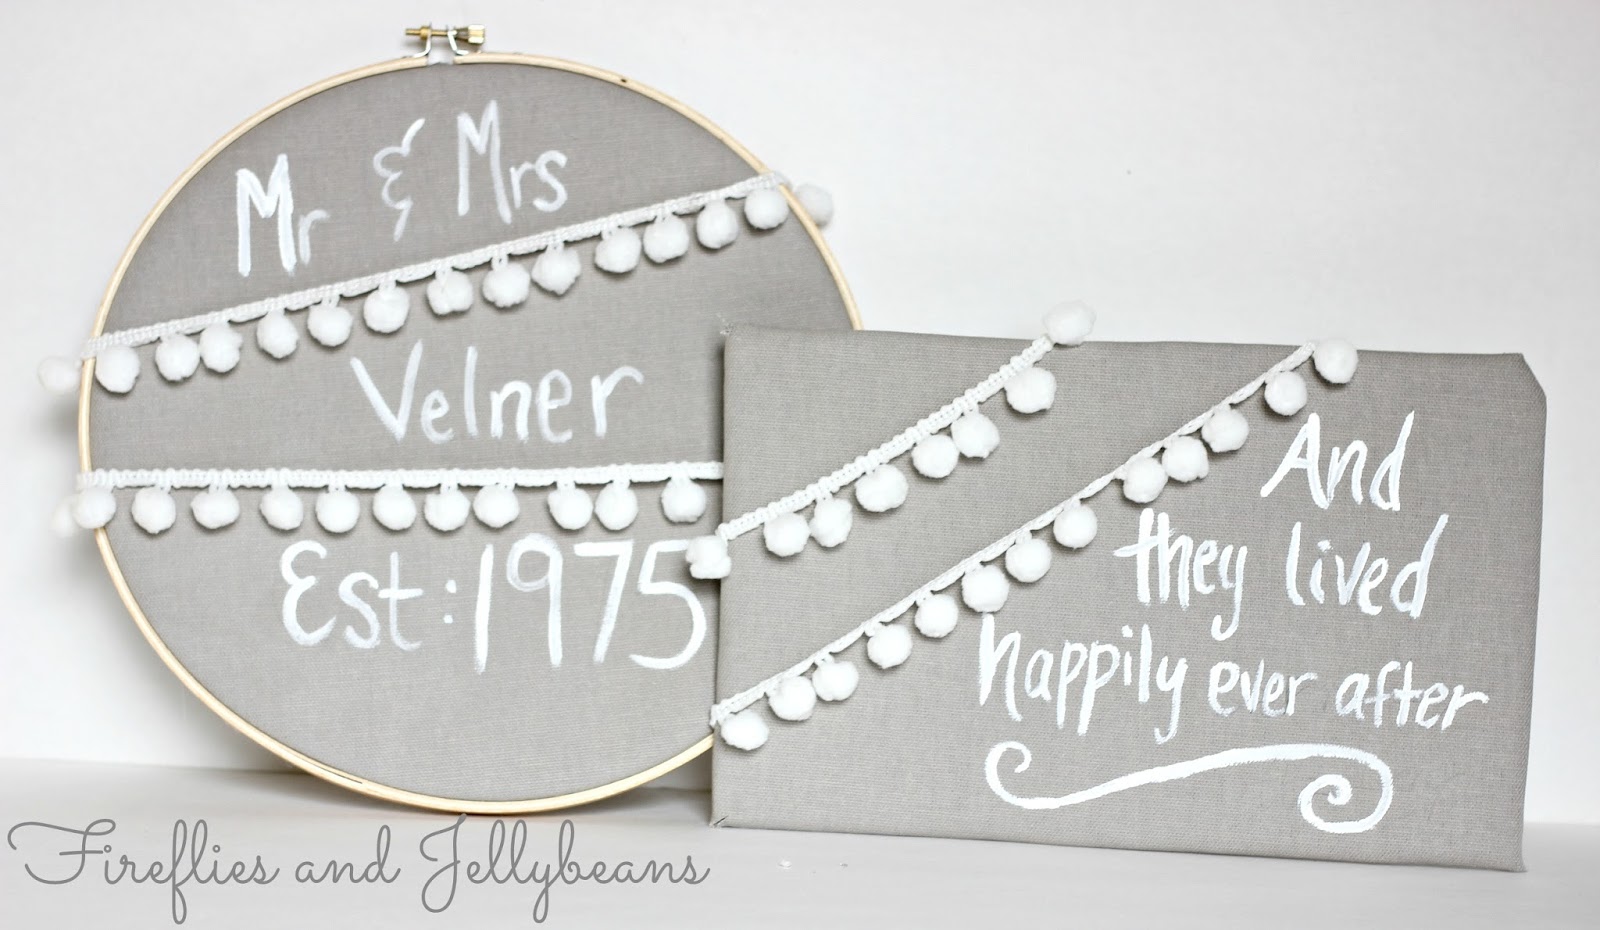
I made 2 signs... they could be used anywhere... the card basket, guestbook table, head table, etc...

Here is how I made them:

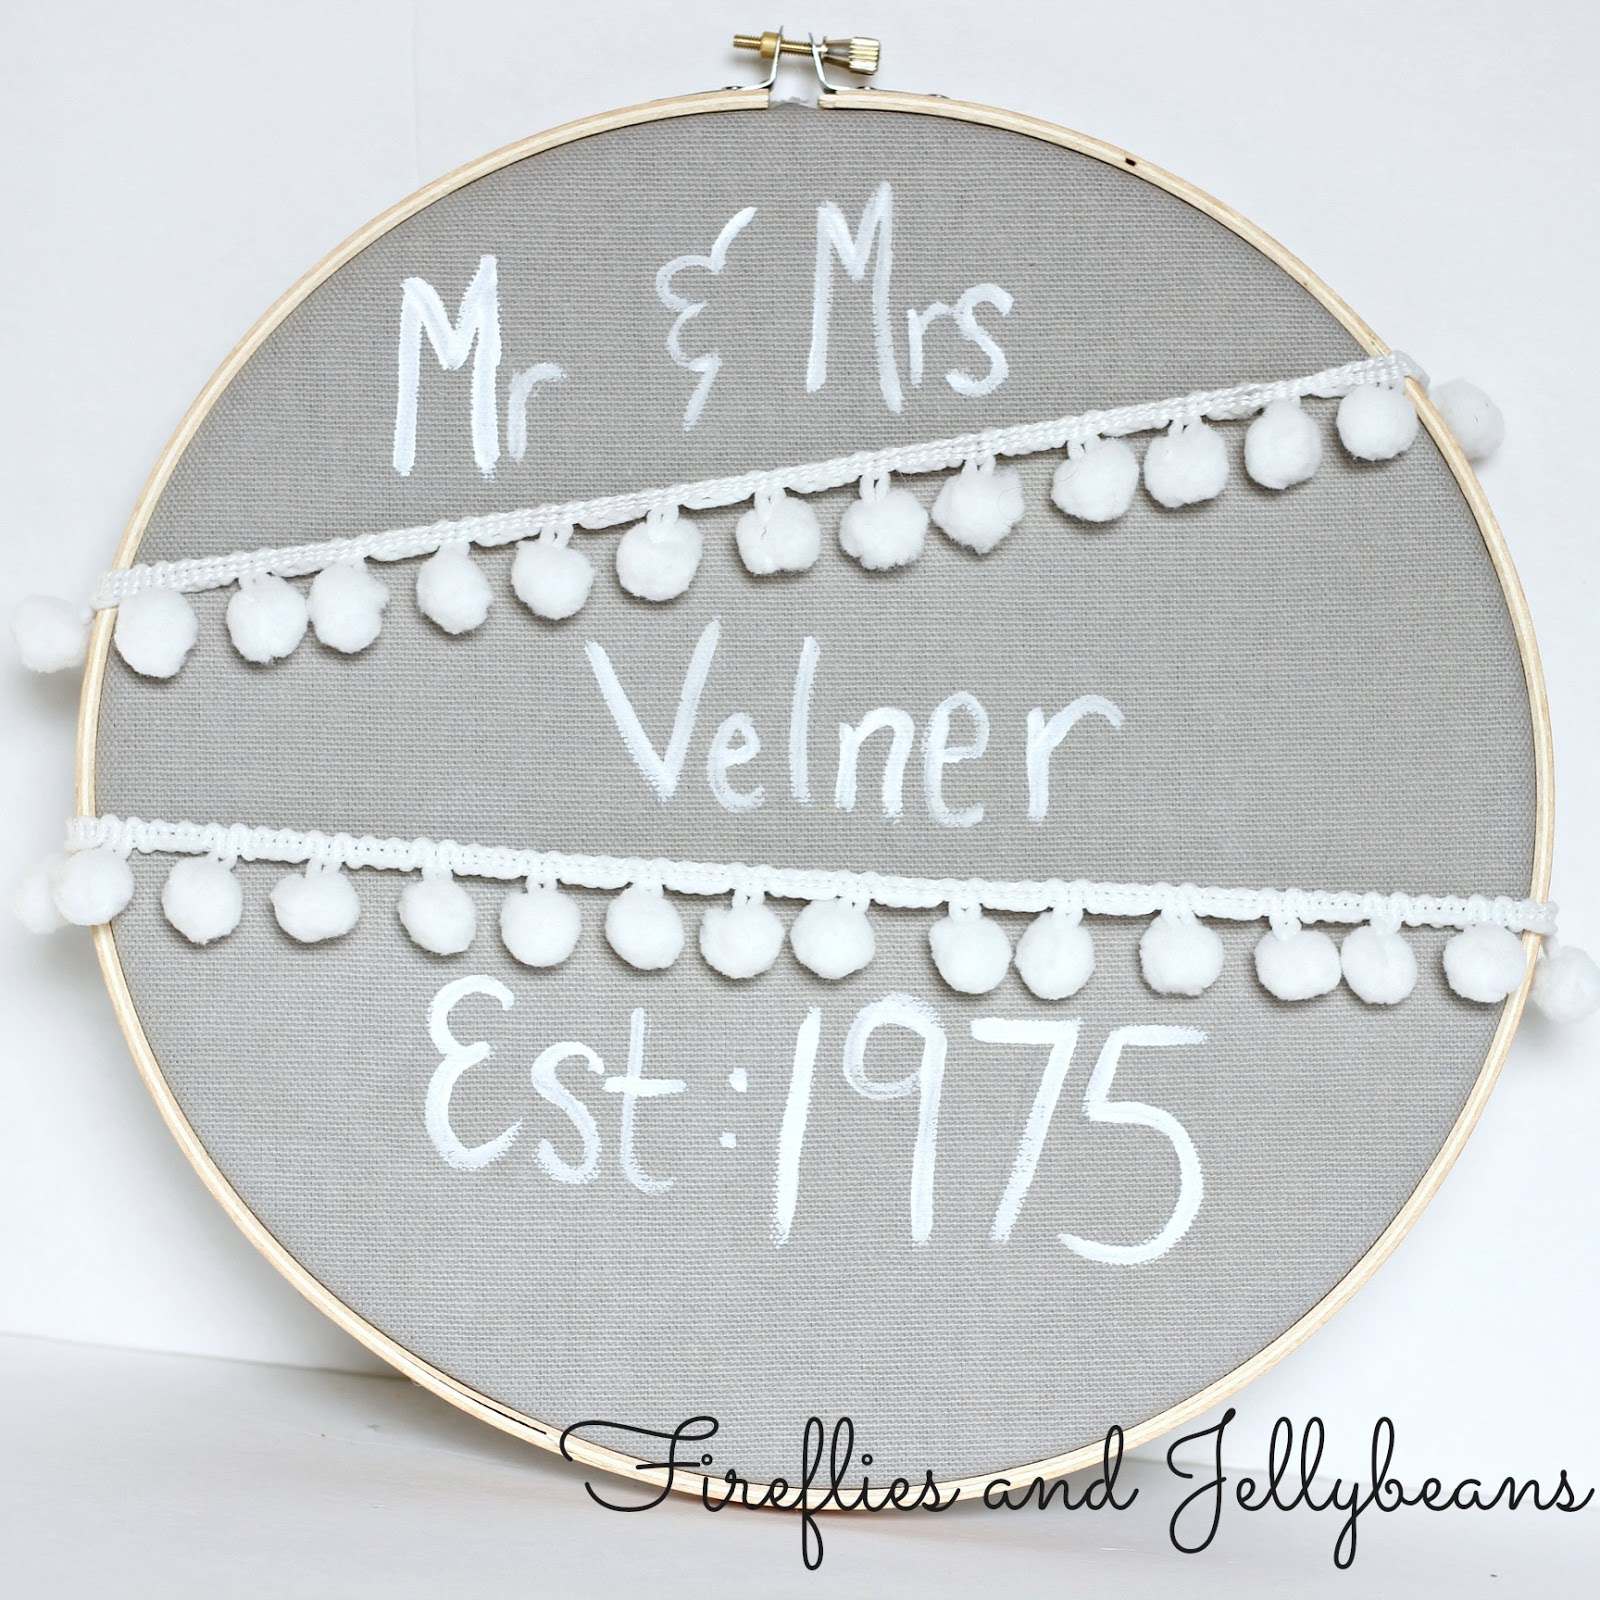
#1 Circle Wedding sign:

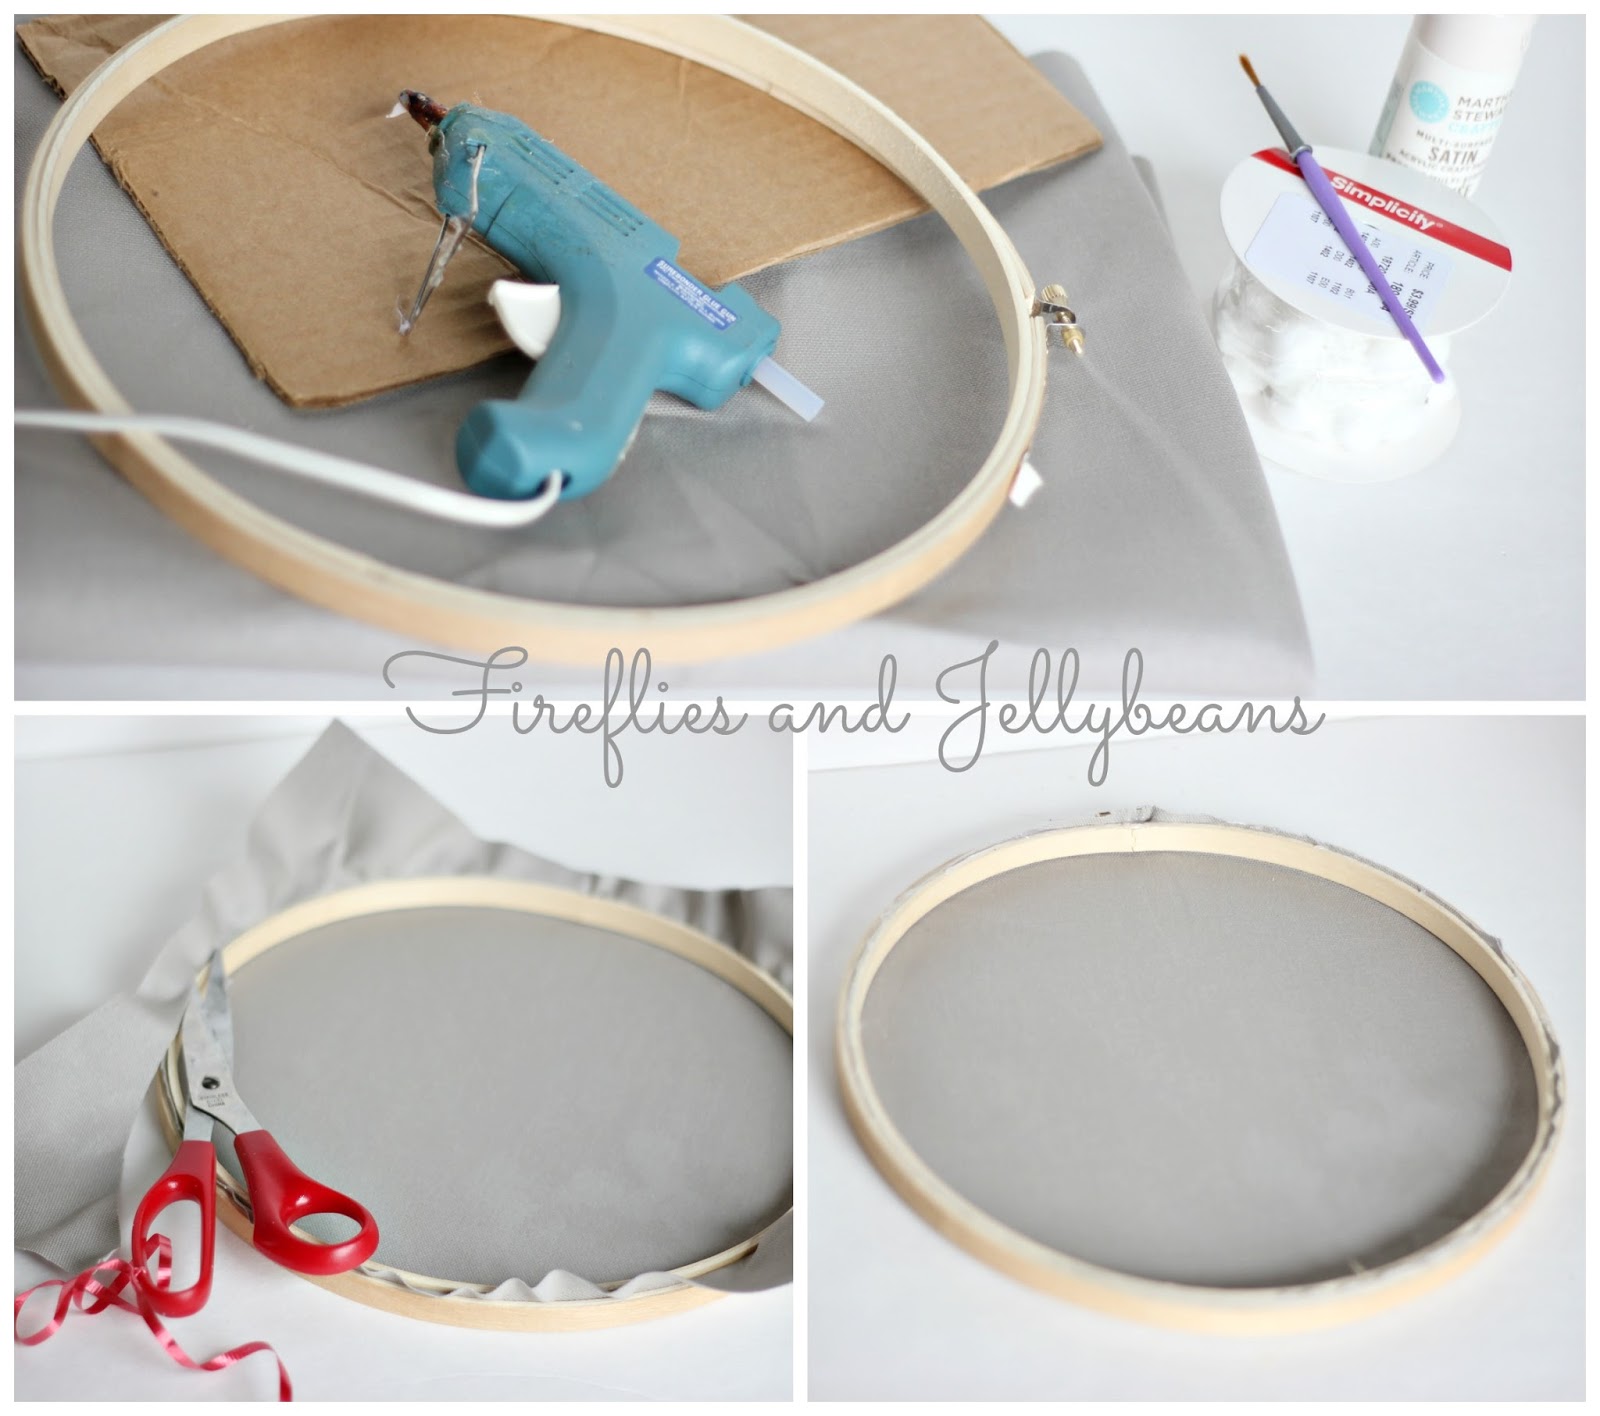
1. Gather supplies: Embroidery hoop, Canvas (or other study fabric), Pom-pom trim, paint/brush, hot glue gun.
2-3. Iron your fabric and place in the hoop. Trip edges off and secure with hot glue on the back. 

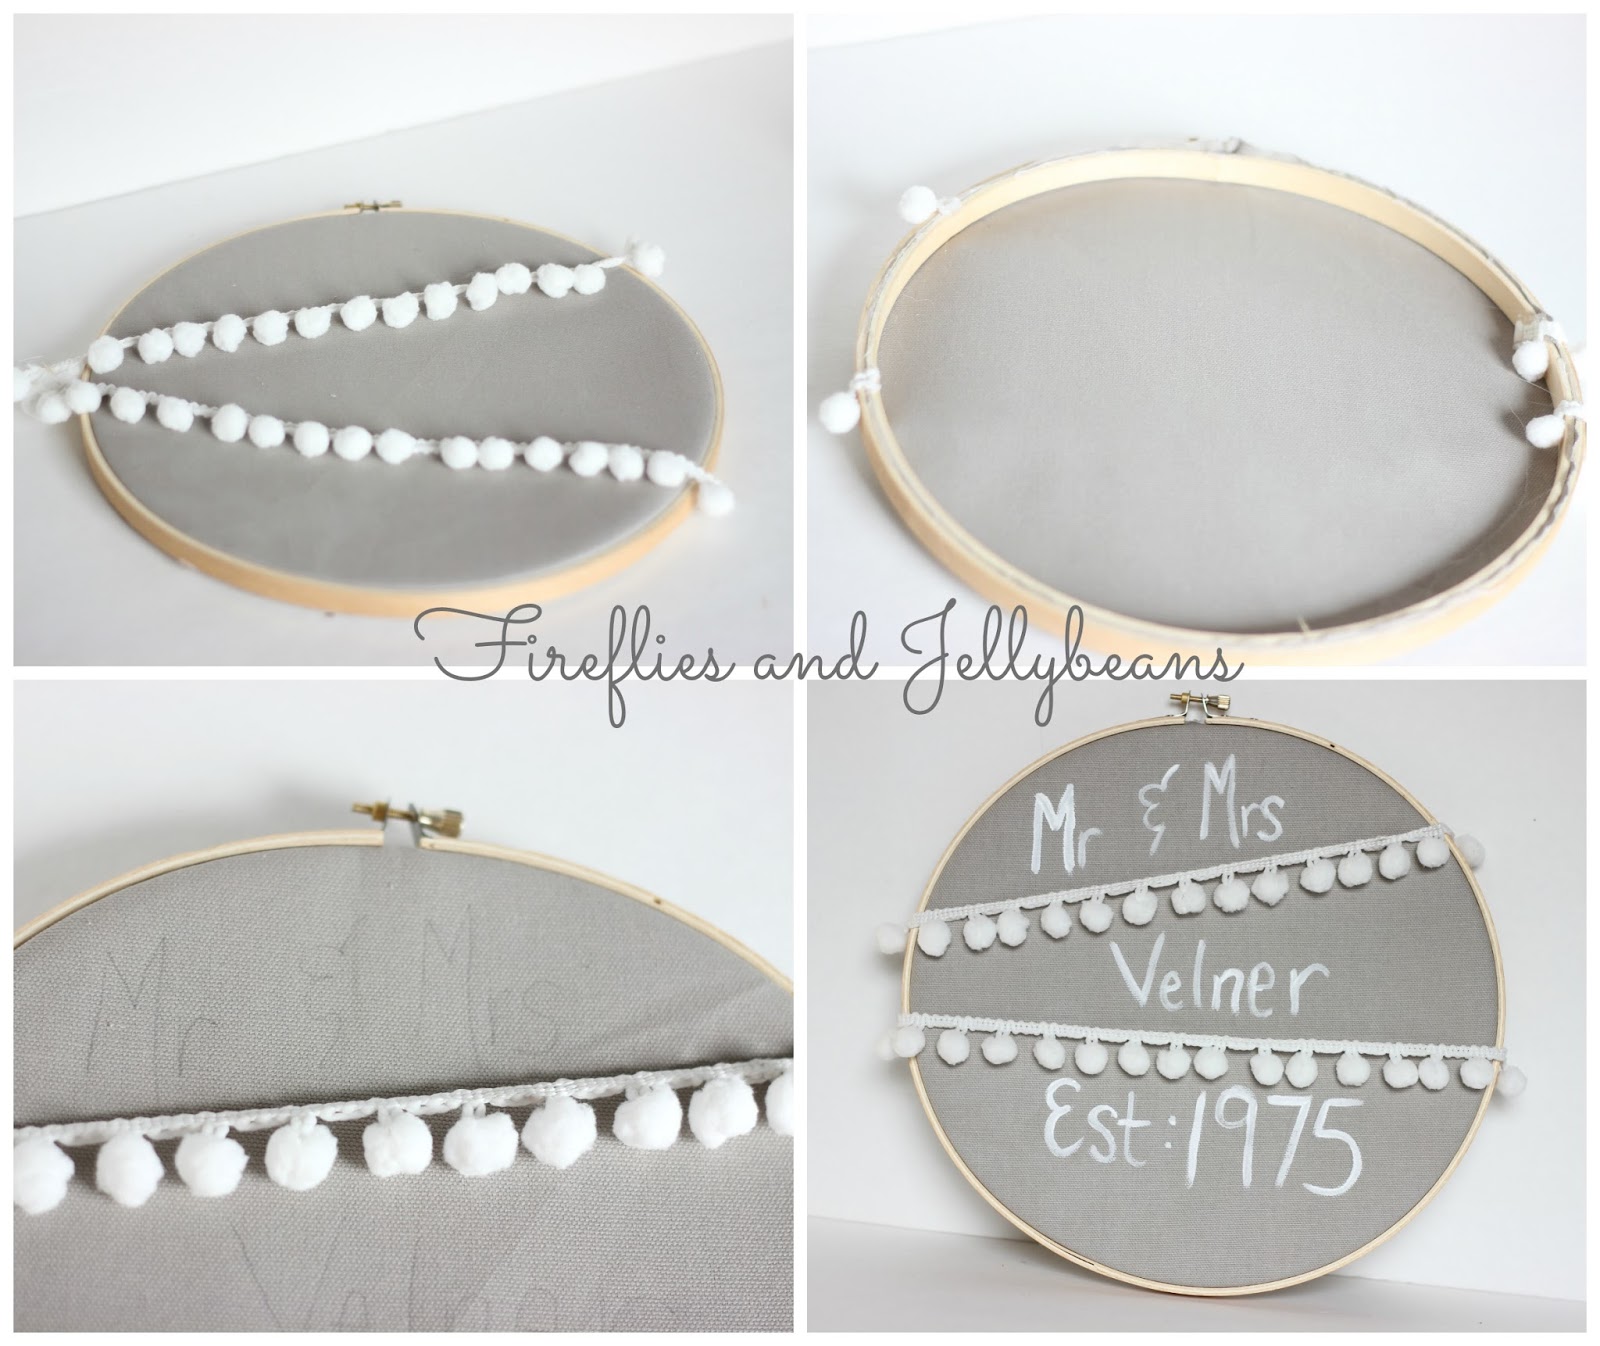
4-5. Decide placement of the pom-pom trim and use hot glue to attach it to the back.
6-7. Use a pencil to draw out your letters and then paint over.  

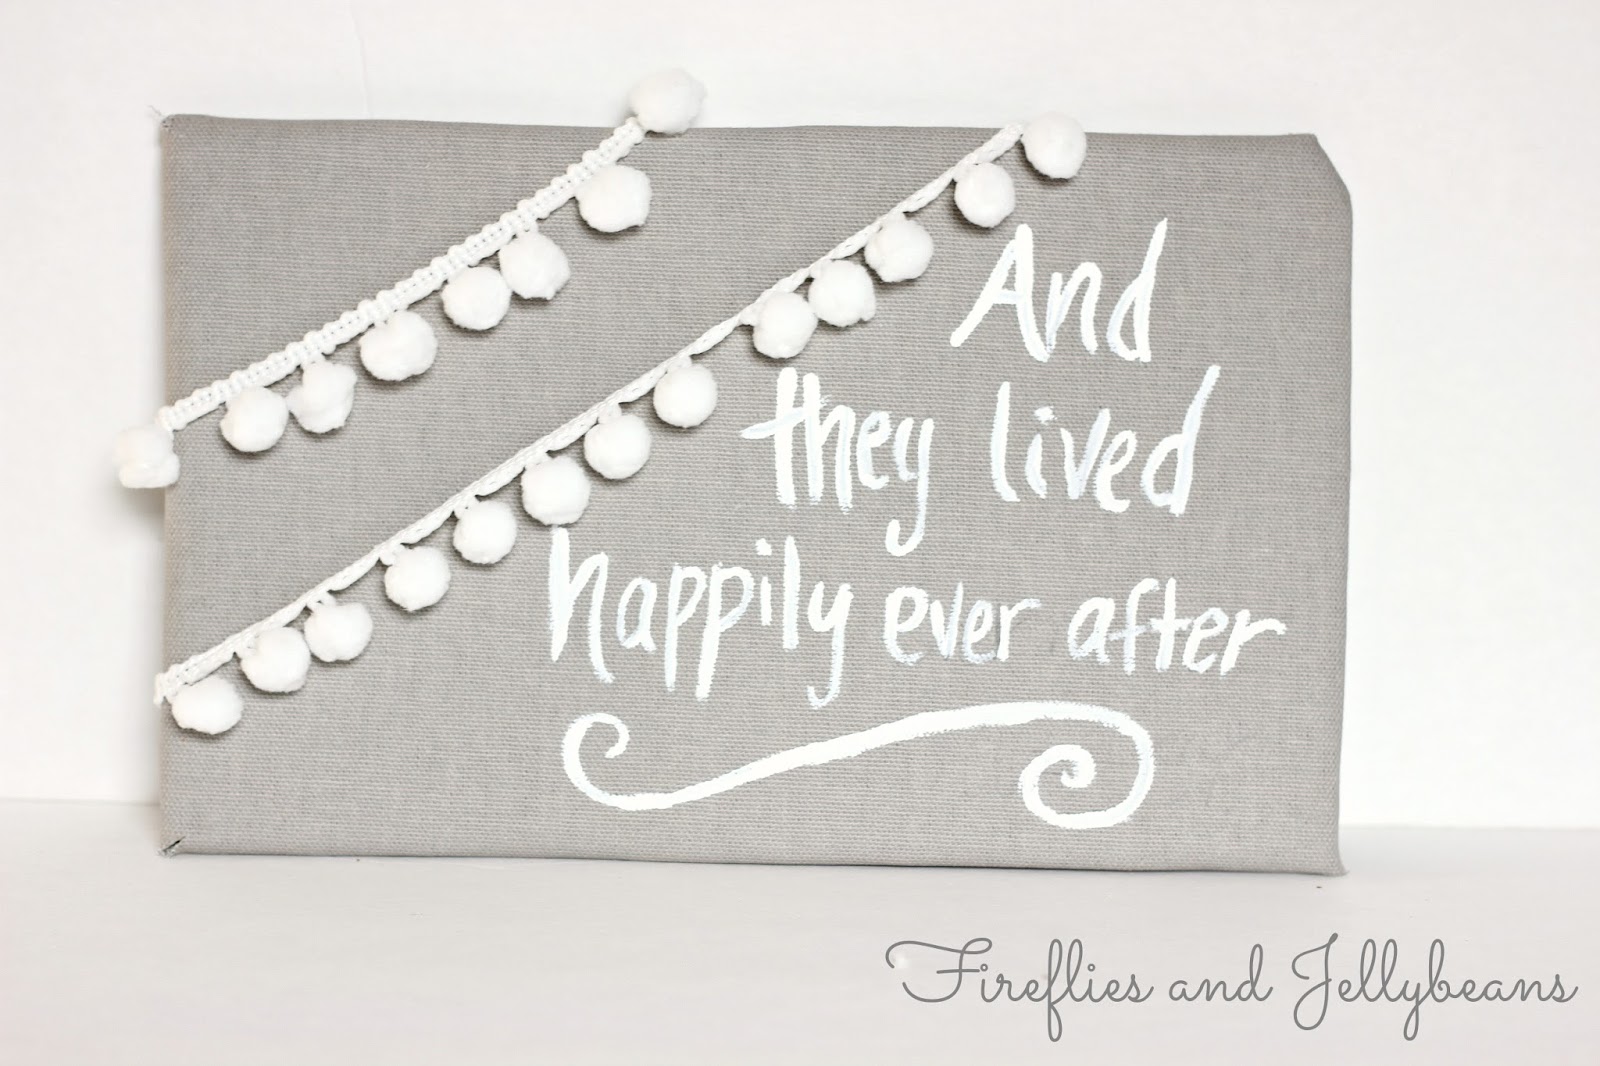
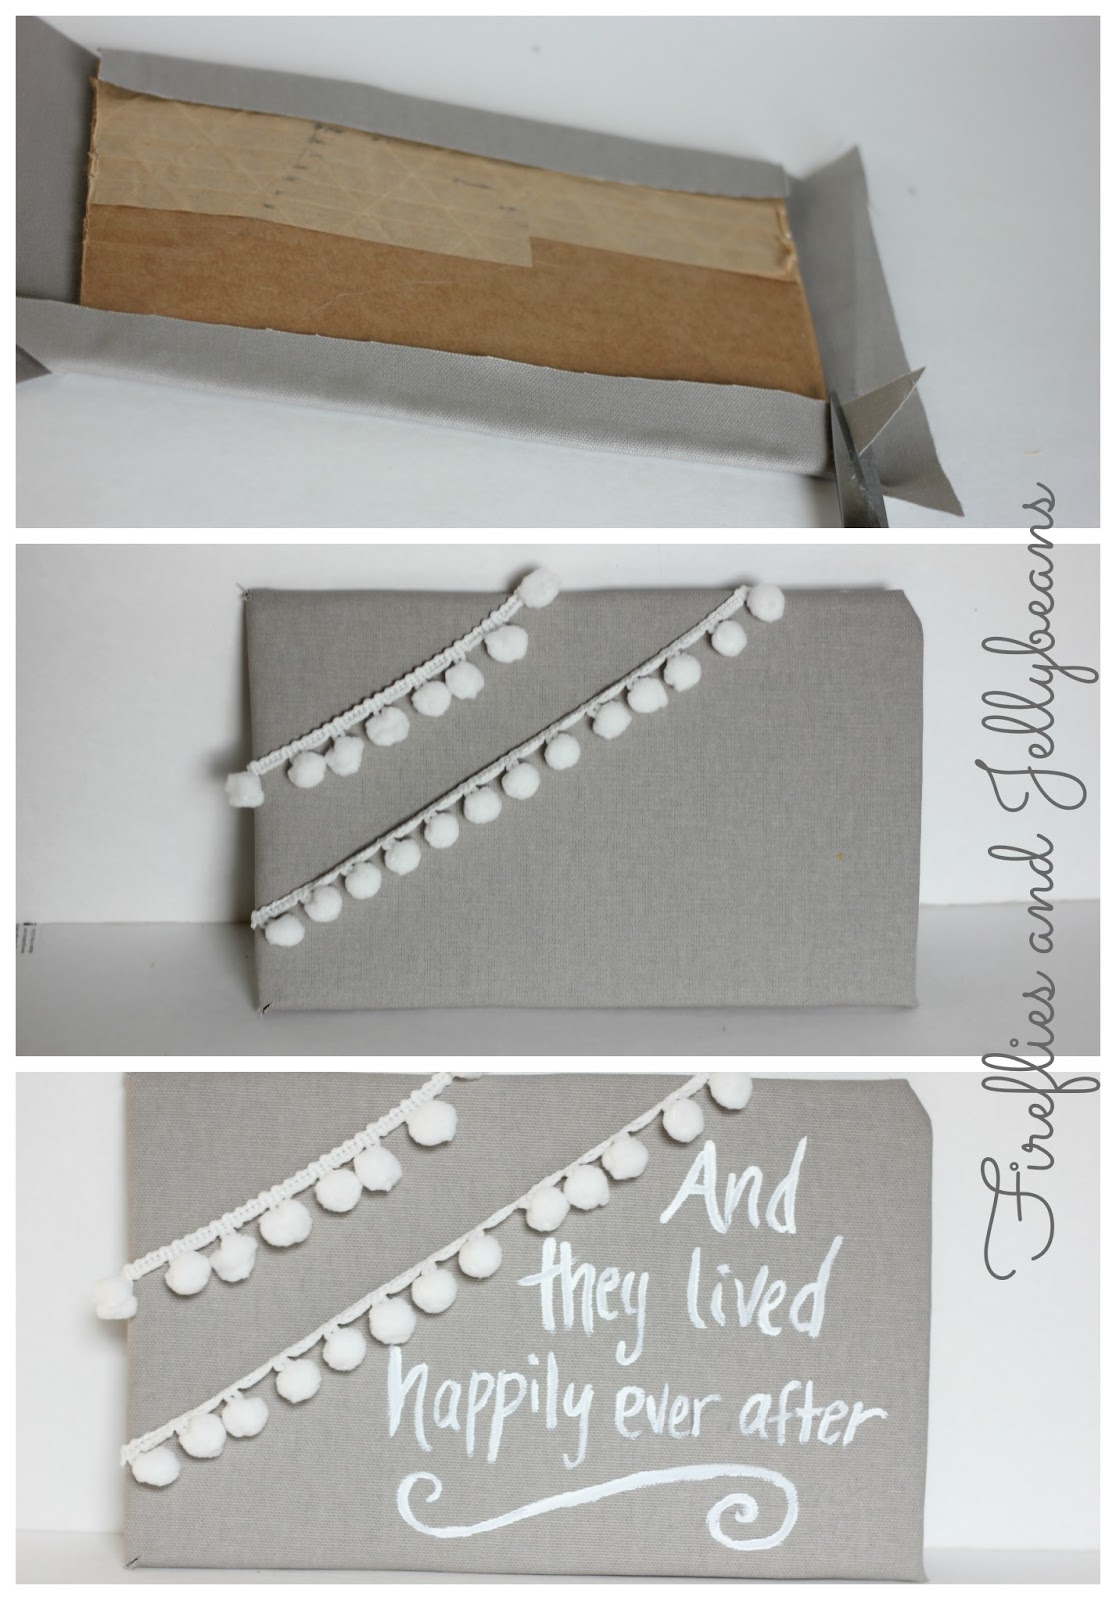
#1. Rectangle Wedding sign:


1. Gather supplies: Cardboard scrap, Canvas (or other study fabric), Pom-pom trim, paint/brush, hot glue gun.
2. Iron the piece of fabric that is at least 1 inch bigger on each side of your cardboard.  
3. Cut a slit into each corner.

4. Fold over the top and the bottom using hot glue to attach it.  either cut off or fold over the extra fabric at the corners.  repeat for the other sides. 
5. Decide the placement of your pom-pom trim and hot glue it to the back side.
6. Using a pencil draw out your letter and then go over it with paint. 

Tip on making letters with paint.  If your paint is too thick it will make it harder, so I add a little bit of water to my paint to help it go on smother.  Also you want to keep your brush full of paint so you will have to reload often. 


join in the fun with more easy and fast wedding crafts:

Friday, May 8, 2015

Teacher Appreciation/End of the Year Teacher Gift


For Teacher Appreciation week, I though hard about what a teacher would really want as a gift.  I could have made something cute or got a gift card (both are good options) but I remember that when I was a teacher the end of the year was tough... it made me question if I even wanted to be a teacher the next year.  Standardized testing combined with crazy kids is enough to drive any one into madness! :)

So I thought I would like to be told I was doing a good job and that my students (and parents of those students) appreciated all the work I had done.   So I decided to make a video for my kids teachers.  So they could watch it any time they needed a reminder that they are GREAT!  This also works great as an end of the year gift so you still have time to make one!

I came up with some questions, some silly some more serious, all about the teachers.  Since my daughter was in preschool (and therefor has several teachers) and my son is in 1st grade and has one main teacher I came up with different questions for each kid.

Elementary questions:
Why do you think [enter Teacher Name here] became a teacher?
What do you think [enter Teacher Name here] does when she is not at school?
What is your favorite thing about [enter Teacher Name here]?
What is your favorite part of being in [enter Teacher Name here]'s class room?
If [enter Teacher Name here] was not a teacher, what job do you think she would do?
Tell me what makes [enter Teacher Name here] special.

Preschool questions:
Tell me what you love about your teachers.
Tell me about your class room.
What is your favorite part about your school.

Here are the videos:


I just video-ed the kid on my phone and then used imovie (on my mac) to edit them.. uploaded them to youtube and sent the links to the teachers.


Thursday, April 9, 2015

DIY Coasters (15 minute Craft: Teacher Appreciation Gift)

I love my kids teachers. They work hard and do a fantastic job!  I am a teacher too, so I know how much they put into it.  So I always like to get them something to show our appreciation.  Teacher Appreciation week is May 4-8th so you have time to make this! 


Here is an easy DIY for you to do to show teachers that you appreciate them.  DIY Coasters paired with a cute glass, some straws and a fun beverage... to show that you know they deserve a break for all the hard work they have done.  This gift uses Oil Cloth since it is water resistant.  You can find it at Joann's (by the home decor fabrics- you may need to ask someone) but they have a limited selection.  I got this print from Oil Cloth By the Yard.  Lots of cute patterns! 

Here is what you will need to do:
1. Gather supplies: 1/4 yard Oil Cloth,  1/4 yard Felt, Sewing machine and other sewing tools.
2. Trace out the coasters.  I used a coaster I had as a template but you could also use a cup.
3. Cut out 4 of each out of the felt and the oil cloth (or more if you want).
4. Use a zigzag stitch and sew around the edge as close to the edge as you can get.  Since the oil cloth and felt do not fry you can leave unfinished edges out.  


And your done!  I got this cute glass much from the Dollar Tree and the Paper straws from Target.  I added lemonade mix to complete the gift! 
Here is a printable you can add to the gift! Just right click and save the image.  


Joining in the fun with:
 

Saturday, November 29, 2014

Teaching generosity for the Holidays- Kids DIY Teacher/Friend Gift {#StreamTeam}

Thank you to Netflix for sponsoring this post! 
So my kids start to get really greedy around the holidays.  They are always talking about what they want for Christmas.  When the toy catalogs come in the mail (That I DID NOT order!) they grab them and circle everything in them.   So to combat all the "I want, I want, I want" I made them make some gifts to give their friends.  I told them that we are going to give these gifts and not expect anything back.  It was tough because they really wanted the Chocolate bars - but I really wanted to focus on the giving. 

They are fast and easy to put together - Here is how you can make your own: 
1. Cut our card stock into 2 rectangles one 3.625"X8 and 3.625"X5" (The 3.625" is when you cut a whole sheet into 3rd's)
2. Put the smaller rectangle on top of the larger rectangle with the bottoms lining up.  I sewed around the edge of mine to give that cute factor but you could totally glue it.
3. Test to make sure your chocolate fits. :) 
4. Decorate with washi-tape or stickers or what ever you have! 

Here are the kids working hard on them. 


Here are the ones the kids made:

You could also do a none-candy option too! 


We have been loving the new VeggieTales In the House series that just started this week! 
My kids are HUGE VeggieTales fans! 
You can only watch this series on Netflix


*Disclosure: I am part of the Netflix Stream team.  However all opinions are 100% honest! 


Wednesday, May 14, 2014

Princess Party

We threw a princess party for my daughter's 4th birthday party! OhMyGoodness - it was so fun!  This is my first really girly party that I have planned and I had a hard time reigning it all in (pun intended!) 

Here is what we did:

First off I made 8 of these Princess Aprons.  As the girls arrived to the party I let them pick an apron to wear during the party (This was also their party favor... I thought it would be better then candy or the cheap party favor toys)
I also had 3 Jr. High girl helpers.  I work with our youth group at our church and I know these girls from that.  They were amazing helpers!  The little girls looked up to them so much.  It was awesome to have the extra help during the party too.  I could be in the kitchen with the food and these girls were helping the little girls. This was by far the best idea I have had for a party!  (they each got a Princess Apron too!)


After we got our princess aprons on we did some princess training.  I broke it up into 2 sessions.  In the first session we:
Practiced our balance by walking with books on our heads
Curtsied to each other
Learned royal words like: Your Highness and Forsooth 

In the second session we:
Practiced our princess wave
Blowing kissing 
Princess twirling

After the first session of  princess training we did our craft: Make Your Own Princess Crown
I ordered these crowns and jewel stickers from Oriental Trading.
It was super easy... they just stuck the jewel stickers to the crowns. 
After the craft we had our second training session. 

After the second session of training we painted the girls nails.  
The girls loved it! 

Then it was time for a snack.
We had pink fruit and fishy crackers (in honor of Ariel) on princess plates.  For cake we had mini-cupcakes.   The mini-cupcakes were the prefect size for the 4 year old girls. 

Next we had the gift opening.  As we open the gifts, I have each girl who gave the gift sit next to the birthday girl as she is opening it.  It keeps all the girls interested and it helps the birthday kid know who gave what to them!  I then take a picture of them and send it in the thank you card. 

After the gift opening we had a dance party for the girls. It was the perfect way to wait for their parents to pick them up!   I just played Frozen radio station on itunes (similar to pandora but for apple).  It was so cute all the little girls singing "Let it Go" from the bottom of their hearts.    
It was so fun and all the princesses had a grand time! 


Wednesday, April 30, 2014

Easy DIY Princess Dress-up Aprons Tutorial {remixed}

I have made Dress-up Princess Aprons for years now.  But I have decided to remix the tutorial a little bit and show you how easy it is to alter it to make it what ever princess you want!   


Here is how you make this version:

You will need:
2 colors of Felt
1/4 inch Elastic
Sewing machine with sewing tools: scissors, thread, needle etc

1. Cut the different pieces:
8X8 inch square
2X42 inch strip
Two 16X28 inch rectangles (one in each color) 

2. Take the top color, fold in half the long way, and cut out a rounded triangle shape.  Open it up and place it on top of the bottom color and place the strip on top of that and sew across the top and down the sides.

3. Take the square and fold it in half and cut out a heart shape top.  Open it up and place it right sides together on to the top of the strip- make sure to line it up in the middle. 
4. Cut a 10-12 inch strip of elastic and sew it to the top back side of the the heart shape neckline.  

Too cute! 

I made a bunch of them for my daughter's Princess Birthday Party (Post coming soon!) 
Honestly- how cute is this picture?!  

Here are other Princess Aprons I have made... as you can see you can change or add your own spin onto it! 


Wednesday, August 28, 2013

No-Sew Lace Applique Tote Bag (#12MonthsOfMartha)

***This post is written as part of the 12 months of Martha program.  I get craft supplies from Martha Stewart Crafts for free to create fun crafts with.  All my projects and opinions are 100% mine.***

This month's 12 Months of Martha box was pretty exciting! 
I got products from the BRAND NEW Decoupage Craft Line!   
“Martha Stewart Crafts is launching a new premium multi-surface decoupage product line that allows users to take decoupage crafting to a new level of durability. This broad line includes more than 57 items tailored to decoupage crafters of every level: premium multi-surface formulas, beautifully detailed paper cut-outs, fabric die-cuts, rolled papers, a variety of trims and doilies, and tools.“

I am excited about all of the items... but I am MOST excited about the Fabric-to-Fabric decoupage!  I made 2 crafts this months so come back tomorrow and see what I did! 

The 1st project I did was an Easy Lace Applique Tote bag:

Here is what you will need:
1. Supplies: Martha Stewart Fabric-to-fabric decoupage, Tote bag, Martha Stewart Lace decoupage trims, brush.
2. Place a cardboard box inside your tote to protect the other side.  Lay out your lace pattern.
3. Brush on the fabric-to-fabric decoupage on the bag where you want your lace to go.
4. Also brush the fabric-to-fabric decoupage on the back side of the lace.
5. Place the lace on to the bag and brush on the fabric-to-fabric decoupage on the top.
6. Repeat for each strip of lace.

It is a great and easy way to make a classy tote bag.

Michaels currently has a 40% OFF coupon for any one regular price Martha Stewart Crafts Decoupage Item (includes decoupage, decoupage mediums, tools and accessories) which is valid until September 29th 2013.

Check out more fun projects on the 12 Month of Martha Pinterest board!


***Disclosure: I was supplied with the Martha Stewart craft supplies but my opinions are always honest!***

Wednesday, November 28, 2012

Easy Gift Wrap with Lifestyle Crafts

Lifestyle Crafts has some fun sets out for the holidays to make gift wrapping a cinch! They have the Knotty and Nice sets.  See the bottom for a 20% off code to use on the WHOLE Lifestyle Crafts site!


I got the Knotty set and it come with die cuts to make 4 different 3-d bows! 

I paired them with some Lace Doily Nesting Die Cuts I already had for a SUPER cute look!

They look great on Kraft paper! 


And on regular gift wrap too! 

Just think of how cute your gifts could be this year! 

Don't forget to use code: fireflies to get 20% off your total order (including sale prices!)

Content Ad