Showing posts with label Guest Posts. Show all posts

Wednesday, July 10, 2013

Adoption Week - A birthmom's story

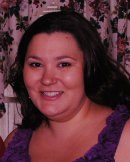
Please welcome Shayla to our blog,  She a birthmom who is sharing her story with us today.  We are so honored to have her.  She does not have a blog, but she has an amazing story to tell!

_________________________________________

I am a birthmom.  I am a mom.  I am a wife, a sister, a daughter and a friend.  I am a child of God.   It’s taken many (many) years but I’ve developed a pretty strong sense of self.  
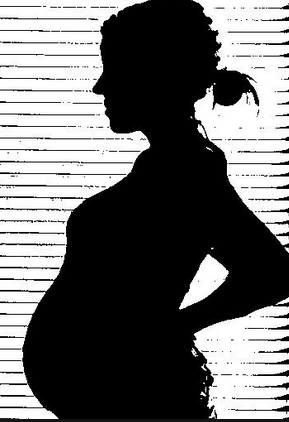
When I was a child, I was thrown into the world of sexual abuse and fatherlessness.  As a teenager I had no idea who I was.  I learned all the wrong things from all the wrong people and tried to define myself by those misgivings.  Is it any surprise that I ended up pregnant my senior year in high school? 
That is definitely not the way I imagined spending my senior year.  I was supposed to work on homecoming floats, and shop for prom dresses.  I was supposed to get caught sneaking out of the house to meet up w/friends at midnight.  Instead I was living with my boyfriend (which meant taking care of a house) working full time, going to school full time and trying to schedule doctor appointments in between it all.   The few times I was able to do “normal” senior-year stuff, I was treated as a bit of an oddity.  Everyone was nice, but all my conversations revolved around the pregnancy.  Everyone was (naturally) curious, asking a lot of questions I didn’t have answers to.  This became my new identity.  I’m a teenage a mom - I am a statistic.

It was my mother that first brought up the idea of adoption.  Since my only knowledge on the subject was firmly rooted in Hallmark specials about worst-case scenarios, I wasn’t thrilled.  And by “not thrilled” I mean I did a lot of yelling and stormed out (give me a break, I was a very hormonal 17 year old).  But the idea was enticing.  I could actually go to college and become something, and my child could have a stable, loving, 2-parent home.   My mother brought up the subject a few more times and I finally agreed to a meeting so she’d stop bothering me.  The counselor at Bethany Christian services explained our options - closed adoption, semi-open, and open adoption.  She explained that we could pick the parents of our child, and that we could have a say in how much information we did or didn’t receive after this child was born.  I knew as she was talking that this was the best thing for everyone involved, that my boyfriend and I had no business trying to raise a child.  It would take several months though before we could truly make the decision.  I can’t begin to explain all the emotions we went through to finally get there.  I could write a book on those few months alone.  Once the decision was made we felt confident about it.  Over the course of the next month we had several more meetings at Bethany and picked out a family.  Ever want to feel like you’re playing God?   Try looking through a pile of families and picking one to be your unborn child’s parents.   Goodness.


We chose open adoption and the next few months were spent developing a strong bond w/our daughter’s parents that continues today.  Her mom was in the delivery room w/us, and we had a baby dedication ceremony at the hospital before my boyfriend and I left.  

 Empty handed.

I’m not going to lie, my arms literally cramped for the next few nights because I didn’t have a baby to hold.  At the time, the law stated we had 10 days to change our minds - no questions asked.  I changed my mind 1000 times a day.   Those were the longest 10 days of my life.

Eventually life got back to normal.  I had graduated, given birth, and was living back home with my mom like every other 18 year old.  I applied to exactly 1 college, got in and started that following January.  It wasn’t easy, but I got on with my life and (many, many stories later) graduated college.   My daughter and her parents came to my graduation.   That was awesome. 

While in college I was able to get several years of free counseling.  As a Counseling major a few sessions were required, I just needed more than most J  This was the first time I started to figured out exactly who I was.  That this person wasn’t defined by abuse, fatherlessness, or even the birth of a child.  I was, first and foremost, a child of God.  I didn’t really know what that meant.   All I knew was that I was more than a product of my environment, and that was as good of a start as I could hope for.   After college though I fell away from God and fell into the I-don’t-want-to-think-about-my-pain- trap.  Years later I finally surfaced, and was desperate to put this pain in my rear-view mirror.  I did some serious soul searching, got back in church and finally decided once and for all that I wouldn’t let my childhood define me.  I’ve had to grapple with some pretty hard truths in my life.  Though none of them trump the fact that I’m a child of God, and that “all things work together for good to those that love the Lord, and who are called according to his purpose”. (Romans 8:27-29)  I have seen this promise play out time and time again.


Over the past few years I’ve gotten married, had a son, and began developing a relationship with my (now teenage) daughter.  Through it all God has taught me so much about sacrifice, love and humility.  I don’t have it all figured out, but I do know that over the next 20 years or so that I’ll be raising children, God will never leave my side.  He’ll continue to show me exactly who he designed me to be.  I’m a mom.  I’m a birthmom.  I’m a friend.  I’m a child of God.

Tuesday, May 21, 2013

Guest Post from Serendipity and Spice

While I am getting used to having a newborn around some wonderful bloggers has stepped in to help out with some fabulous guest posts! Don't worry I will be popping in here and there to give updates and of course do the Show Off Your Stuff Party! We have a great line up for you all!

Up Next is Melissa from Serendipity and Spice.

Hi there! I'm Melissa from Serendipity and Spice- I'm soooo super excited to be a guest here on Fireflies and Jellybeans today while Fawnda is spending time with her sweet little one!  Congratulations Fawnda!!
So, who's got a bad case of Spring fever? I sure do!  I'm ready for warm weather, sunny days, flip flops, and beach vacations!  Unfortunately we don't live near the beach- BUT that doesn't mean you can't bring the beach to you...or the essence anyway.
Today I'm going to share with you a quick craft tutorial that turns an ordinary glass Coke bottle into extraordinary beachy theme vases!
Twine Covered Beachy Vases by @serendipitynsp


They turned out ADORABLE didn't they?

I used Mexican Coke that you can read more about here...it's good! Now, I must say, it took several tries to figure out what to do with these Coke bottles...you can check out my craft fail here so you know what NOT to do.
Well, these are the bottles:
I used an 8oz and a 12oz bottle for this project. Then I bought some Sisal Rope from Hobby Lobby for about $3.  Using the glue gun I secured the end and started wrapping the rope around the bottle as tight as possible.
Now, I know you've seen other jute and twine wrapped projects but I changed this one up a bit.  Instead of using hot glue all around the bottle and burning my fingertips off I just secured the end with hot glue and used good old fashioned Elmer's White Glue to secure the twine to the body of the bottle.
I just painted the glue on as I wrapped the twine- once dry it will keep the sisal from slipping out of place. I used the hot glue just a few times during major curves to give added security.
Twine Covered Vases
Now, you'll notice that you can still see through to the bottle.  I just worked my way back down the bottle filling in the gaps.
Finally, I added some beads from an old broken necklace and this cute little glass star charm that's been sitting in my jewelry box FOREVER!  I LOVE using old jewelry on home décor items- it gives the jewelry a new sense of life- check out what I did with my grandmother's antique broach here.
Every time I look at these now I want to go to the beach!
Beach Vases
Thanks so much Fawnda for having me today! I loved getting the chance to hang out with you guys today!
I hope you’ll grab a cup of coffee, stop by, and visit me sometime! -Melissa

Monday, May 20, 2013

Guest Post from Oh, Mrs. Tucker

While I am getting used to having a newborn around some wonderful bloggers has stepped in to help out with some fabulous guest posts! Don't worry I will be popping in here and there to give updates and of course do the Show Off Your Stuff Party! We have a great line up for you all!

Up Next is Patti from Oh, Mrs Tucker! 

 Hello, Firefly and Jellybeans Readers! I'm Patti from Oh, Mrs. Tucker! I am a longtime writer/blogger and new grandmama. As soon as I found out I was going to become a grandmother for the first time, I envisioned building a site where grandparents and parents could come for information and fun. When Fawnda sent out a call for help via posts, I quickly volunteered (so I could meet you!) and she graciously agreed to let me fill in for a day. I hope I don't disappoint.
 ~~~~~~~~~~~~~~~
 Some days nothing but a frosted brownie will do. Hello, lover... brownie
(photo credit: Oh, Mrs. Tucker!)

 Yep, some days require a little one-on-one time with some quality chocolate and a generous dose of cream cheese frosting. Hello, darling... brownie
(photo credit: Oh, Mrs. Tucker!)

 The dirty little secret here, is that sometimes I bake from a box and add a splash of my own homemade signature ala Sandra Lee. Sure, there might even be a little imbibing while I'm baking. Listen, if I'm gonna Sandra Lee something, I'm going all in. Ready for the recipe?

  BROWNIES:
Open 1 packet Ghirardelli Triple Chocolate brownie mix.
 Mix.
 Pour.
 Lick spatula.
 Bake.
 Cool.

  FROSTING:
 Powdered sugar (you decide how much)
 Softened cream cheese (you decide how much)
 1-2 tbsp softened butter (why so precise? because everything is better with 1-2 tbsp of butter) 
Mix.
 Place frosting into piping bag.

 Go crazy.

 Take a photo for Pinterest.

 Eat your mistakes.

 Take more pics.

 Enjoy!

 So. Good.


Tuesday, May 14, 2013

Guest Post from Todd&Lindsey;

While I am getting used to having a newborn around some wonderful bloggers has stepped in to help out with some fabulous guest posts! Don't worry I will be popping in here and there to give updates and of course do the Show Off Your Stuff Party! We have a great line up for you all!

Up Next is Lindsey from Todd & Lindsey

Hello there! I'm Lindsey from toddlindsey.com. (I know, how original, right?) 


I'm an art teacher that spends ALL my free time crafting, cooking, baking, making miniatures and in general, just detoxing myself from kids and school. I love the creative process of making. Anything. I especially love when that process results in food. Or really beautiful things. Or cute things. 

I guess I should share who Todd is, since he is the other part of our blog name. :) Todd is my very outgoing, comic-loving husband of a little over one year. Todd and I have three children... I mean pets. Lily and Jose are cats and Banner is our beagle! They all turned five at the beginning of the year. (No, that's not a coincidence; I just made all their birthdays at the same time for the sake of my sanity... Can I do that for our future kids?) 


Feel free to visit us at toddlindsey.com for easy and yummy recipes, DIY home decor, room reveals, dollhouse miniatures and more! 

Now on to the sweet stuff. 

I am SUPER excited to share this recipe with you all. Oh. My. Goodness. These cookies are amazing! And really easy to assemble. I got this awesome recipe from my friend Becca. Once you try these, you will never want to go back to boring Peanut Butter Blossoms. :) Okay, so that may not be true. But trust me, these are so good!!!


Ok. So you start off real complicated with some store bought refrigerated dough. I bought this kind:


You will also need a bag of Reese's cups. (Funny story: So I always pretty much know what's in my pantry. I like to keep a bag of peanut butter cups on hand so I knew I had a full bag in my pantry when I started this baking project. Howeverrrrr, when I went to go make these, I realized someone *hint hint* had eaten almost the whole bag! Thatsomeone left a measly two cups left. I had to run to the store, which is literally across the street, to restock!)


But back on track now.

Separate the dough according the the pre-portioned pieces.


Place some mini muffin liners in a mini muffin tin. Place one lil' mound of dough into each liner. They are so cute right now! :)


Bake for 9-11 minutes at 350*. While they are baking, unwrap all the peanut butter cups. Try not to eat any!


When the cookies are done, gently press a Reese's cup in the center of each cookie. Work quickly!


Remove to a wire rack to cool. They are yummy warm, room temperature or cold!


Don't eat them all in one sitting! I mean, it will totally be worth it "in the moment".


Is your mouth watering yet? I know mine is!

I look forward to having you visit toddlindsey.com soon! 

Monday, May 13, 2013

Guest Post from Chill Thoughts

While I am getting used to having a newborn around some wonderful bloggers has stepped in to help out with some fabulous guest posts! Don't worry I will be popping in here and there to give updates and of course do the Show Off Your Stuff Party! We have a great line up for you all!

Up next is Cristyl from Chill Thoughts

My name is Cristyl and I write over at Chill Thoughts. I haven’t been blogging very long; just a few months! I write about my life, my family and pretty much anything that comes to mind; I’m currently wallpapering my desk in post-it notes with ideas for my future posts! I’m excited to be chosen as a guest blogger at Fireflies and Jellybeans while Fawnda is out enjoying her precious new little one!  Congratulations, Fawnda!  Today, I’m excited to share my Garlic Crouton Recipe with you!

I love a good salad!  Especially dressed up with lots of veggies, bacon bits and croutons.  Lately I’ve been making my own croutons and I’m loving how cost-effective and super-tasty they are.  And they’re so easy to make!  Here’s what I do…

I use bread I have on hand to make my croutons.  I’ve used cheap store brand wheat bread as well as sourdough bread.  DH says he prefers the sourdough, so that’s what I used for my latest batch.  I use 4 slices of bread for a batch of croutons (in these photos I was making a double batch because we love these so much).
  I use four slices of bread per batch; cut the slices into 1” cubes (you don’t have to be precise - make the cubes whatever size you prefer).


Place the cubed bread into a bowl with a tight-fitting lid.


This recipe only requires three ingredients other than the bread; I told you it is super-easy!  Melt a 1/4 cup of butter (half a stick) in a microwave-safe bowl.  Mix 1 teaspoon of parsley flakes and 1/2 teaspoon of garlic salt into the melted butter. (I prefer super-garlicky croutons, so I usually use about twice as much garlic salt.  Feel free to adjust to your preference.)  Now pour the butter and spice mixture over the cubed bread, place the lid on your bowl and shake vigorously to coat all the cubes in the mixture.


Spread the coated cubes on a baking sheet of your preference; I just love my Pampered Chef stoneware for making croutons (and just about anything else).  Pop that into a pre-heated 300 F oven and set a timer for 20 minutes.  After twenty minutes, turn the croutons and return them to the oven; set a timer for another twenty minutes.  Bake the croutons until they begin to brown nicely (I prefer mine more crisp so I let them get very brown; feel free to adjust the cooking time to achieve the perfect crouton).
 Remove from the oven and allow to cool.


That’s it!  Super tasty, easy to make and much cheaper than most retail croutons!


I hope you will stop by my blog to check out what’s going on; I plan to share more of my favorite recipes as well as sewing projects, craft projects and just daily life!

Tuesday, May 7, 2013

Guest post from My Repurposed Life

While I am getting used to having a newborn around some wonderful bloggers has stepped in to help out with some fabulous guest posts! Don't worry I will be popping in here and there to give updates and of course do the Show Off Your Stuff Party! We have a great line up for you all!

Up next is Gale from My Purposed Life

 
I am so happy to be sharing here today!  I have been reading Fireflies and Jellybeans for years. 
So, who is My Repurposed Life?  A middle aged woman named gail who is in the process of repurposing her life by showing others how to repurpose unwanted thrift store or curb finds.  I do it all on my own, no Mr. MRL to help me cut, saw and build.  I like to redesign items and make them new and useable again.  Many of my projects are too difficult for a beginner, so today I’ll show you an easy project anyone can conquer.
repurposed shutterThis magazine rack has been a very popular post for me.  I call it a shutter, but it’s actually half a a bi-folding door, with every other slat removed.  You can get shutters for about $5-10 at your local habitat for humanity Re-Store. 
What you will need:
  • Shutter or bi-folding door
  • Hammer
  • Paint (I recommend spray paint for any slatted project)
  • Sawtooth hanger
  • optional: wood putty or spackling if you would like to fill the holes left after removing the slats

claw hammer shutter
Use the claw of your hammer to snap out every other slat.  Place the claw on the slat you want to remove and give a quick twist.  It will break the slat allowing you to remove it.

shutter magazine rackAfter you have your slats removed, you can use the wood putty or spackling to fill in the holes where the slats were. (you may notice that this is the back side of my magazine rack-hanging it like this would make it difficult to hang magazines)

Paint your new magazine rack a fun color. As I noted above, there is a right and wrong way to hang your magazine rack—before you add your saw tooth hanger you will want to grab a couple of magazines to test the orientation of your magazine rack. 

repurposed shutter-magazine holderI like to have the wider portion on the top, with the magazines flowing behind each other.   After you give it a test run, you are ready to attach your saw tooth hanger.  Embellish any way you’d like.  You can do this to a tall shutter or bi-fold door and lean it against a wall instead of hanging it.  You could also display vintage towels or small blankets instead of magazines.
You can check out the complete details of this shutter magazine rack on my site. I make mine a little different now, but it takes more tools.  I wanted to show you that anyone can make this project.
If you love to make old new again, you can check out these great projects:
kid's red benchThis kid’s bench was made from a footboard and a headboard.  I made the table to match from scratch. This project is currently the most popular post on My Repurposed Life.

repurposed crib toybox bench
Here’s another great kid’s piece.  It’s a toy box bench made from a salvaged crib.


Repurposed Desk to ChestThis is my all-time favorite project.  Many of my projects find new homes, however I couldn’t let this one go.  I use it in my bedroom for extra storage.  I fondly refer to this tall lingerie chest as the “tower of terror”.   It was definitely a fun challenge.
I hope you visit My Repurposed Life soon, I’m sure you’ll find something to inspire you to repurpose and reuse some unwanted items. You can start by checking out my galleries on my sidebar.
Thanks so much Fawnda for letting me fill in for you today!  I wish you all the best with your new bundle of joy!  Such a blessing!
gail

Monday, May 6, 2013

Guest Post from Life with Leahy


While I am getting used to having a newborn around some wonderful bloggers has stepped in to help out with some fabulous guest posts!  Don't worry I will be popping in here and there to give updates and of course do the Show Off Your Stuff Party!   We have a great line up for you all! 

Up Next is Sarah from Life with Leahy


Hi there!
Welcome!
I am Sarah from Life with Leahy!

I have been blogging for about three and half years. I started blogging to document my daughters life... and my blog has slowly become a way to feature fun crafts we do together, projects I do around the house and yummy recipes we try! I hope you will come back for many visits in the future!

Today I am so excited to get the opportunity to share my Floating Paper Mobile with you! 
I created this project last spring for my daughter's nursery. I was looking for something to fill the corner of her room and had stumbled upon similar pieces on Etsy. Not wanting to spend over $40, I set out to find tutorials on how to make one myself. I didn't like a lot of the tutorials out there, so I just started winging it from the different ones I read! 

And here is what I came up with.... 


Her nursery is a mix of lavender, grey and white, so the mobile encompasses on three of those colors. I am going to run through a tutorial of what I did to create this piece. 
This tutorial is pretty long, but please bear with me! I wanted to be pretty detailed, so there's no confusion!

MATERIALS
12x12 card stock in colors of your choice 
(You will need at least 5 pieces of card stock, more if you choose to do multiple colors. I chose card stock that was a bit textured on one side to give off different light as it moves)

2 inch circle punch
White wood circle 
(I found one that had eight small circles in the top which was PERFECT when it came time to hang. I found it in the floral department. I was originally going to use an embroidery hoop. You could really use anything similar.)

Needle and Thread
Paint & Brush
Fishing Line 
Hot Glue Gun
Small Clear 3M picture hanging hook (see picture at the end)

As you can see a lot of this project involves materials you probably already have... and the rest of them are easy to find and cheap! This project is really about time. I created this over a couple of weeks. Don't be in a rush!

TUTORIAL
The shorter pieces of my mobile are all purple. I used 72 purple circles (8 strands of 9)
The longer strands are grey and white. I have 2 strands of white and 2 strands of grey. 
I used 24 white circles (2 strands of 12) and 24 grey circles (2 strands of 12). 
I have a total of 120 circles in this mobile. You will need to decide which color combinations you would like for yours and adjust accordingly. You really can decide to do any combination! 

STEP 1: Decide on your color combinations and punch out your circles!!!
I found it helpful to store my punched out circles in plastic containers!

STEP 2: We are going to create the strands of paper circles. I started with purple. 
Thread your needle. You are going to start by threading through the bottom of your circle


Your knot will be at the back of the circle once you pull your thread. 

Next you will "sew" through the top of the next circle. 

Next you have to loop the thread around and back through the SAME hole. This secures the circle in place, so it does not slide down the thread. 

After you have looped around, you will sew through the bottom of this circle.
To clarify, Circle #1 should only have thread coming out the bottom. Circle #2 should have thread at the top and bottom. 

Now we repeat... over and over again! 
You are securing each circle in place so that it will not slide up and down on the
 thread once it is hanging.

Now you will add the next circle. After adding Circle #3, you will want to loop around again through the SAME hole to secure in place. 
 

Keep adding circles, repeating the looping process. 
I suggest getting comfy on the couch at this point, with your choice of beverage! 
It's easy, but time consuming!
 

Once you add Circle #9 to your strand (of purple) or Circle #12 to your strand of white/grey, you will want to stop at the top hole. You will knot off your thread and add a little dab of hot glue to the end to secure it in place. This also ensures that your circles won't slide off the end! Go back and add hot glue to the top knot of your strand of circles, as well. 

STEP #3 - Repeat this process of creating these "circle strands". You will need to have 8 strands of with 9 circles on them (purple ones for me). You will need 4 longer strands of 12 circles (grey and white ones for me).

 After you have created all 12 of your circle strands we will be assembling the mobile! 
That was the hard part!!  

STEP #4 - Paint the wooden circle your choice of color. I chose white! 

Once paint is dry, we will start assembling. You will need your hot glue gun ready for this part!

STEP #5 - ASSEMBLY -We will be hot gluing each strand to the painted, wooden circle. I chose to group my strands in 4 sets of 3. Two short strands with a long strand in the middle. I hot glued the two shorter (purple) strands on the outside and then glued the longer strand on the inside of the circle. This creates some dimension to the mobile and makes it appear fuller. 

FIRST, glue the longer strands into the middle of the circle. You want them to be across from one another. NEXT glue the shorter strands on the outside of the circle, on either side of the longer strand.

 In the picture below you can see what I mean by gluing across from one another... there is a grey one behind the word HERE... directly across from the grey one featured.


STEP #6 - HANGING - Not going to lie... Hanging this project up proved to be the most challenging part. You may come up with an easier idea to do this... but this is what worked for me. 

My circle had these eight little holes in it... I used fishing line tied through these holes in order to hang it.


 I created a loop of fishing line through each hole and tied the ends together. So, basically each hole had a giant circle of line tied through it. 
I gathered each circle together and tied another piece of line through them all to create the long string at the top. 
You will need a bit of assistance here just to make sure it gets level. Have someone hold it for you, while you adjust the lengths of the circles and re-tie, if necessary to get a balanced mobile.


 Okay... I hope you survived that part! Just takes some patience.... 
Last step! 
Stick your little 3M hook to the ceiling.... give it an hour or so... and then loop your fishing line through! 

Tada!!! It's DONE!


Now sit back and stare at the beautiful project you have created!!! That wasn't that bad, was it?!
Thanks for visiting and reading through this tutorial! 
Please stop by for a visit! We have lots of other fun (and EASY) projects featured!!!

Content Ad