


Let's welcome our next Guest Poster for our Sew It Yourself: Kids Clothes Series!
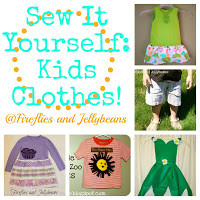
Today we have Lindsay from PA Country Crafts! Take it away Linsay!
_______________________________________________________________Hi! Thanks so much to Fawnda for letting me share a tutorial with her readers! My name is Lindsay and I blog over at PACountryCrafts. I am married with five kiddos- one boy and four girls and we live on a little “farmette” in Pennsylvania, where we actually call them "lightning bugs" instead of fireflies. On my blog you will find lots of my craft projects, some tutorials, yummy recipes, and a little look at our crazy life out here in the country. A little bit of everything...
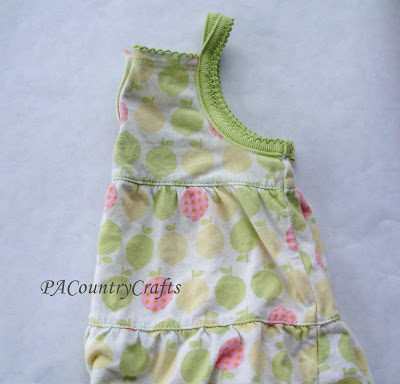
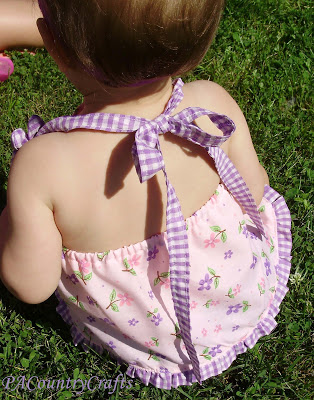
For my guest post, I decided to make a little halter top for my youngest daughter - she could use a few more shirts in her wardrobe. This could easily be lengthened to make a dress, but she isn't quite walking yet, so this way she doesn't have to bear crawl to avoid getting her knees stuck.
OK! Let's get started! I like to start out with a shirt that already fits well- for this one I folded and traced a tank top.
If your side isn't already an a-line shape, make it slant out as pictured. I added seam allowance to the side (3/8") and the top (3/4") but I let the underarms alone since I used single fold bias tape. To make the back, I just traced the front pattern from the bottom of the arm holes down, adding an inch to the width and 3/4" to the top to insert 1/4" elastic (Note: If you are making this in a larger size, you will want to use thicker elastic, so leave more seam allowance.)
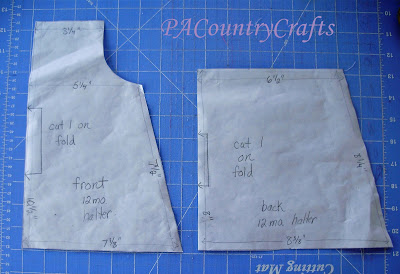
Then, cut on the fold for each piece- I used a lightweight cotton.
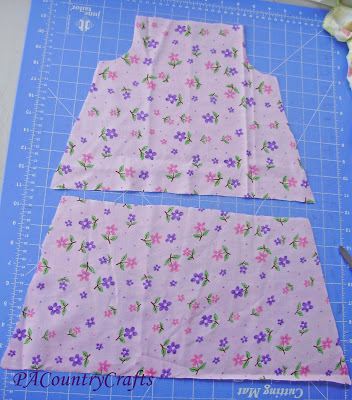
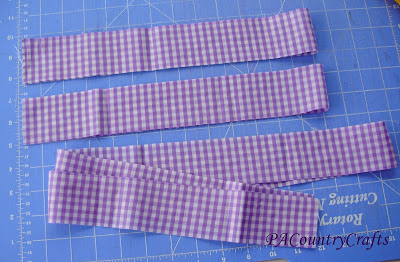
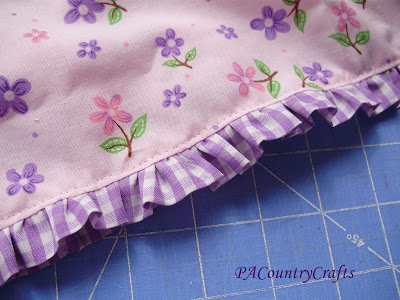
For the neck ties, cut two strips 2" wide by 21" long (or as long as you need to make them fit the size you are making mine were pretty long, and probably a choking hazard- wear under supervision.) The ruffle for the bottom should be 2" wide by twice the finished width of the entire bottom- 44" long for mine.
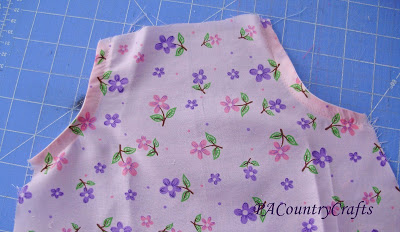
To make the front, use single fold bias tape along the edges of the arms.
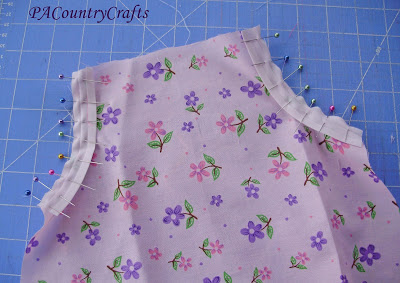
See? Not too bad. I don't even like single-fold bias tape, but it is just a little, so I did it with minimal grumbling.
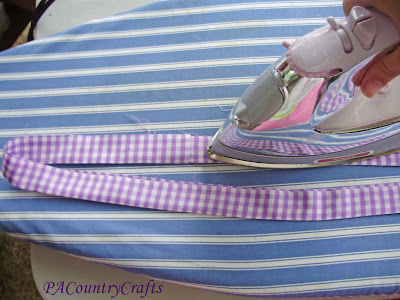
To make the straps, sew the long sides together with a 1/4" seam then flip the tubes right side out.
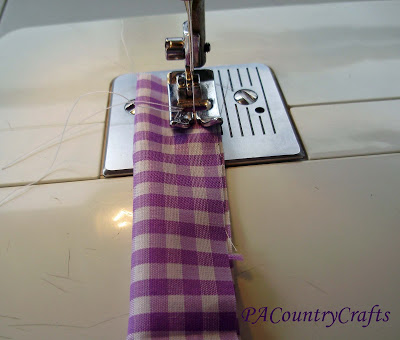
Press and topstitch both long edges and fold one end in twice to hem.
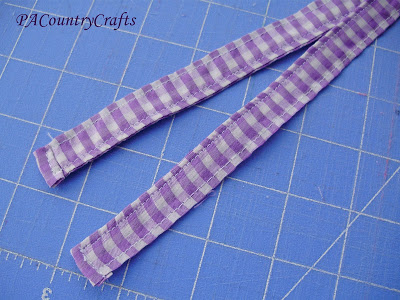
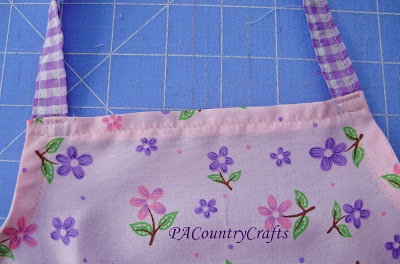
Fold the top edge under 1/4" and again about 3/8"-1/2" and insert the straps at the ends.
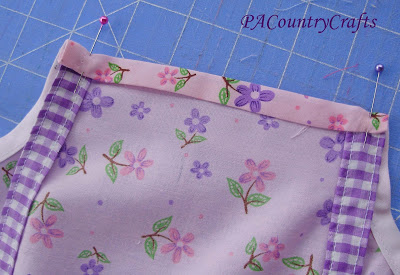
Sew the top about 1/8" from the folded edge. Flip the straps back up and sew them in place.
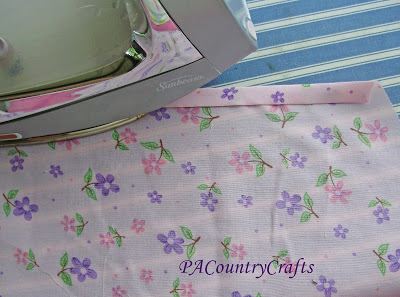
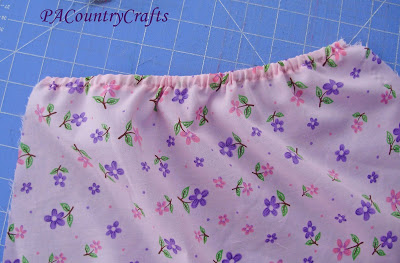
Now, let's move on to the back... Press the top edge of the back under 1/4" and again 3/8"-1/2". Sew 1/8" from the folded edge to create a casing for the elastic.
Cut a piece of elastic the width of the back of your original tank top- for me I used 10"- and thread it through the casing, sewing in place with a small zig-zag stitch at each end.
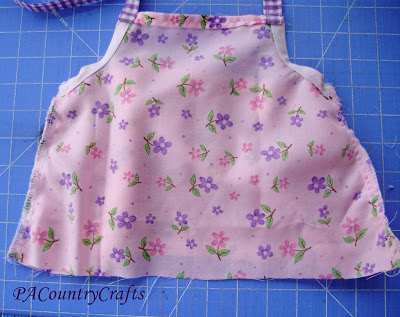
Sew the front to the back along the sides and overlock or zigzag stitch over the edges to make them all neat and tidy.
Almost there! Now for the ruffle... sew the strip in a tube and press it in half.
Sew a long basting stitch and pull to gather. Pin it to the bottom edge, making sure it is evenly gathered the whole way around. Sew it in place, trim a million loose threads, and overlock or zig-zag to finish it off.
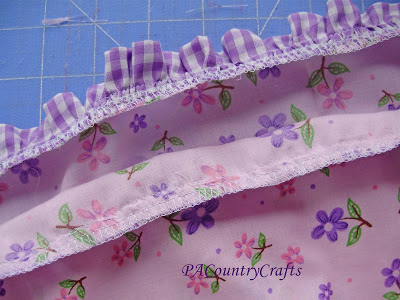
To make it extra pretty and to keep the ruffle from flipping up, topstitch close to the bottom edge.
TA DA! Super cute, and I think it was pretty easy, too!
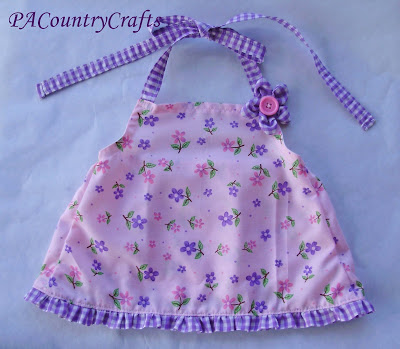 |
| Front |
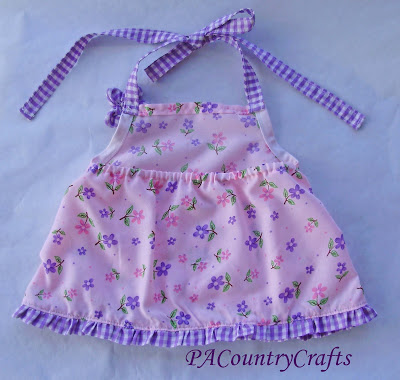 |
| Back |
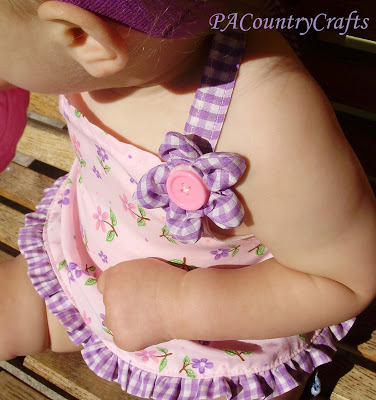
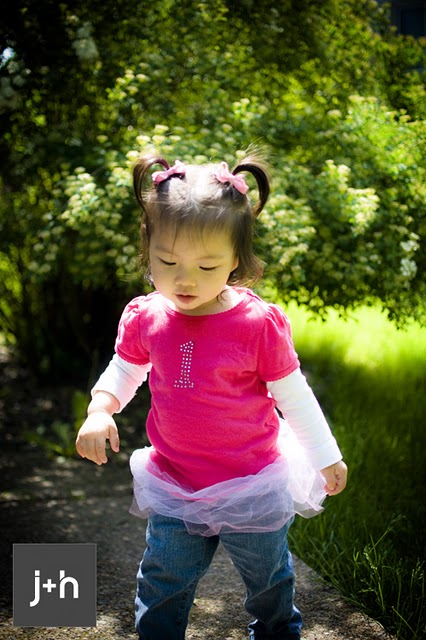
A cute summer top for my cute little girl! I paired it with denim shorts and a matching flower headband, but it would be so cute with a matching ruffle diaper cover, too!


