Showing posts with label felt projects. Show all posts

Tuesday, July 6, 2010

Cell Phone Pocket

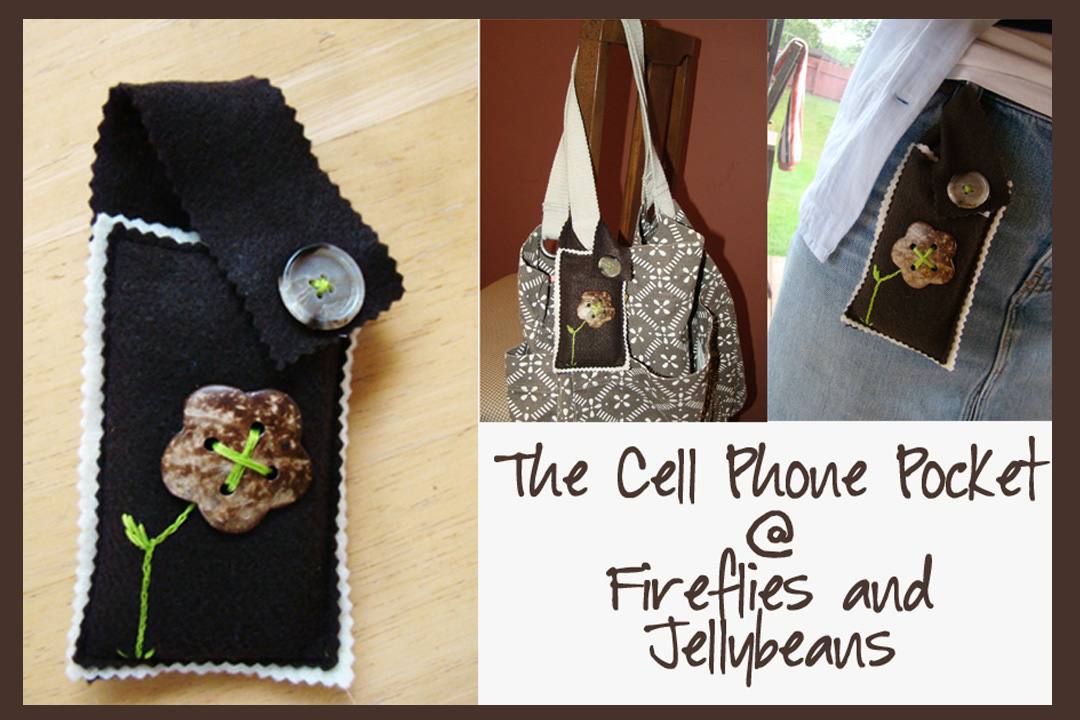
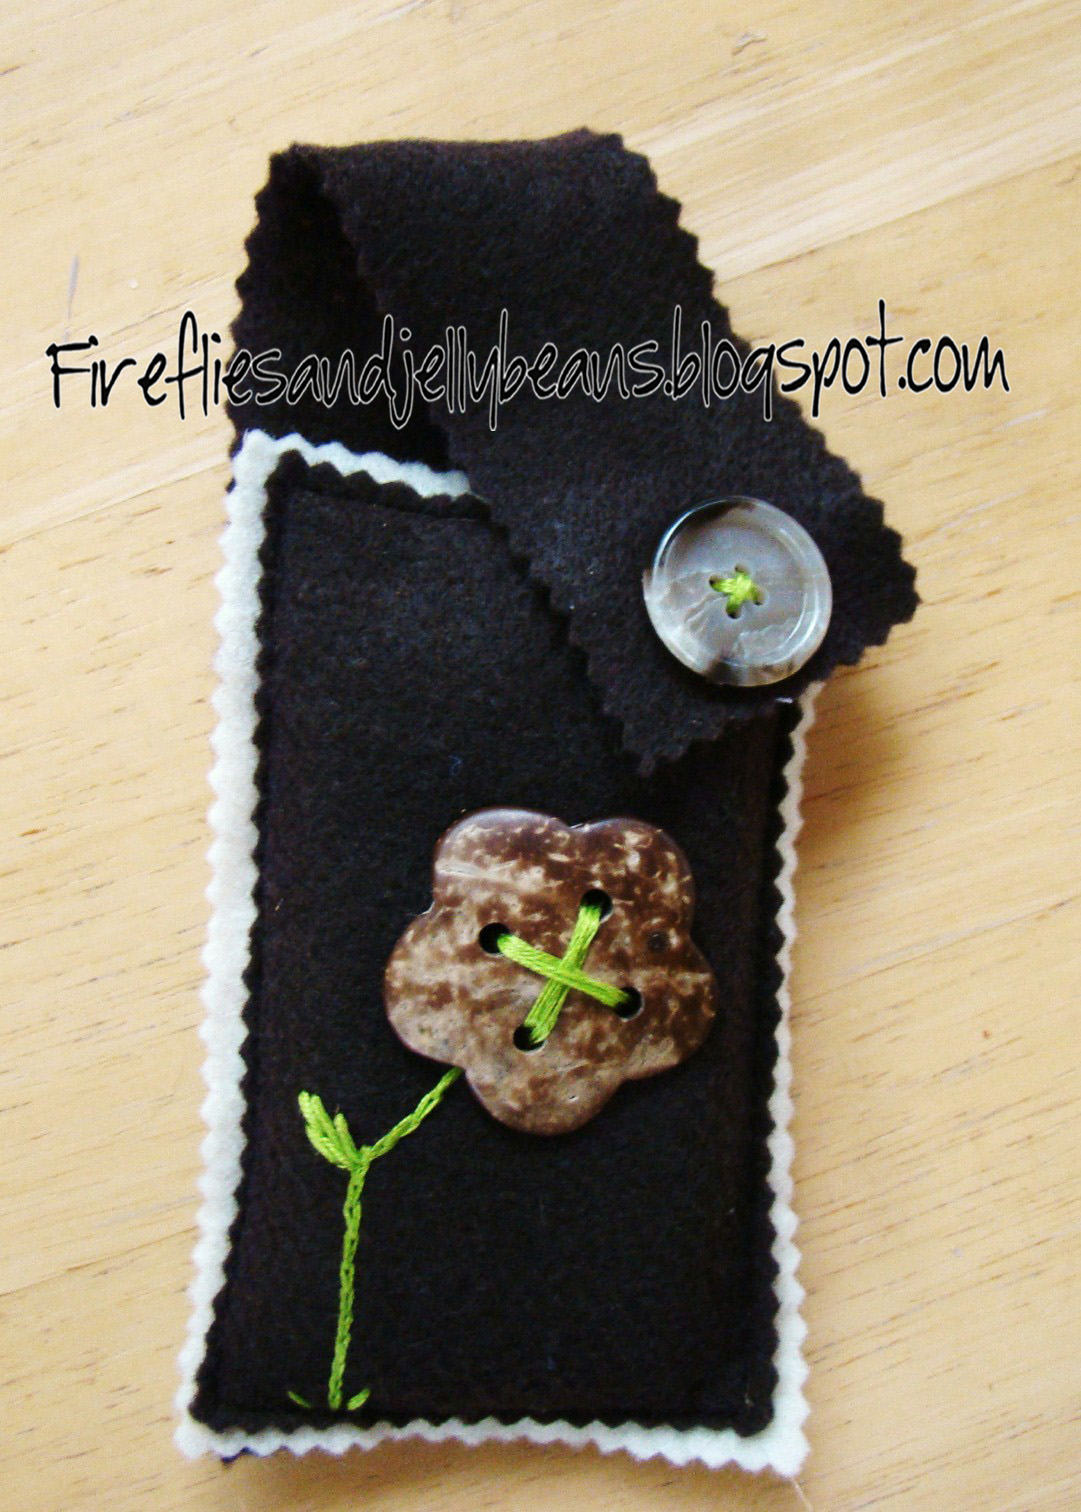
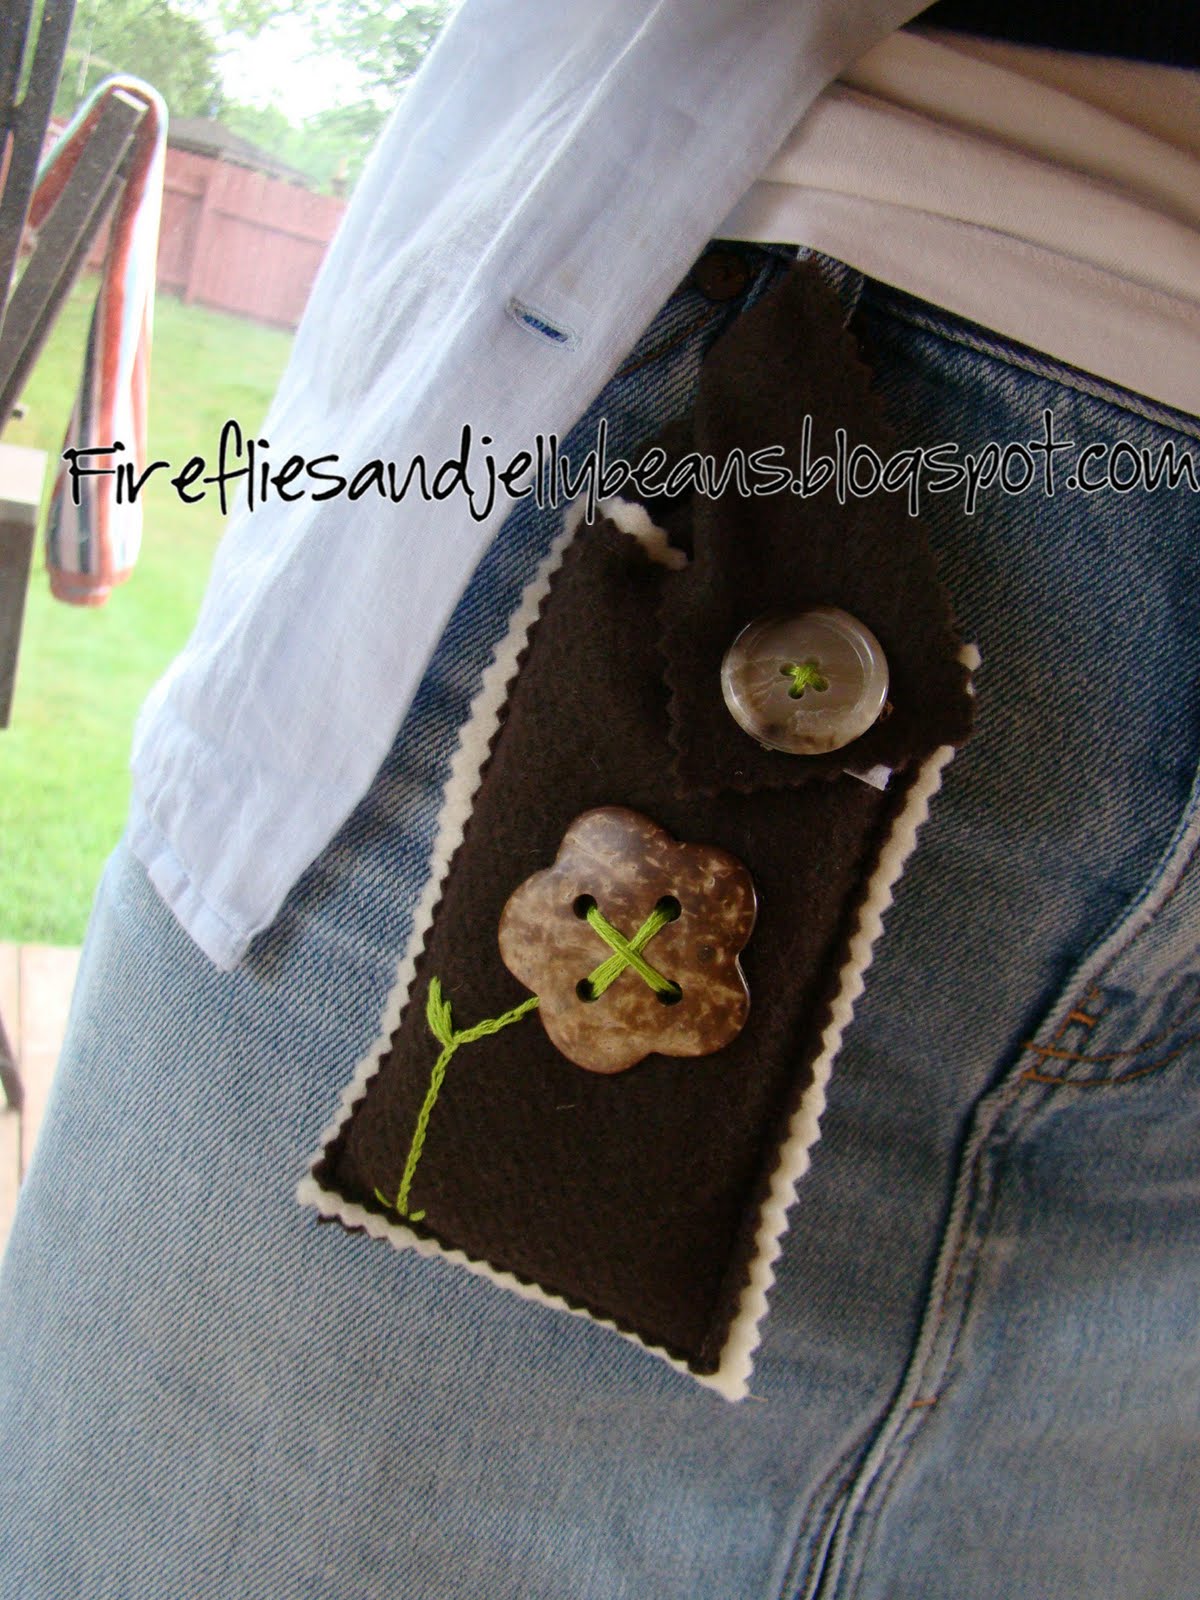
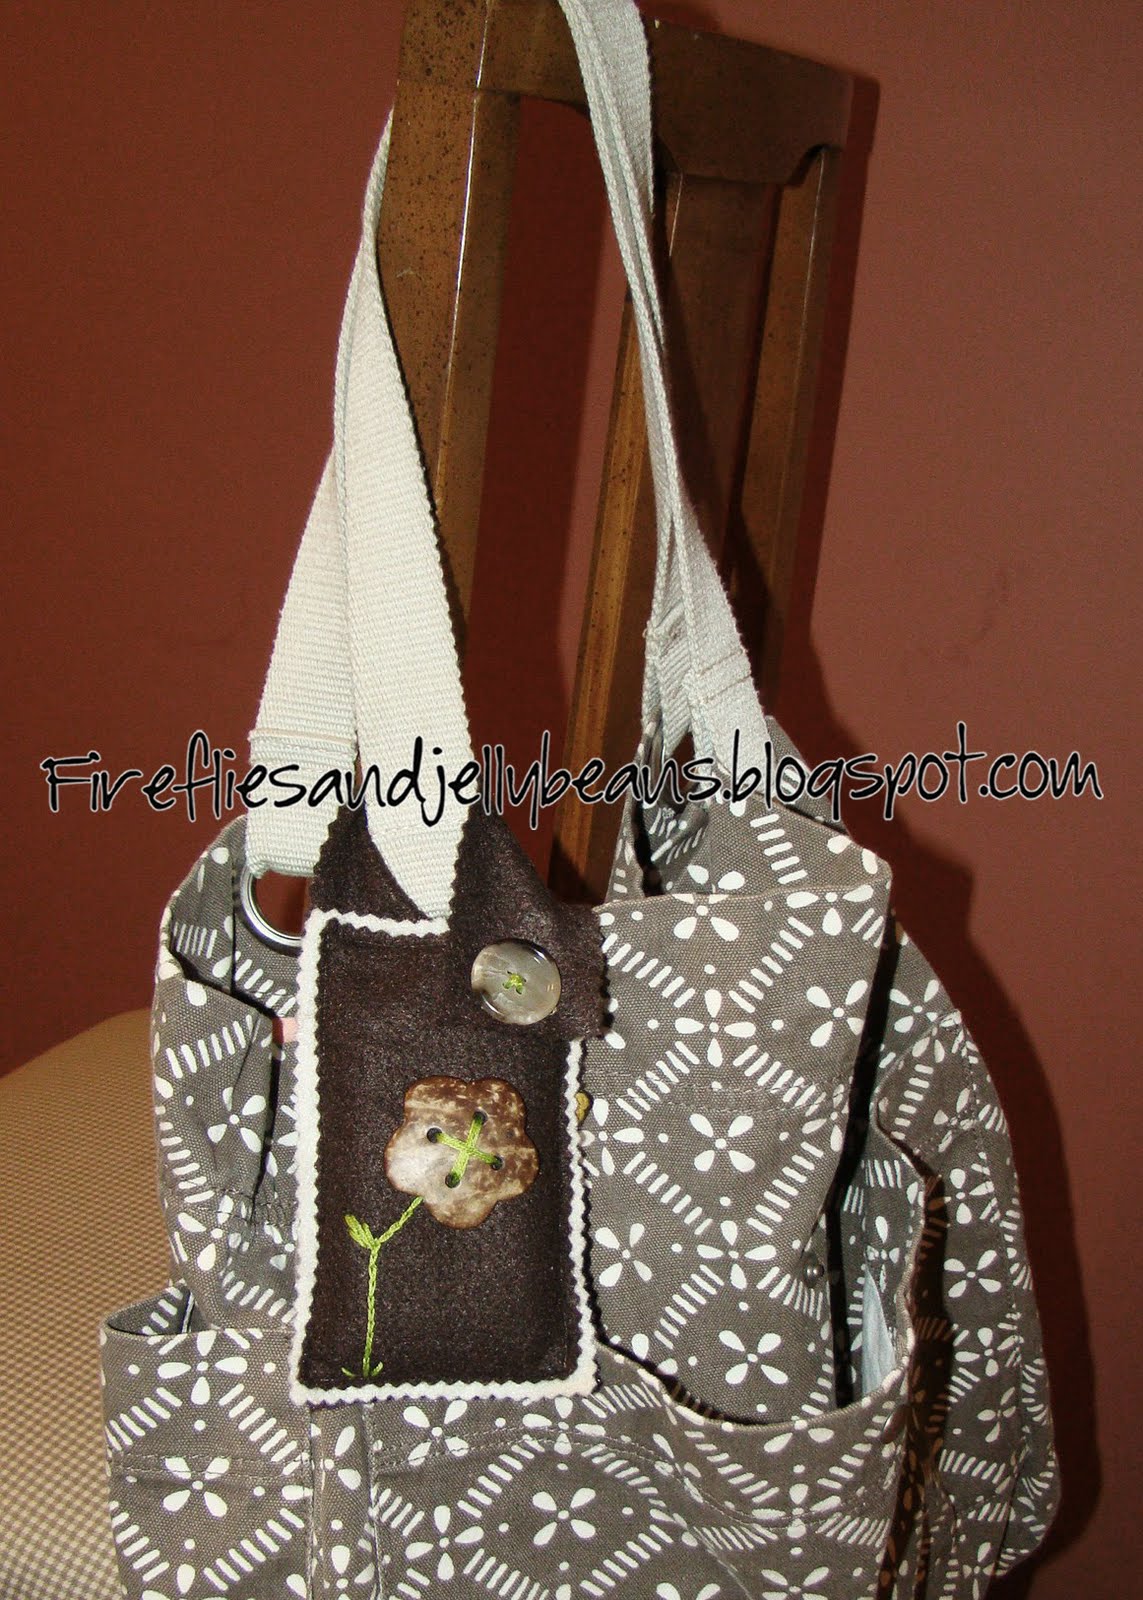
This little pocket helps you bring your cell phone with you everywhere and still look cute! It also would work great for an Ipod.
It is a quick project! It took me about a half an hour to complete.

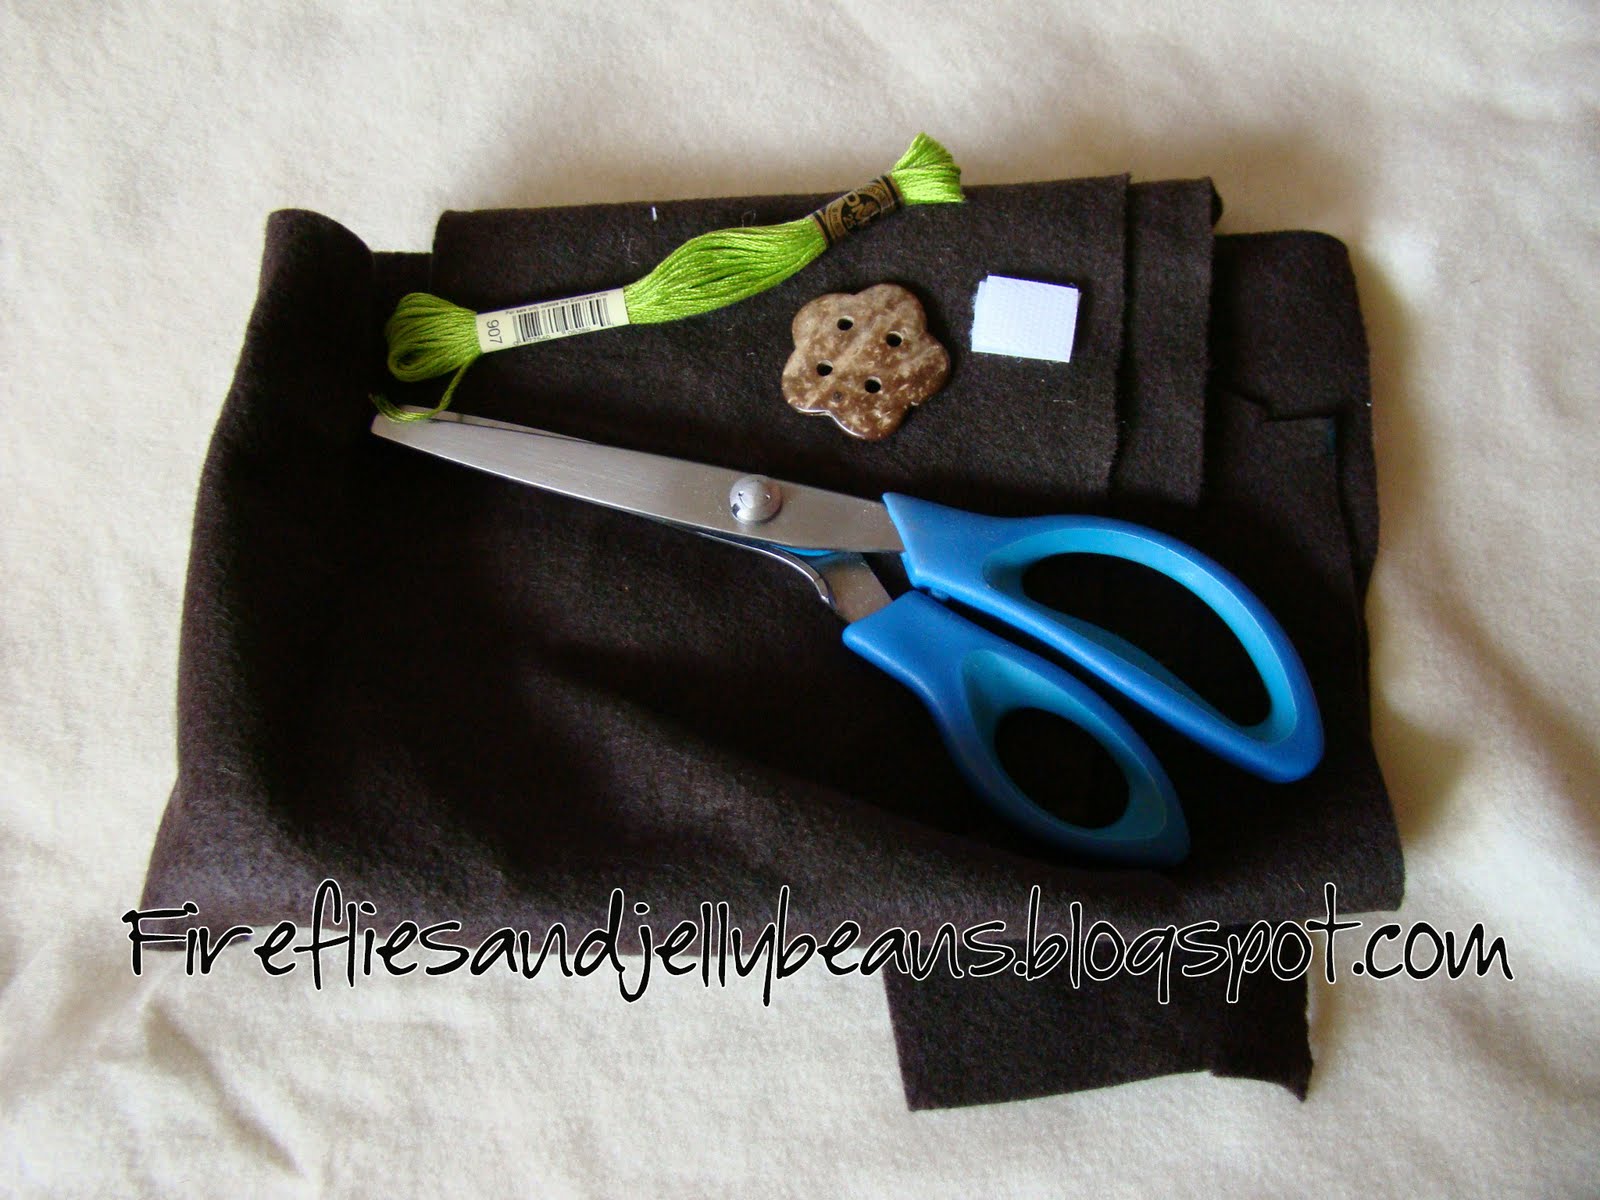
Here is what you will need:
Felt (in two colors)
Small square of Velcro
Pinking Sears
Embellishments (I used a button and embroidery thread)
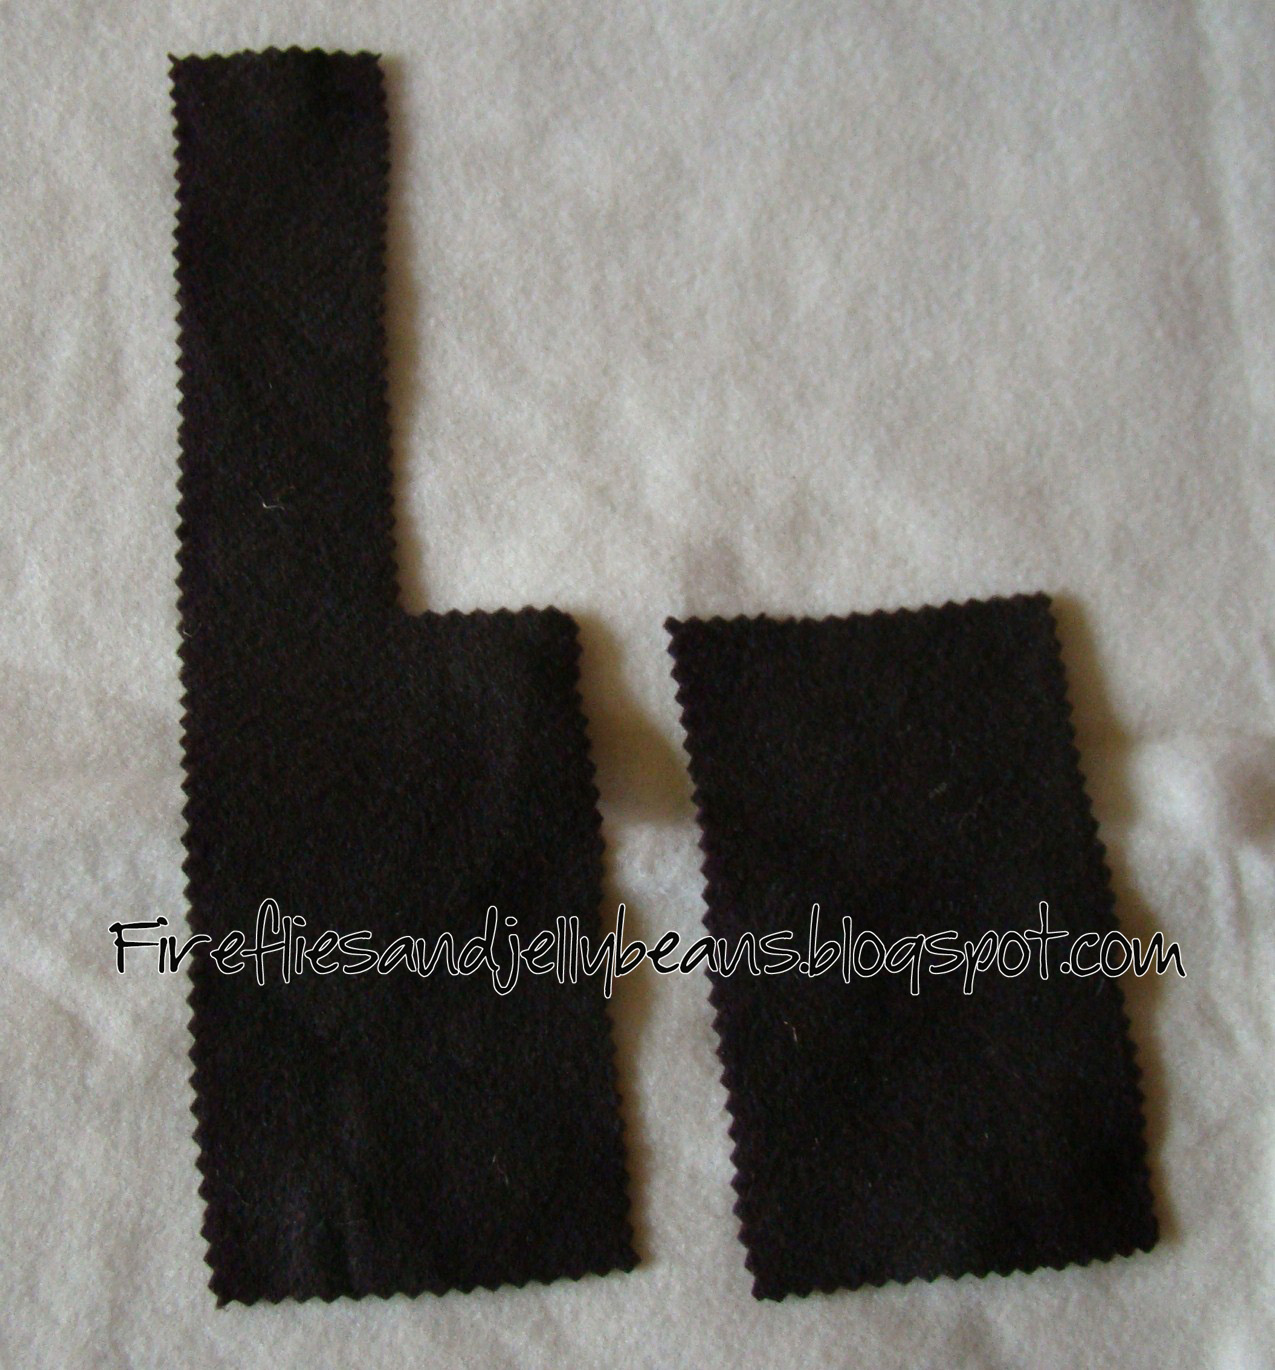


1. Cut your pieces.
1 rectangle of main color (about an inch wider and longer than your cell phone or Ipod)
1 rectangle + strap of main color (the rectangle is the same size as the other one - the strap is 1.5 inches by 5 inches - it should be all one piece)
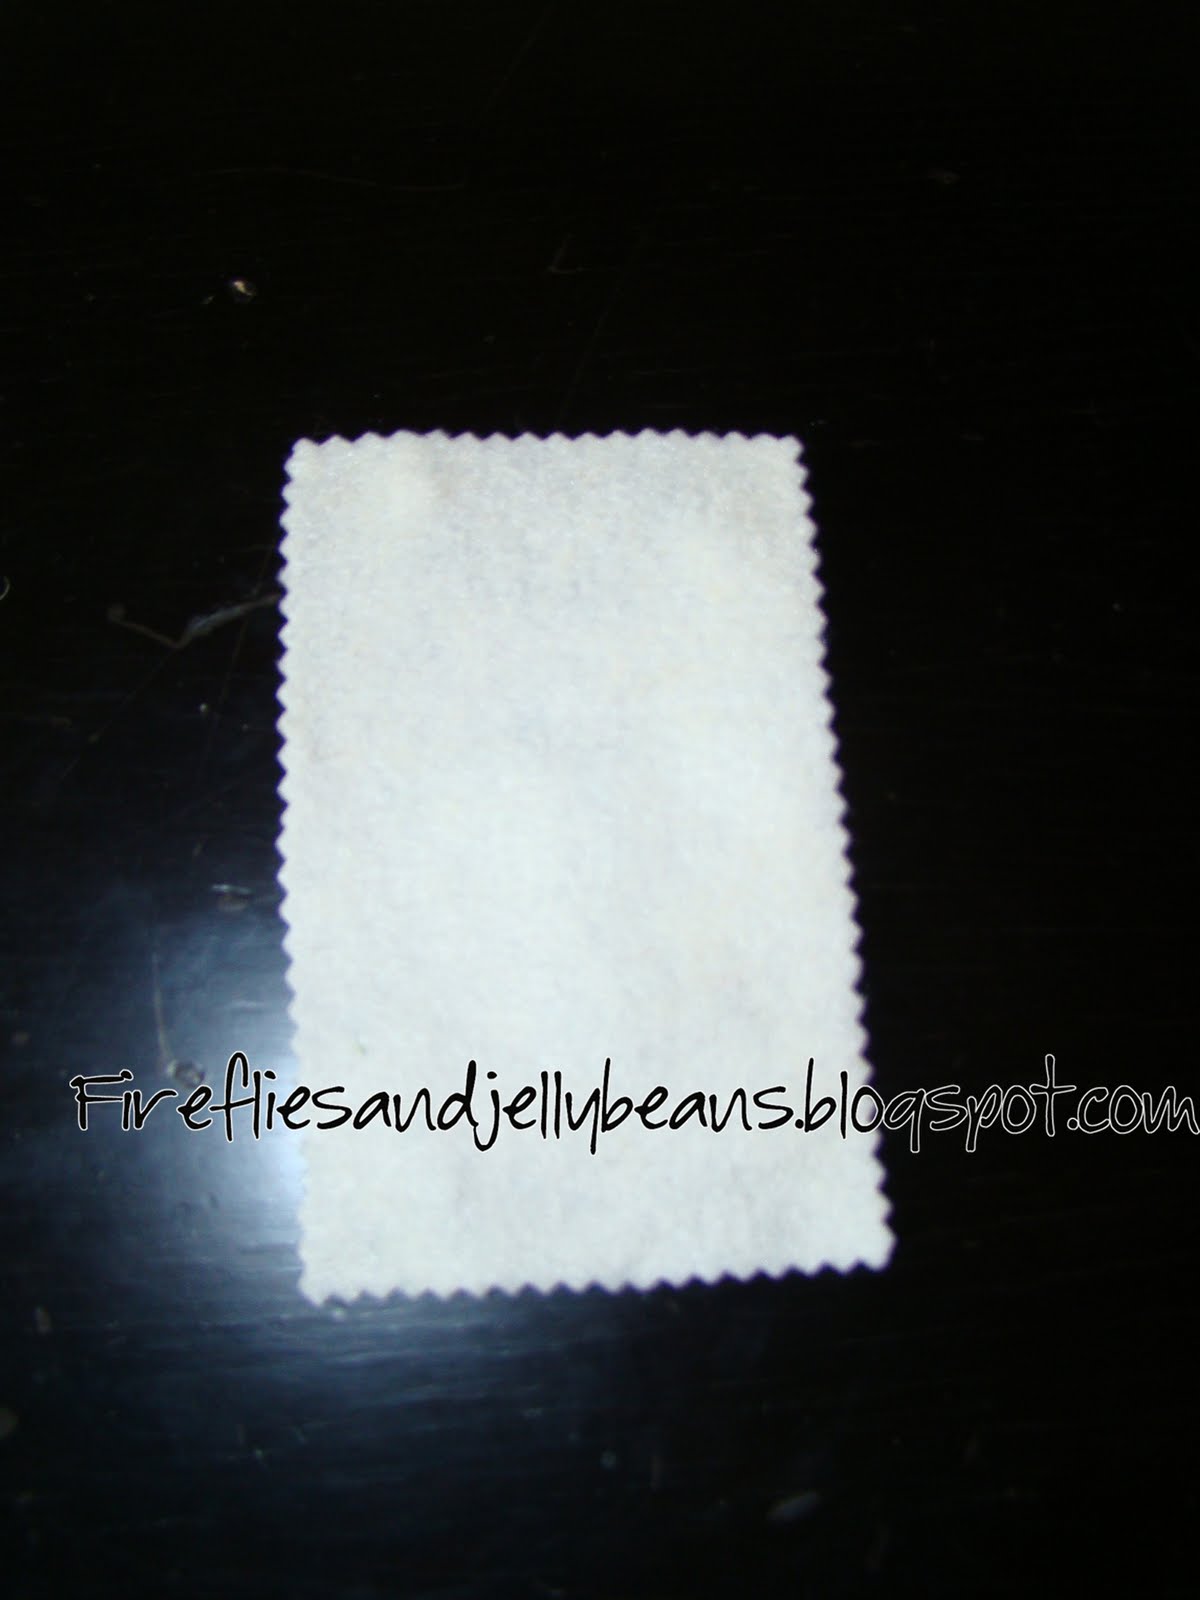
1 rectangle of coordinating color- about 1/2 inch wider and longer than your first rectangle.
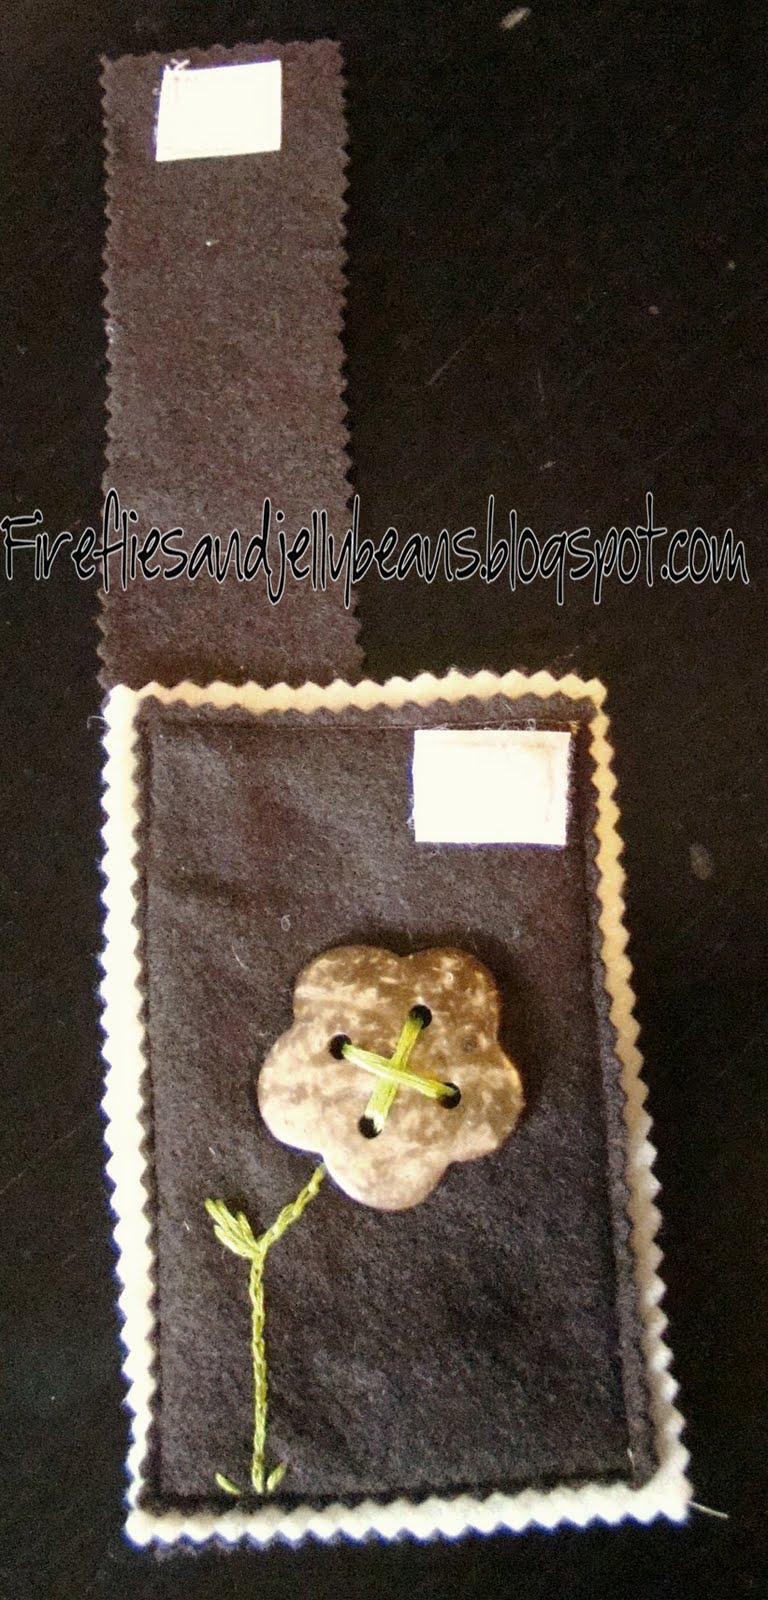
My rectangles were:
Main color (Brown): 3" X 5"
coordinating color (Cream): 3.5" X 5.5"

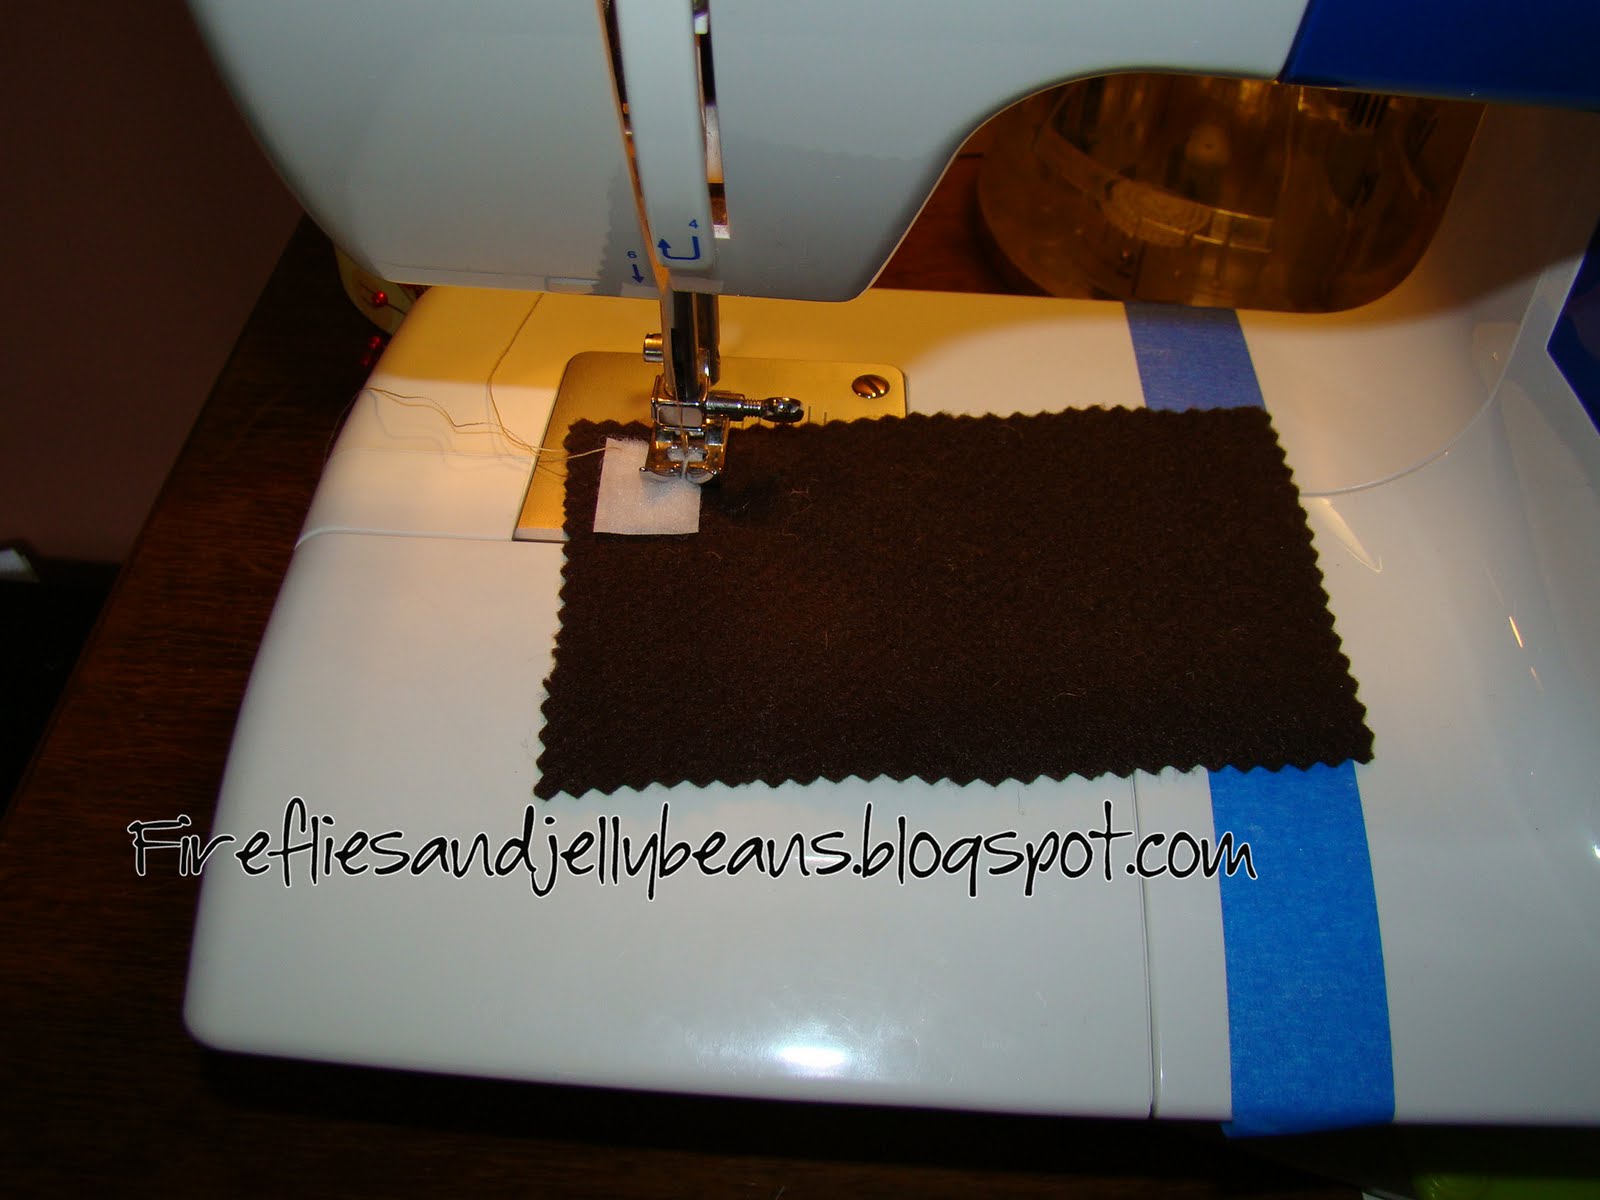
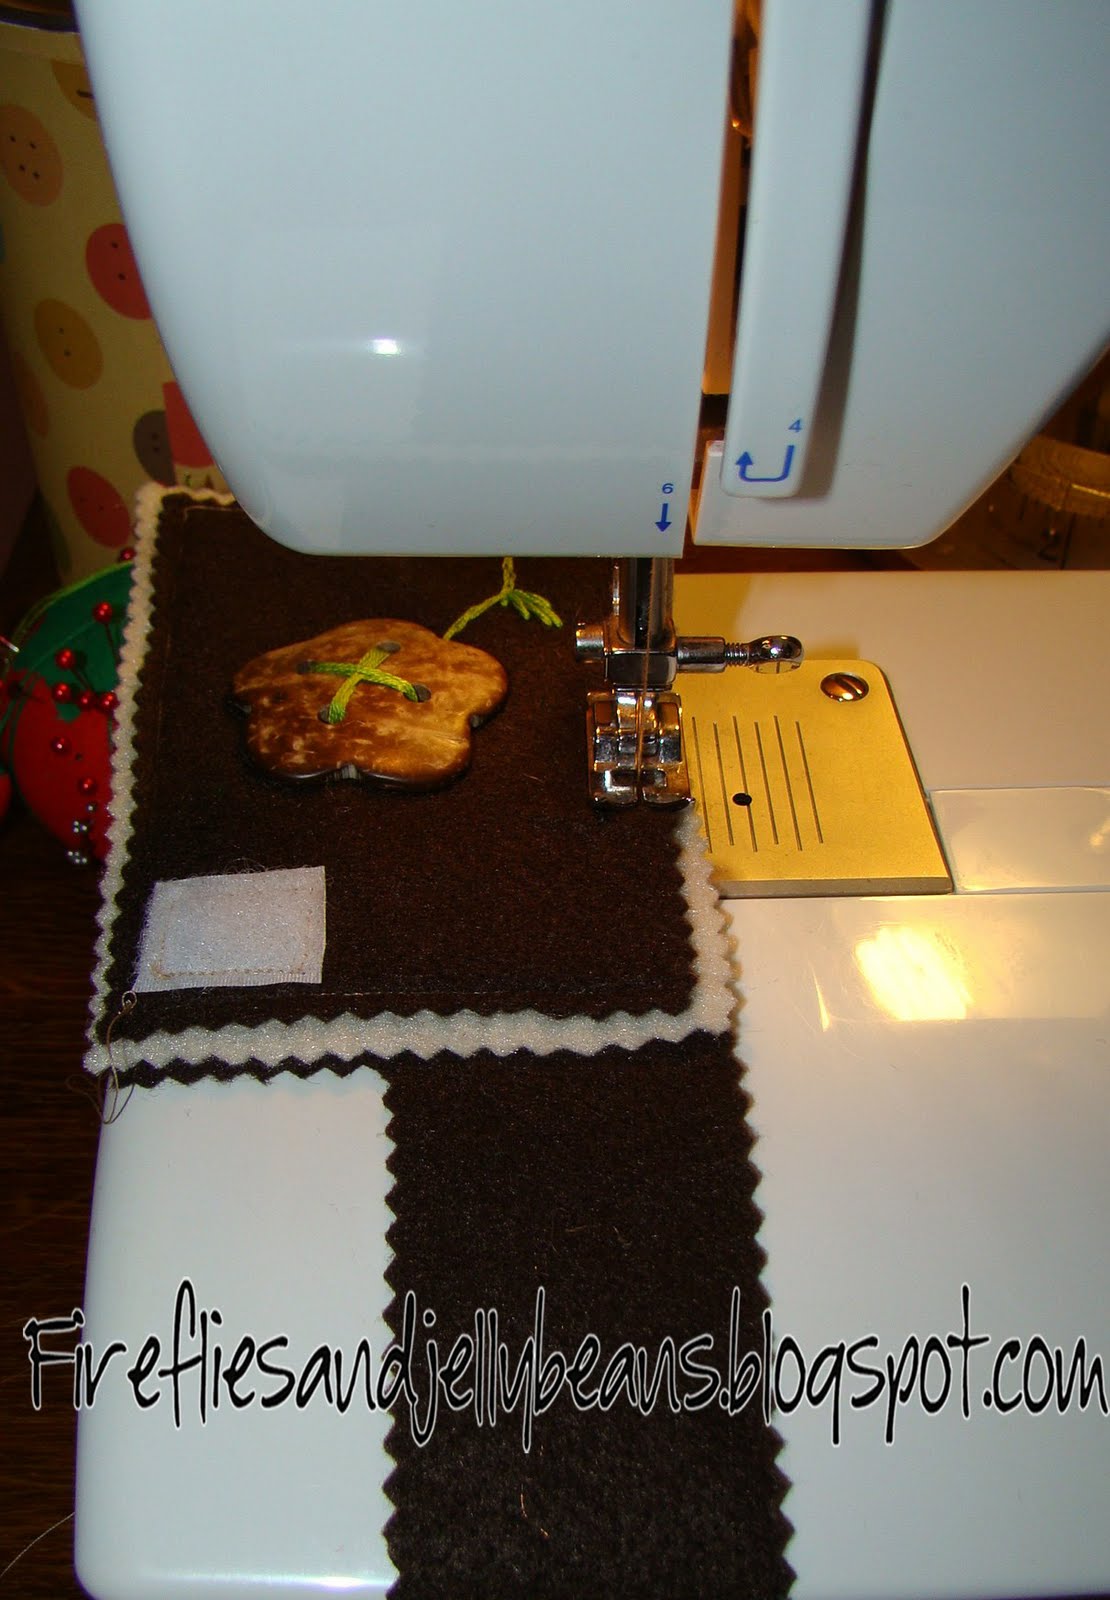
2. Sew your Velcro to the TOP side of both the main color rectangle and strap


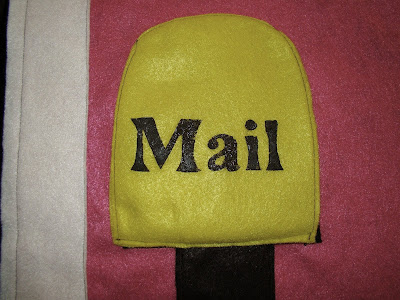
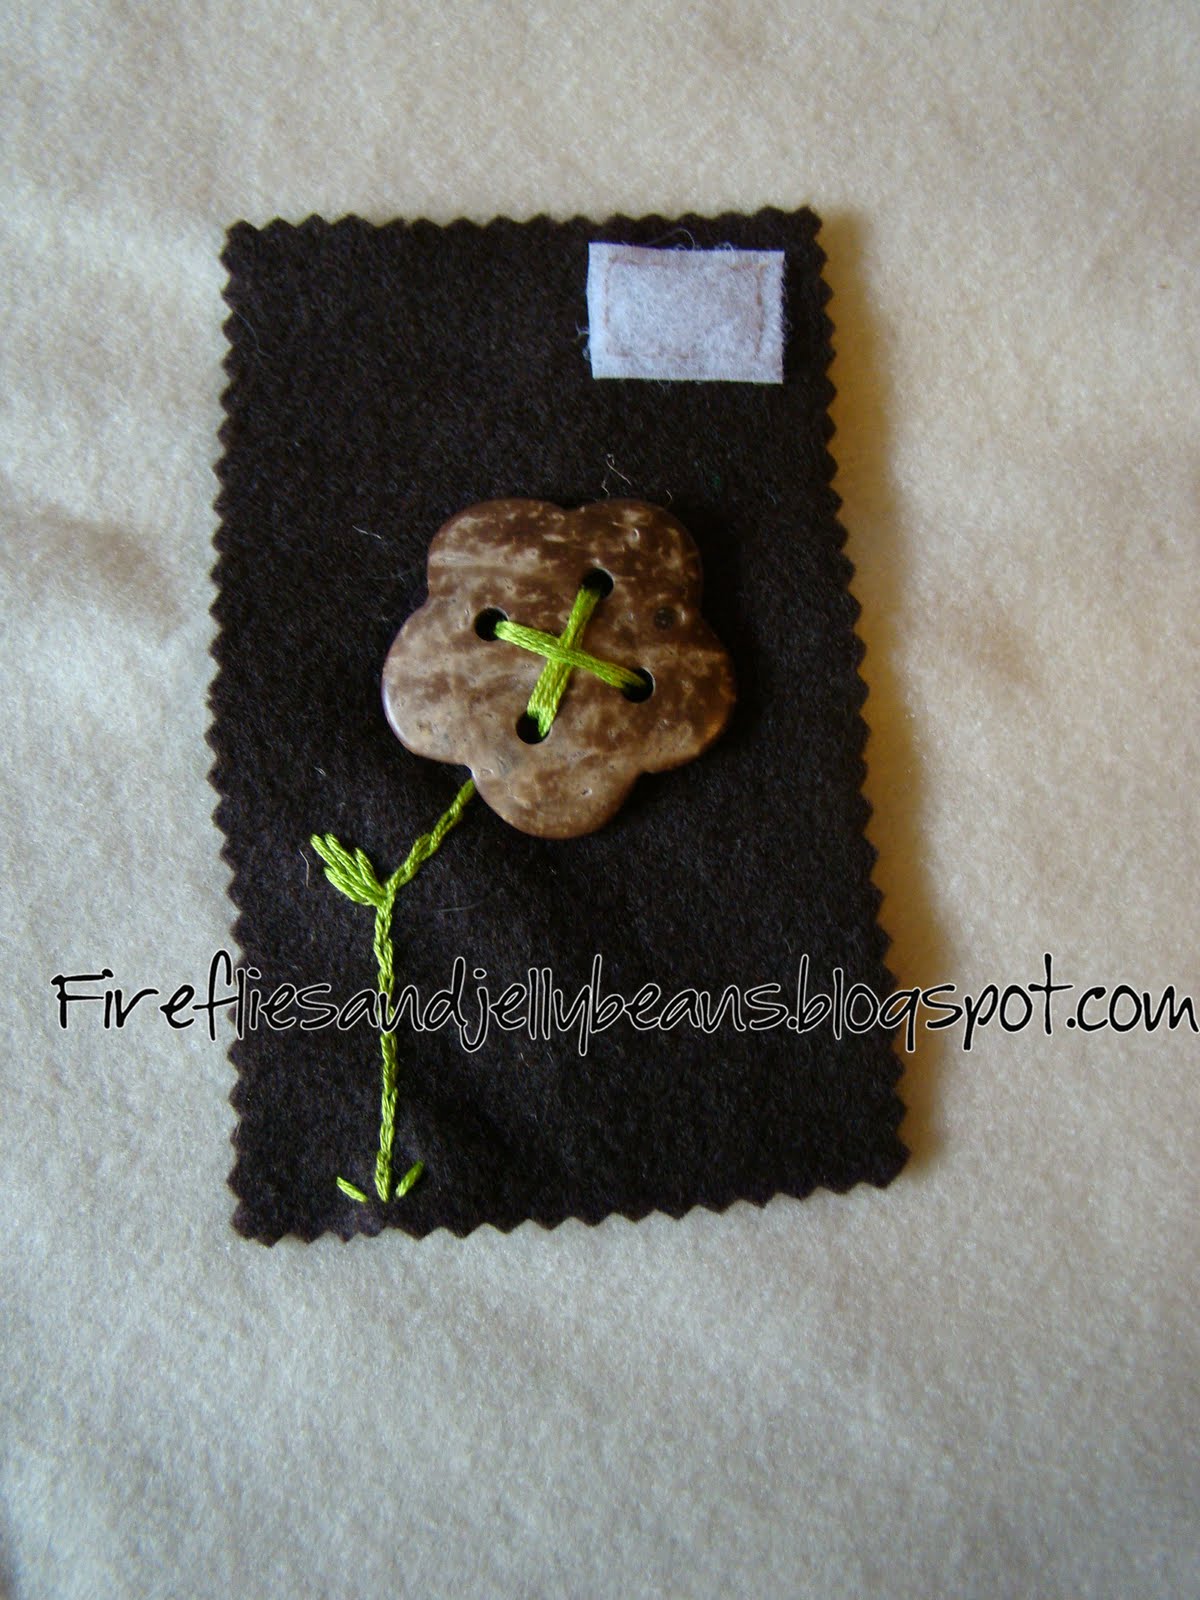
3. Embellish your front rectangle.

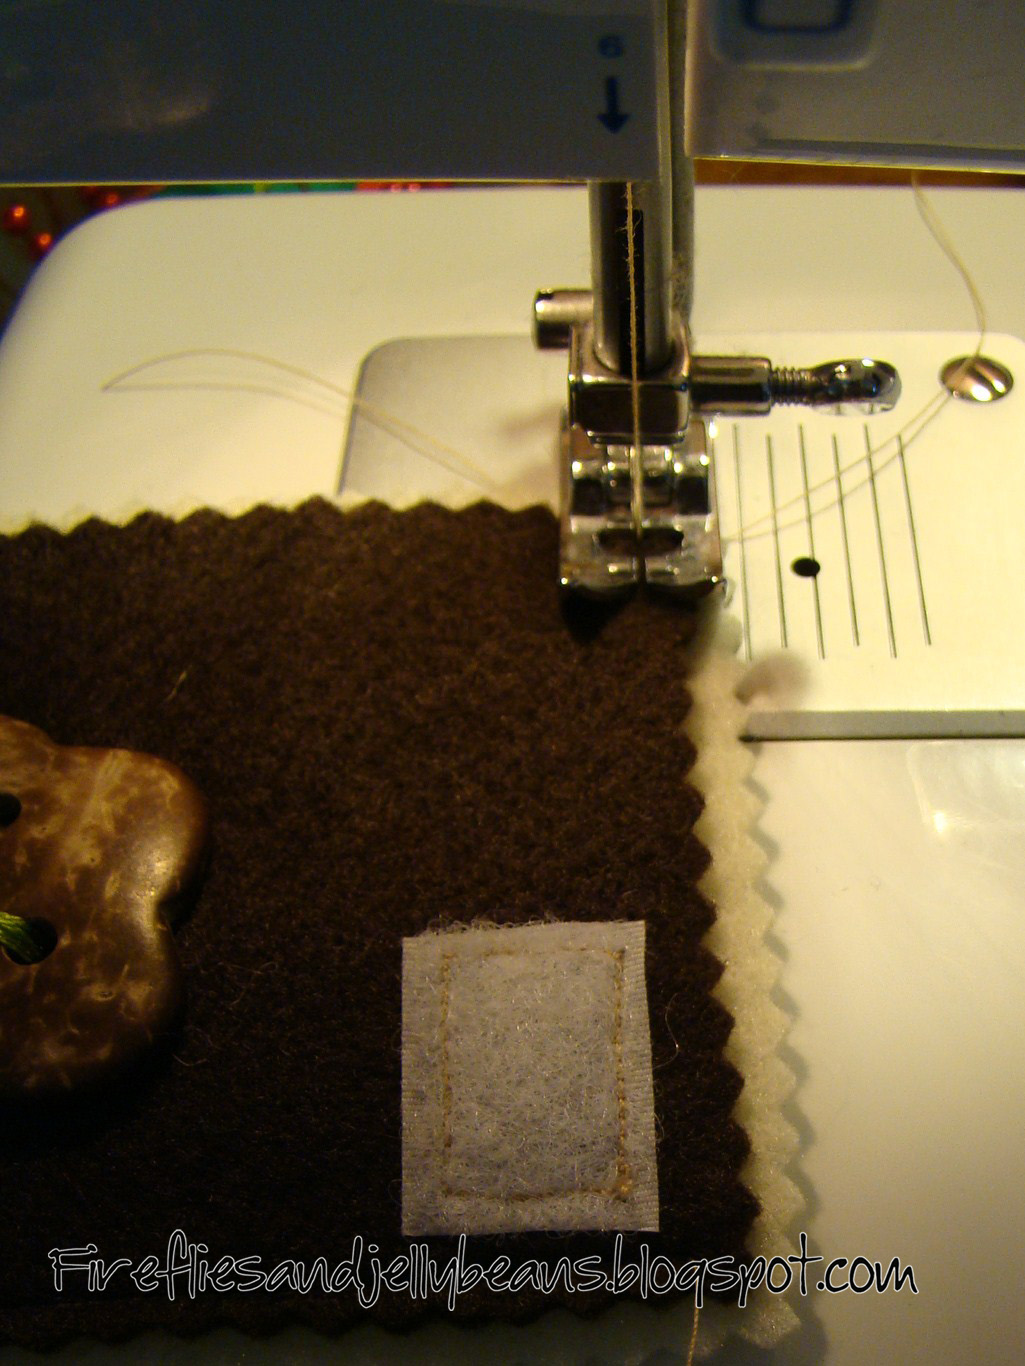
4. Sew the main rectangle to your coordinating rectangle ONLY across the TOP.
DO NOT sew all 4 sides!

5. Place your front rectangles (now sewn only in the top) onto your rectangle+strap with WRONG sides together. Sew on the two sides and the bottom attaching the pieces. Leave the top open for your pocket!


Optional:
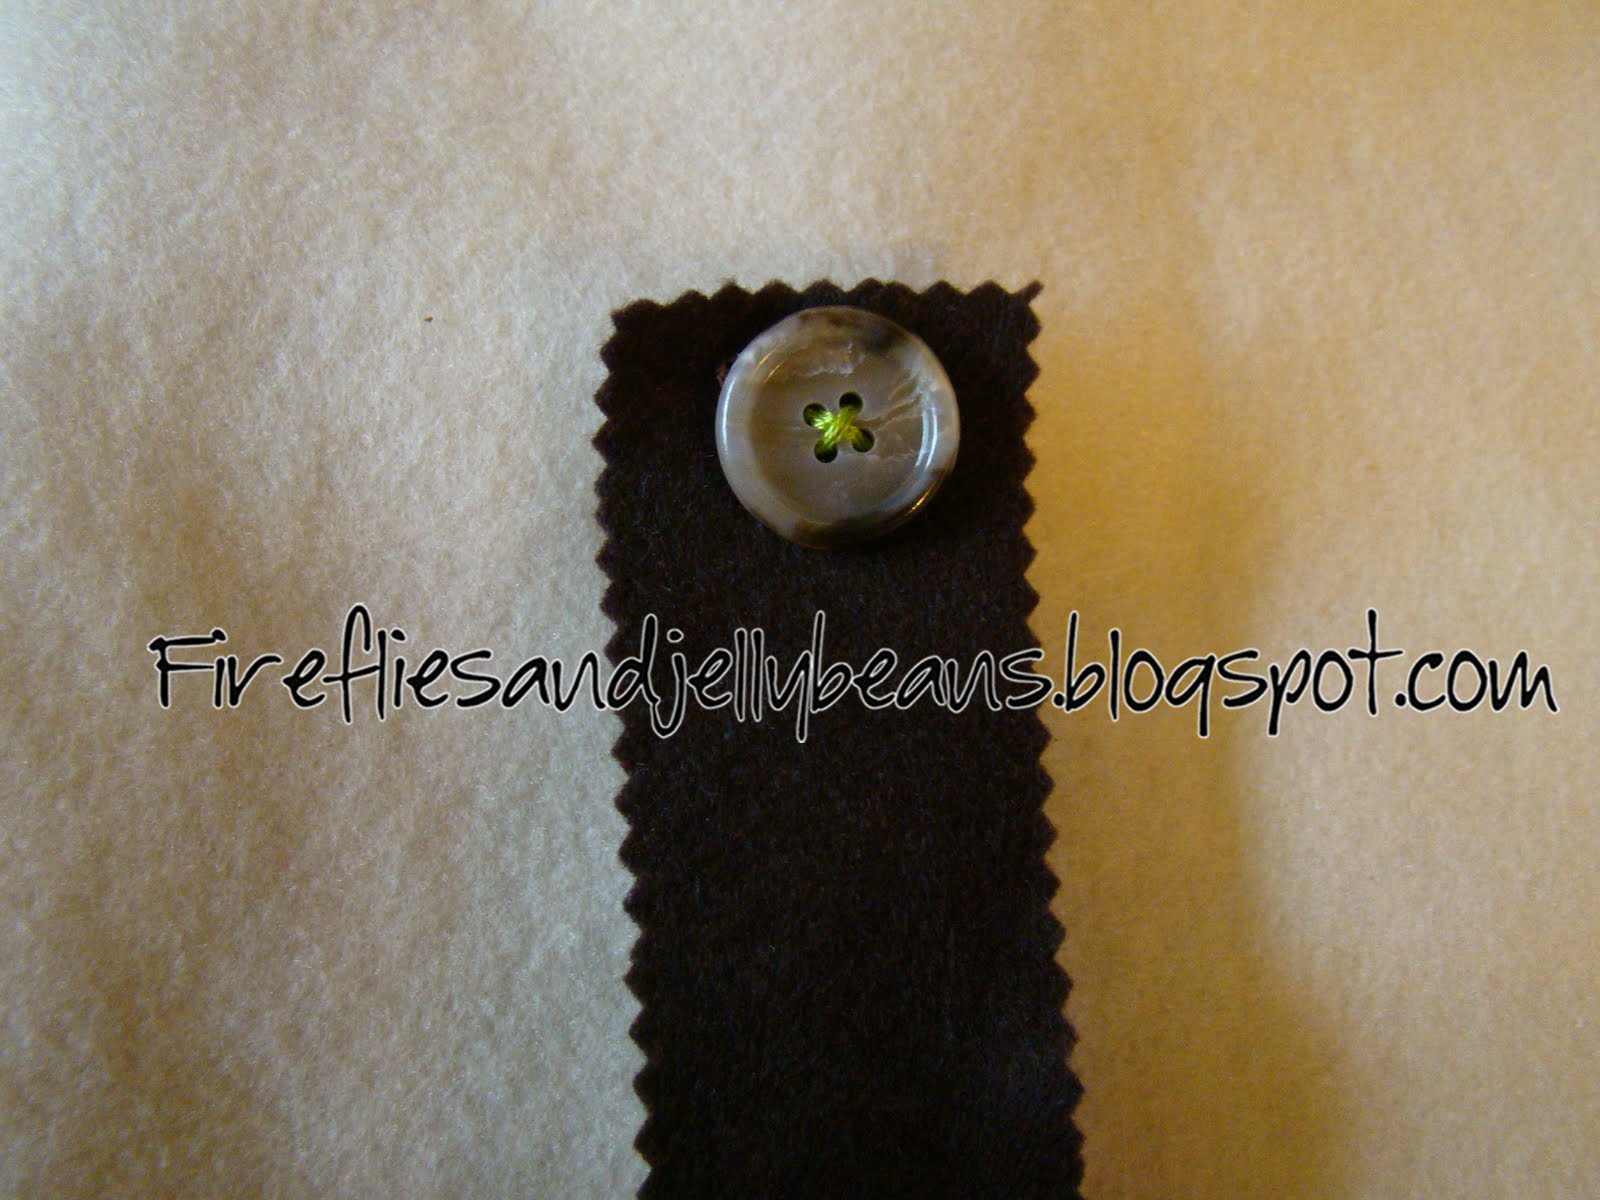
I sewed a button on my strap so that it would look like I had a button closer and not a Velcro closer... it is up to you if you want to add this step!

Place your phone in your new cute pocket


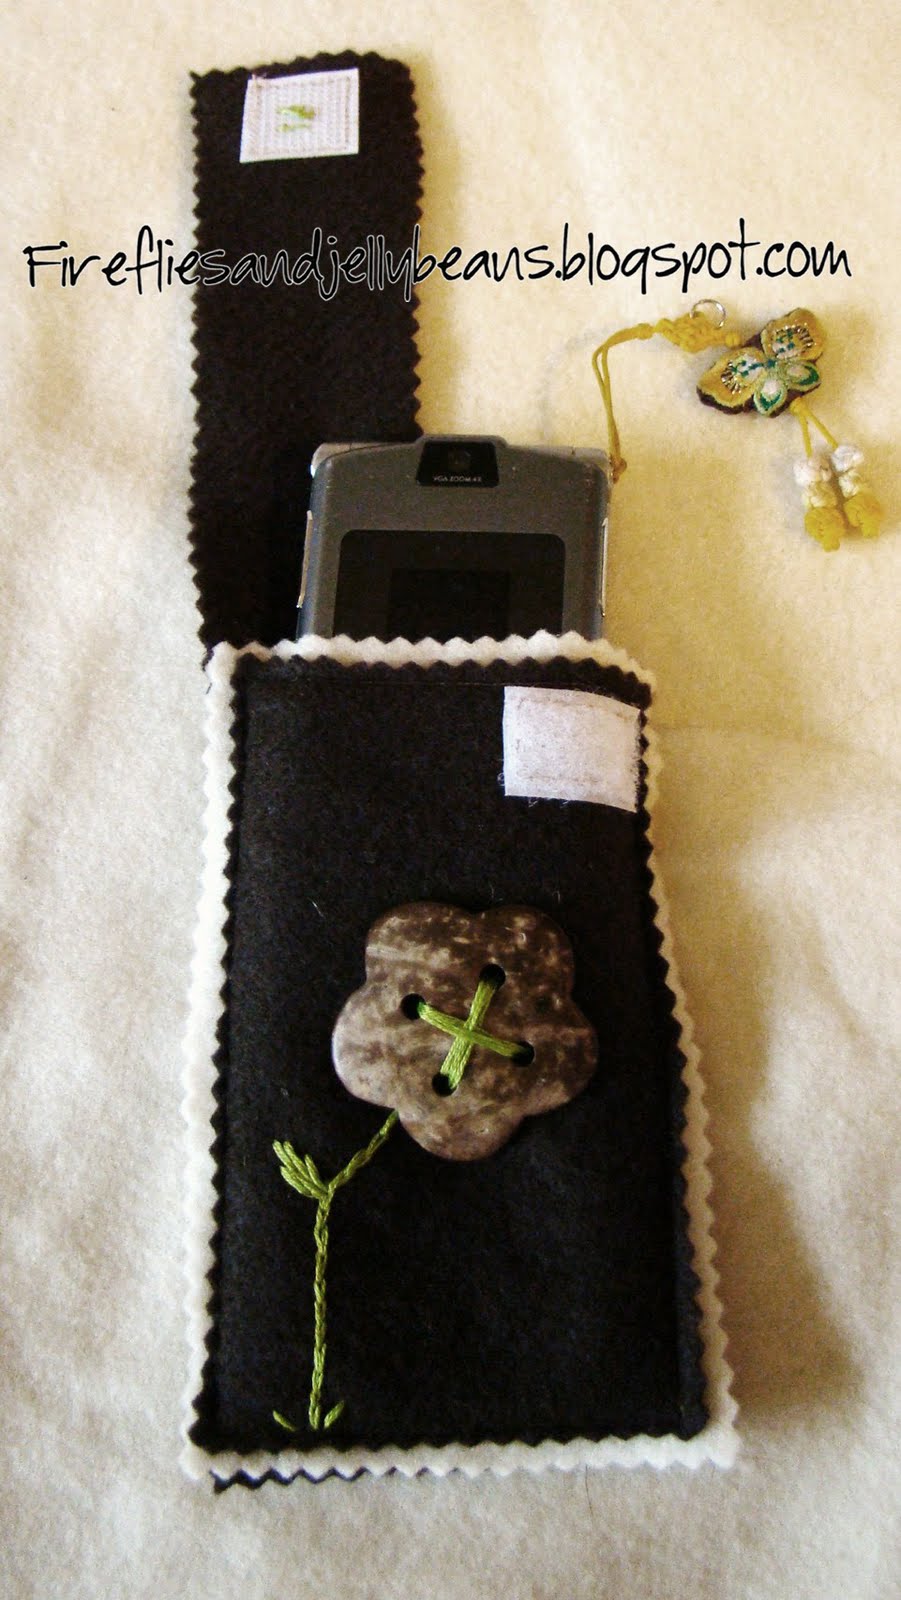
You can wear it through a belt loop...

...or on a purse strap!


Linking to:

http://www.thethriftyhome.com Show and Tell Green Funky Junk's Saturday Nite Special

Saturday, March 20, 2010

Felt House Along Week 5 {Side 4, Some Lettering and Sewing it Together!}

Welcome to Week 5 of the Felt-House-Along! Today I am going to show you my finished side 4 and how I did my lettering. {I probably should have showed you the lettering during side 1- I think I will edit that post to add the lettering part in for anyone one else who finds this!}

Here is my finished Side 4! I made the tree and apples like I did on Side 3 and the window like I did on Side 2.

Here is how I made the basket:
1. I cut out a basket shape out of yellow felt and cute 8 strips out of brown felt.
2. I took 4 of my brown strips and pinned them diagonally onto the basket and sewed them on.
3. I then pinned the other four strips diagonally in the opposite direction (crossing over the first set of strips). I sewed the strips onto the basket.

4. I flipped the basket over and trimmed off the extra pieces of the strips.

5. I sewed a straight line across the top the finished the top edge.

6. I pinned the basket to the side. I sewed around the outside of the basket leaving the top open.
Now you can put apples in the basket once you have picked them!


Here is how I did my lettering.
I used Freezer Paper Stencils. I L-O-V-E Freezer Paper Stencils... I used them a lot. It is so easy and it looks so great! I knew I would not be able to cut out felt letters neatly. And I knew that I would not be able to sew them on neatly either. So the Freezer Paper Stencils was my solution to have NEAT letters.

1.Trace you word onto freezer paper (found at any grocery store or Target, Walmart, etc in the same aisle as the baggies). I like to print my words out in a font I like from my computer, but you can free hand it too.
2. Use an Exato knife to cut out the letters.
3. Iron the freezer paper (wax side down) to where you want you word to be. Make sure you iron is set to WOOL setting for felt (or it will melt... I know I melted some on my other felt house!) Make sure all your letters are stuck to the felt.
4. Dab your paint on over the letters. I use acrylic craft paint, and heat set it with my iron once it dries. You can also use fabric paint. I had to do 2 coats of paint for the felt.
5. Peel off the freezer paper (You can do this when the paint is dry or wet). Once the paint dries heat set it with your iron (set to WOOL).
There you have it --BEAUTIFUL letters! :)

This is how I sewed the whole thing together.
1. I sewed each side to the top (right sides together)
2. I sewed the sides together (right sides together)
Make sure you use pins, LOTS of pins. These are big pieces that you are working with, and you don't want them to shift and move on you. (I did not take pictures of this part... sorry!)

I will show you the BIG REVEAL of the finished felt play house on Wednesday! I will set up a McLinky on that day for all of us to show off our FINISHED houses! : )

Saturday, March 13, 2010

Felt House Along Week 4 {Side 3 - A tree and a Dog house}

I did it! I finished side 3 this week! I put a tree (with pick-able apples) and a dog house. Next week I am going to do side 4. I am also going to show you how I added the lettering to my house. You may have noticed that I have not added a name or address or any other words to my house with felt. That is because I Freezer Paper Stencil them on. It turned out much neater for me to do that way. I will show you that next week!

Ok on Side 3!

Here is how I made the apples:
1. I made a pattern out paper so that they would be the same size and shape. Cut 2 piece from the apple pattern.
Also cut out a leaf shape.
2. Sew on a square of Velcro. (I used the soft side of the Velcro for the apples and the rough side for the house side) You can also sew on the leaf.
3. Sew the two sides together with RIGHT sides facing OUT. Leave a opening to fill with stuffing.
4.Fill with stuffing and sew the opening closed.
Repeat for how ever many apples you want.
Here is how I made the tree.
1. Sew your grass on to your side and cut out a tree shape (I cut out 2 tree shapes that are the same. I am going to put the other tree on side 4 to match up on the corner) Pin and sew your tree trunk and branches to your side.
2. To add the leaves, I cut out several leaf shapes. I pined the first layer of leaves down...
...and I sewed them on with one line down the middle. Don't they look like leaves now. It also adds dimension.
3. Add another layer of leaves over lapping the first layer, filling in any gaps and sew on the same way.
If you are going to add apples or fruit to your tree, sew on the Velcro square now.

Here is how I made the dog house.
1. Cut out the house shape and sew it onto the side. Sew around all 5 sides (including the bottom).
2. Sew on all the trim and accessories onto the house as well. .
3. Now sew a line about 1/4 and inch away from the trim on the inside of the trim. Do this on both side. (it is hard to see the stitch so I drew a line to help you see it)
4. Cut in between the trim and the line that you just sewed to make the flap door. (This is a horrible picture but it is the only one I got of this) I really like how this door turned out. I kind of wish I would have done the front door in a similar way.
Side 3 all done! This will be the back side of the house.

How are you all doing on your houses? I would love to see the progress or if you have already made a felt playhouse I would love for you to link it up below.

This McLinky is ONLY for the felt house along... please use the Show Off Your Stuff McLinky for ALL other projects! I will delete any link that does not have to do with the felt house along!
Thanks! : )


Content Ad