Showing posts with label Fashion. Show all posts

Tuesday, June 7, 2011

Summer Sewing for BOYS!! Mens shirt into boys shorts

Here is a SUPER easy sewing project for your summer time boy!

Take a men's shirt and turn it into shorts!
What is so nice about use the men's shirt is that your legs are already hemmed! : )  


Here is what you will need:
Men's Shirt
Dana's (From Made) Pattern for Shorts with pockets
(You use her pants pattern and shorten it for the shorts)

1. Cut out Dana's Pattern pieces and mark on the pattern how long you want your shorts to be... I used a pair of shorts my son already had.  Remember the legs are already hemmed so you don't need to add a seam allowance! 

2. Cut out the front and the back pieces 

3. Cut out your pocket pieces out of the extra fabric of the shirt.

Sew together using Dana's Shorts tutorial  and Pocket tutorial
 (honestly she has better pictures and directions that what I could do!) 

Love love love!!  
The boy and the shorts!  

I made this shirt into these shorts.

Here are some shorts I made out of Seersucker material using the same pattern.... I love this pattern... so easy for some awesome boy shorts! 
Of course I made a shirt to match!  I just cut out the shape of a 3 and used Wonderunder to attach it to the shirt and hand embroidered around it.  

Made is celebrating the SUMMER boy this week! 
Check out all the cool boy projects over there!


Tuesday, May 24, 2011

T-shirt to Long sleeve Ruffle Cardigan


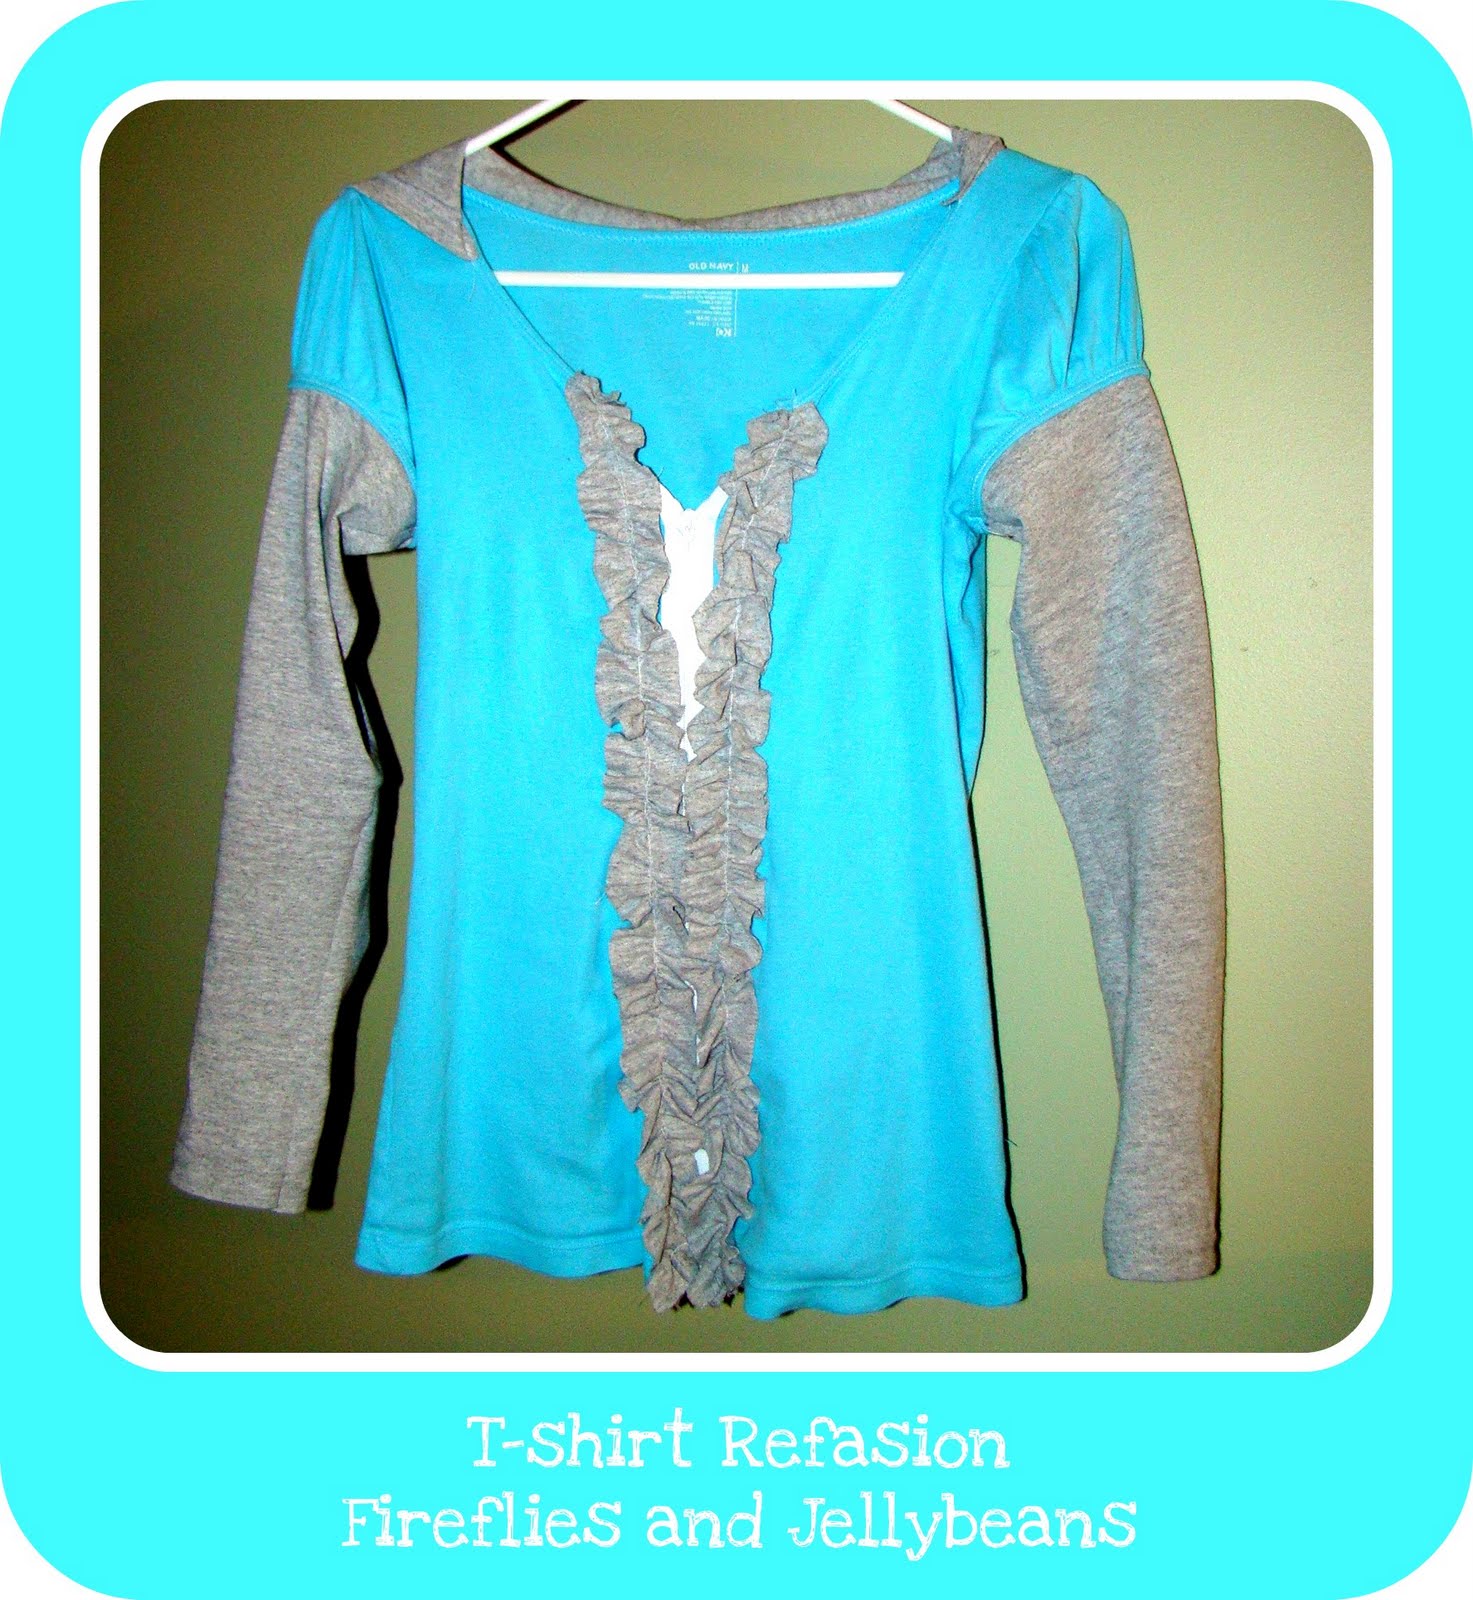
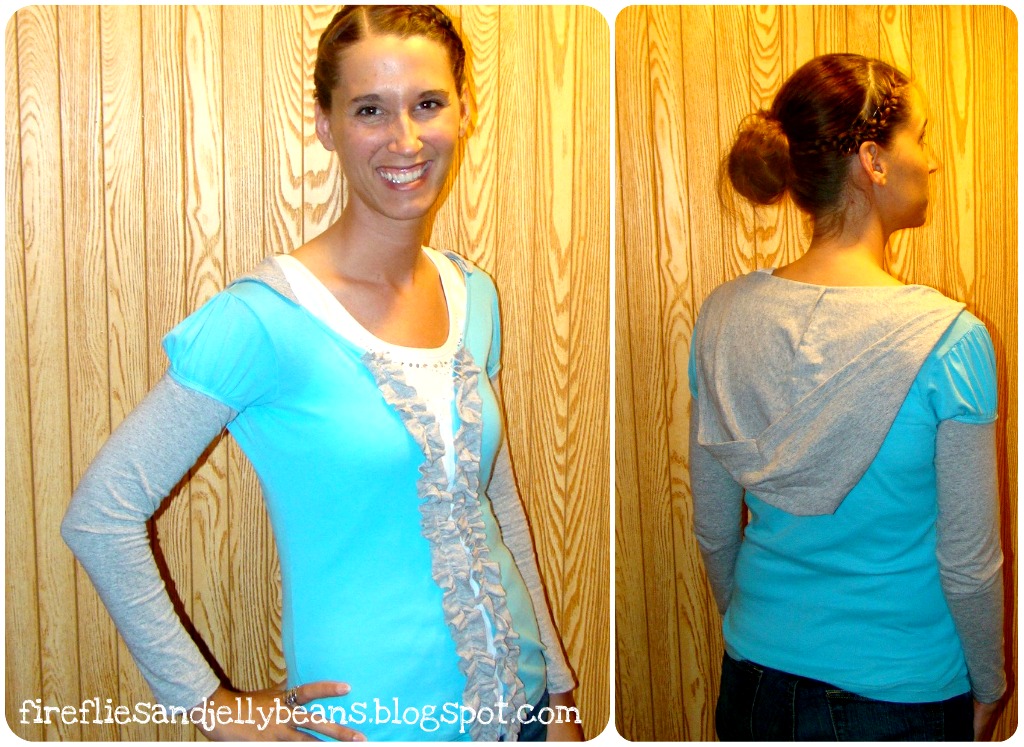
Here is the refashion I did for the CSI Project... in case you missed it!

 
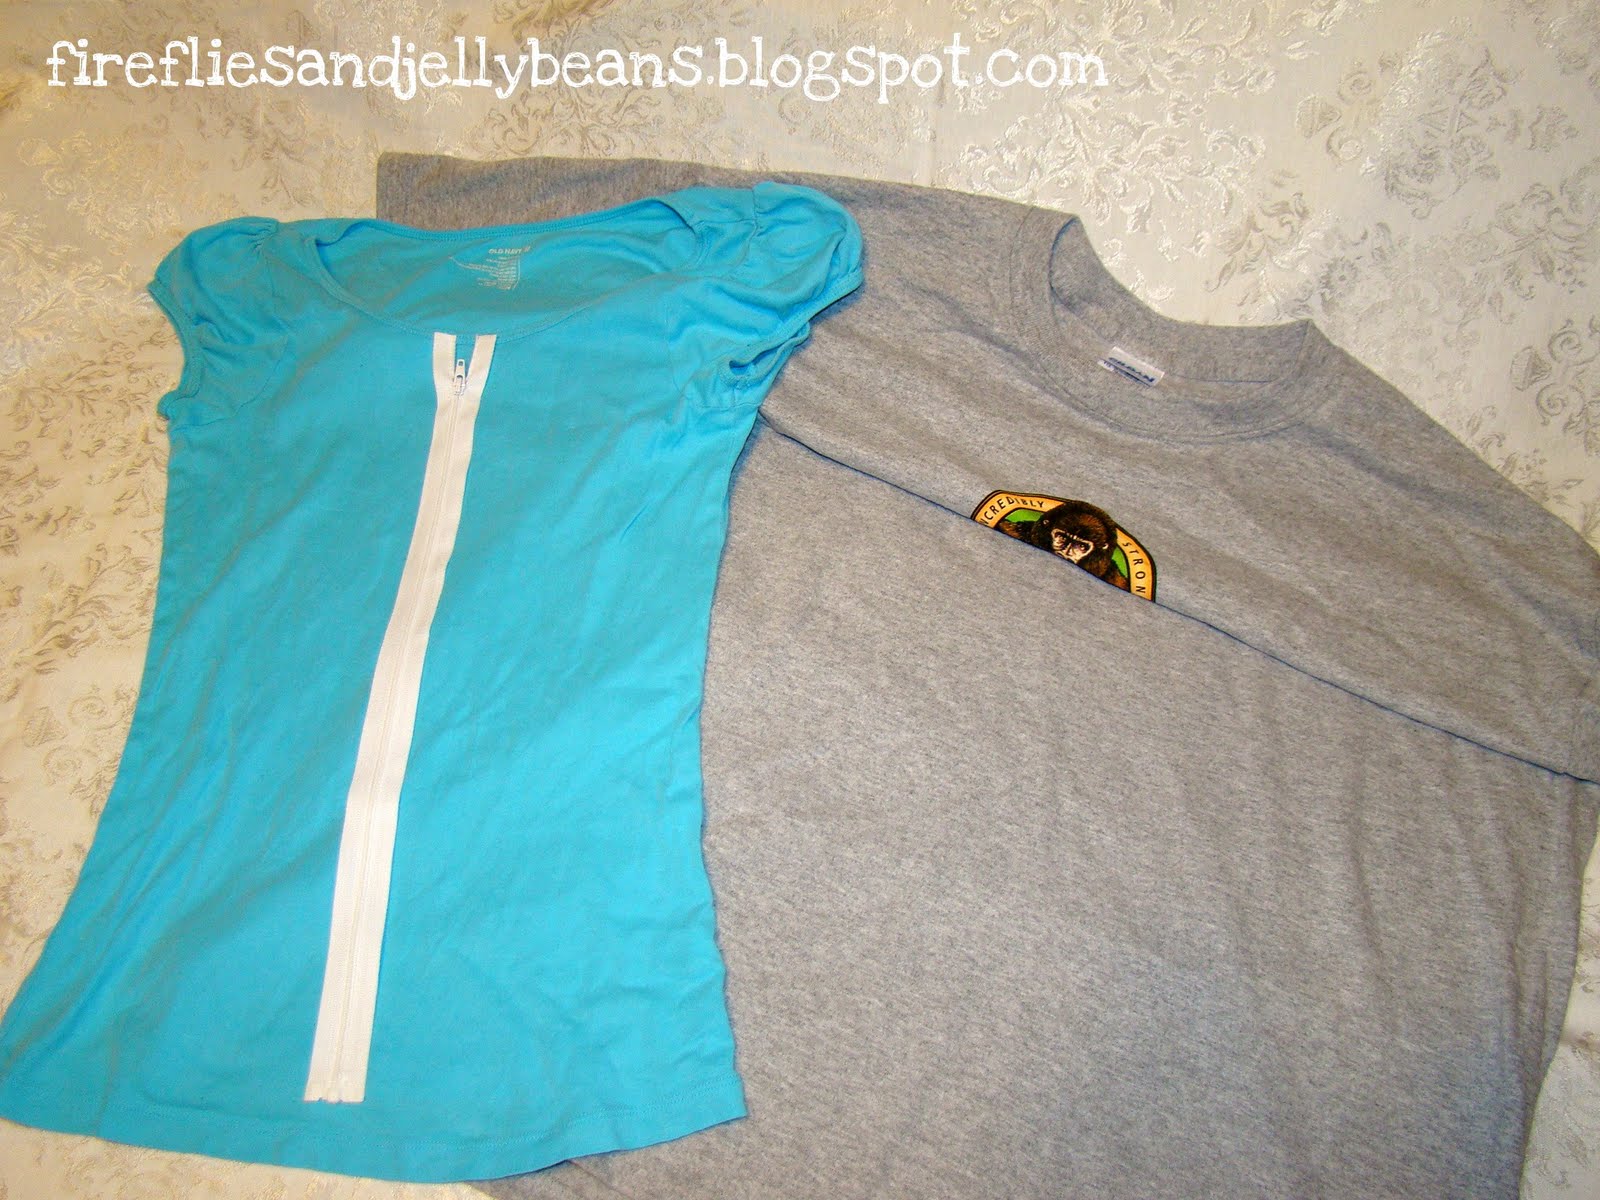
Here is what you need:
T-shirt
Extra T-shirt (I used an extra large one because you get more fabric that way!)
Zipper (Make sure that it is a SEPARATING one)
Sewing machine with sewing tools.

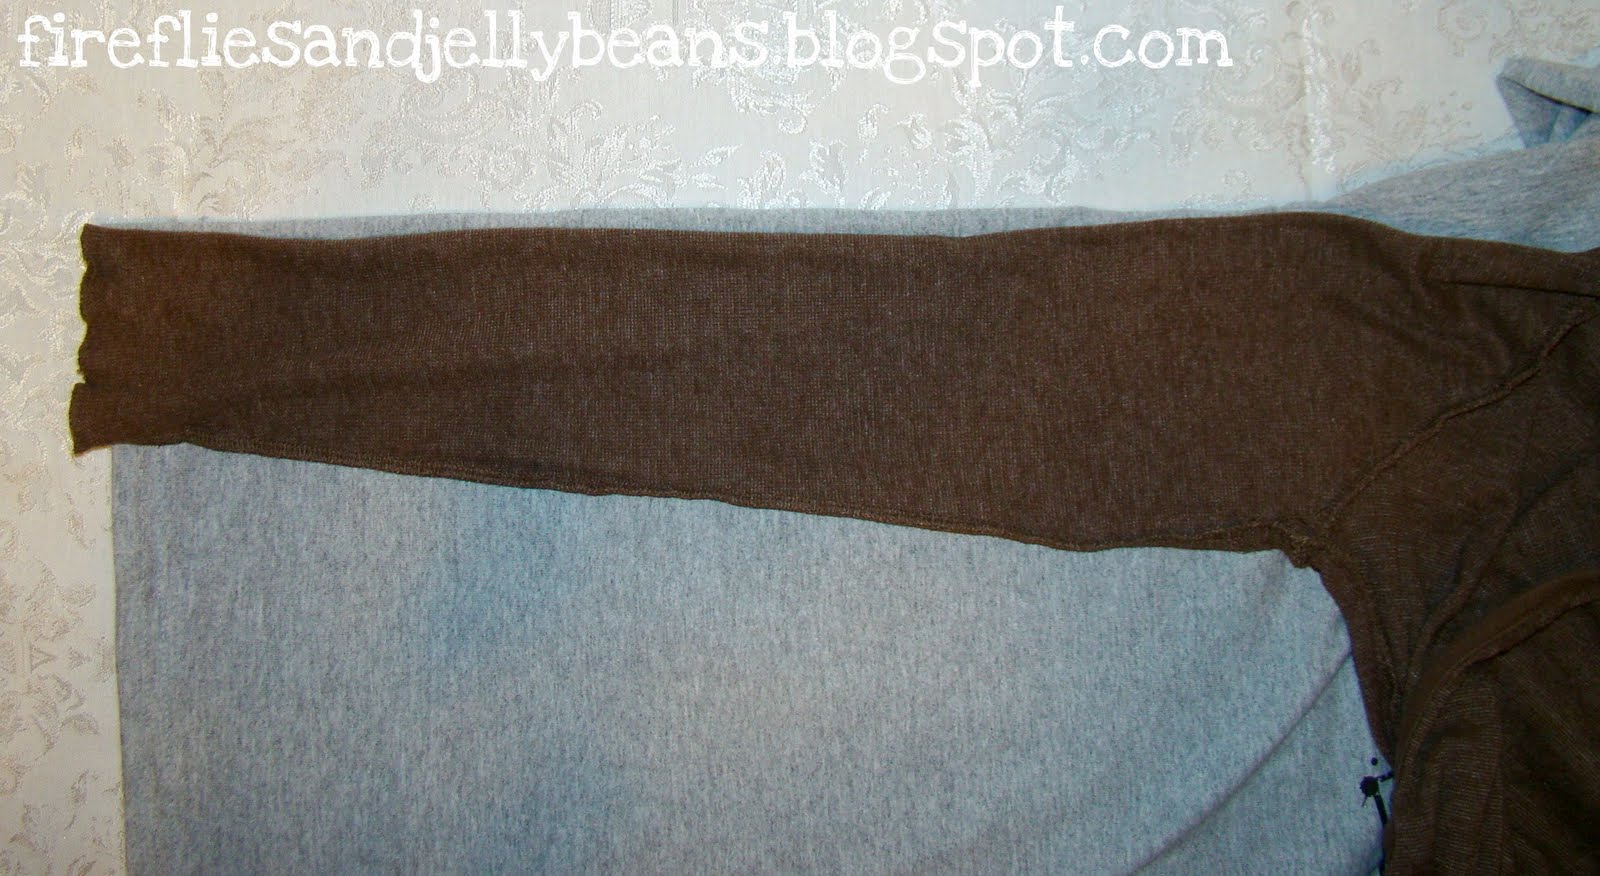
Use another long sleeve knit shirt as a sleeve template.  Lay out your sleeve on the side of the extra t-shirt with the wrist in the bottom (That way the sleeve is already hemmed for you!) .  Cut out your sleeve leave at least 1/2 inch as a seam allowance.  You should be cutting though 2 layers of fabric.  Repeat with the other sleeve on the other side of your shirt.

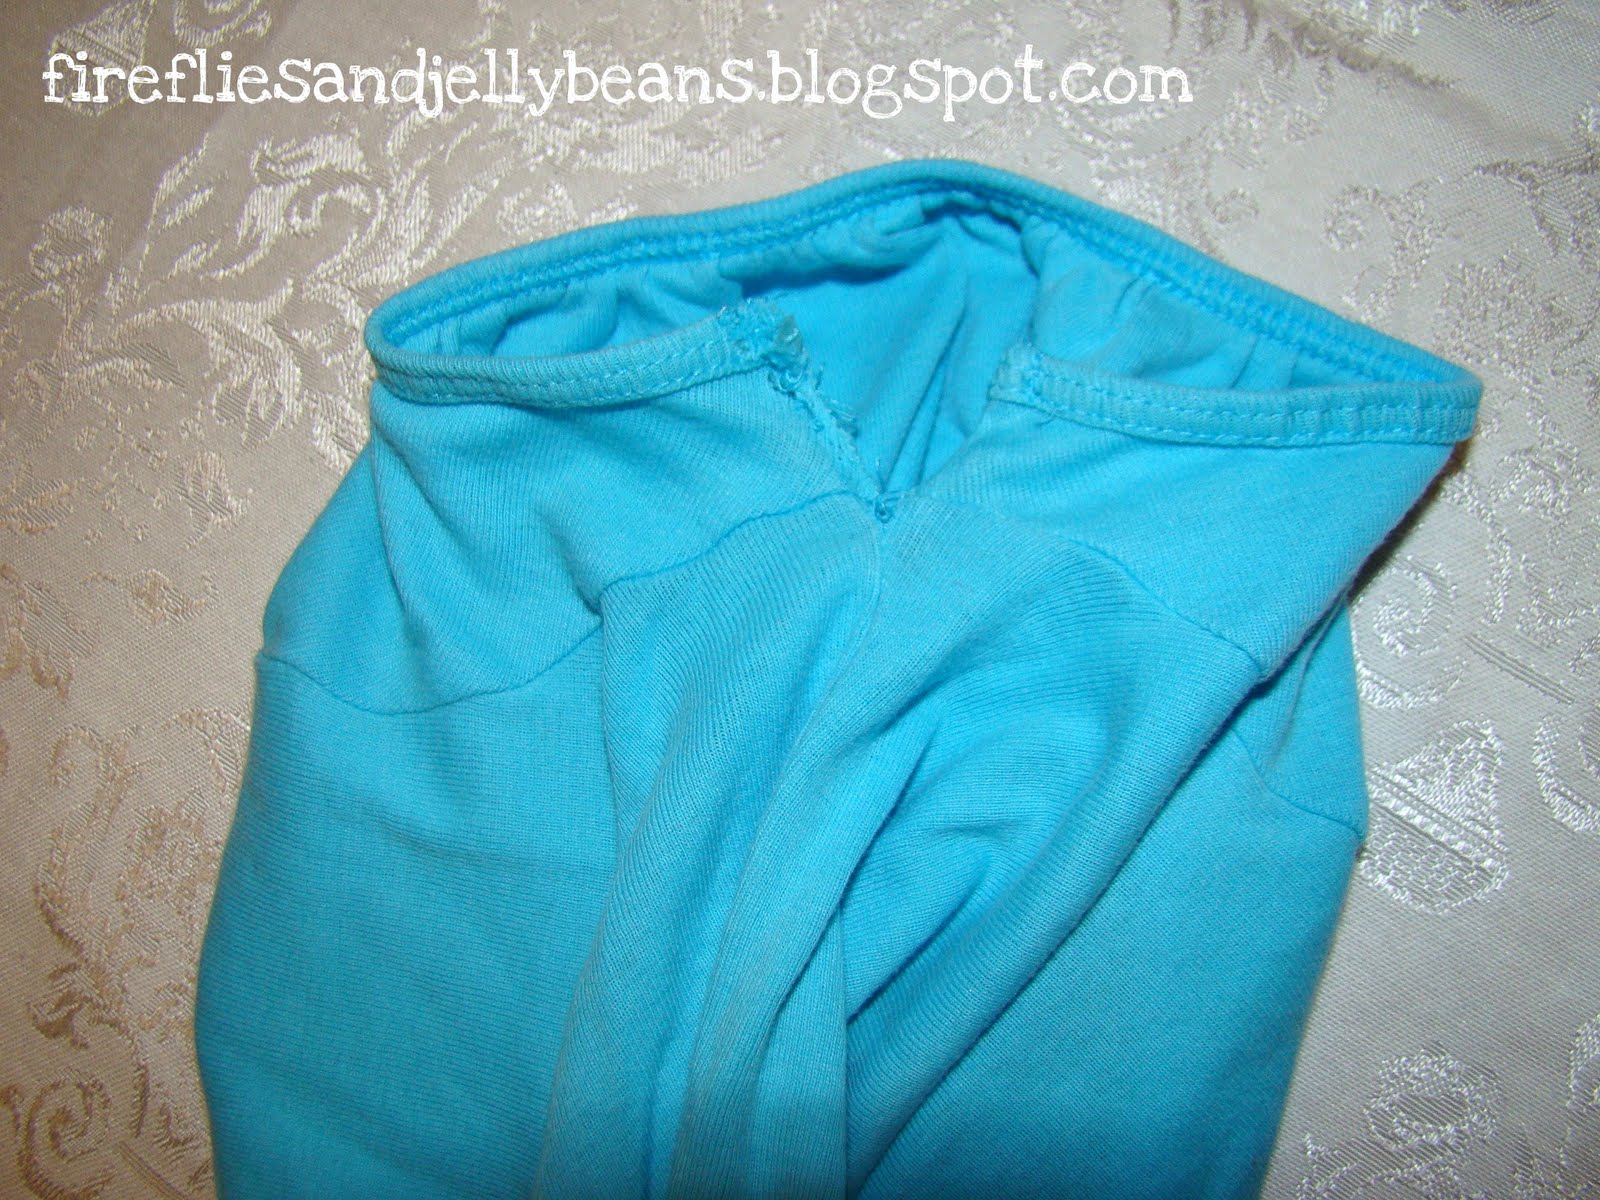
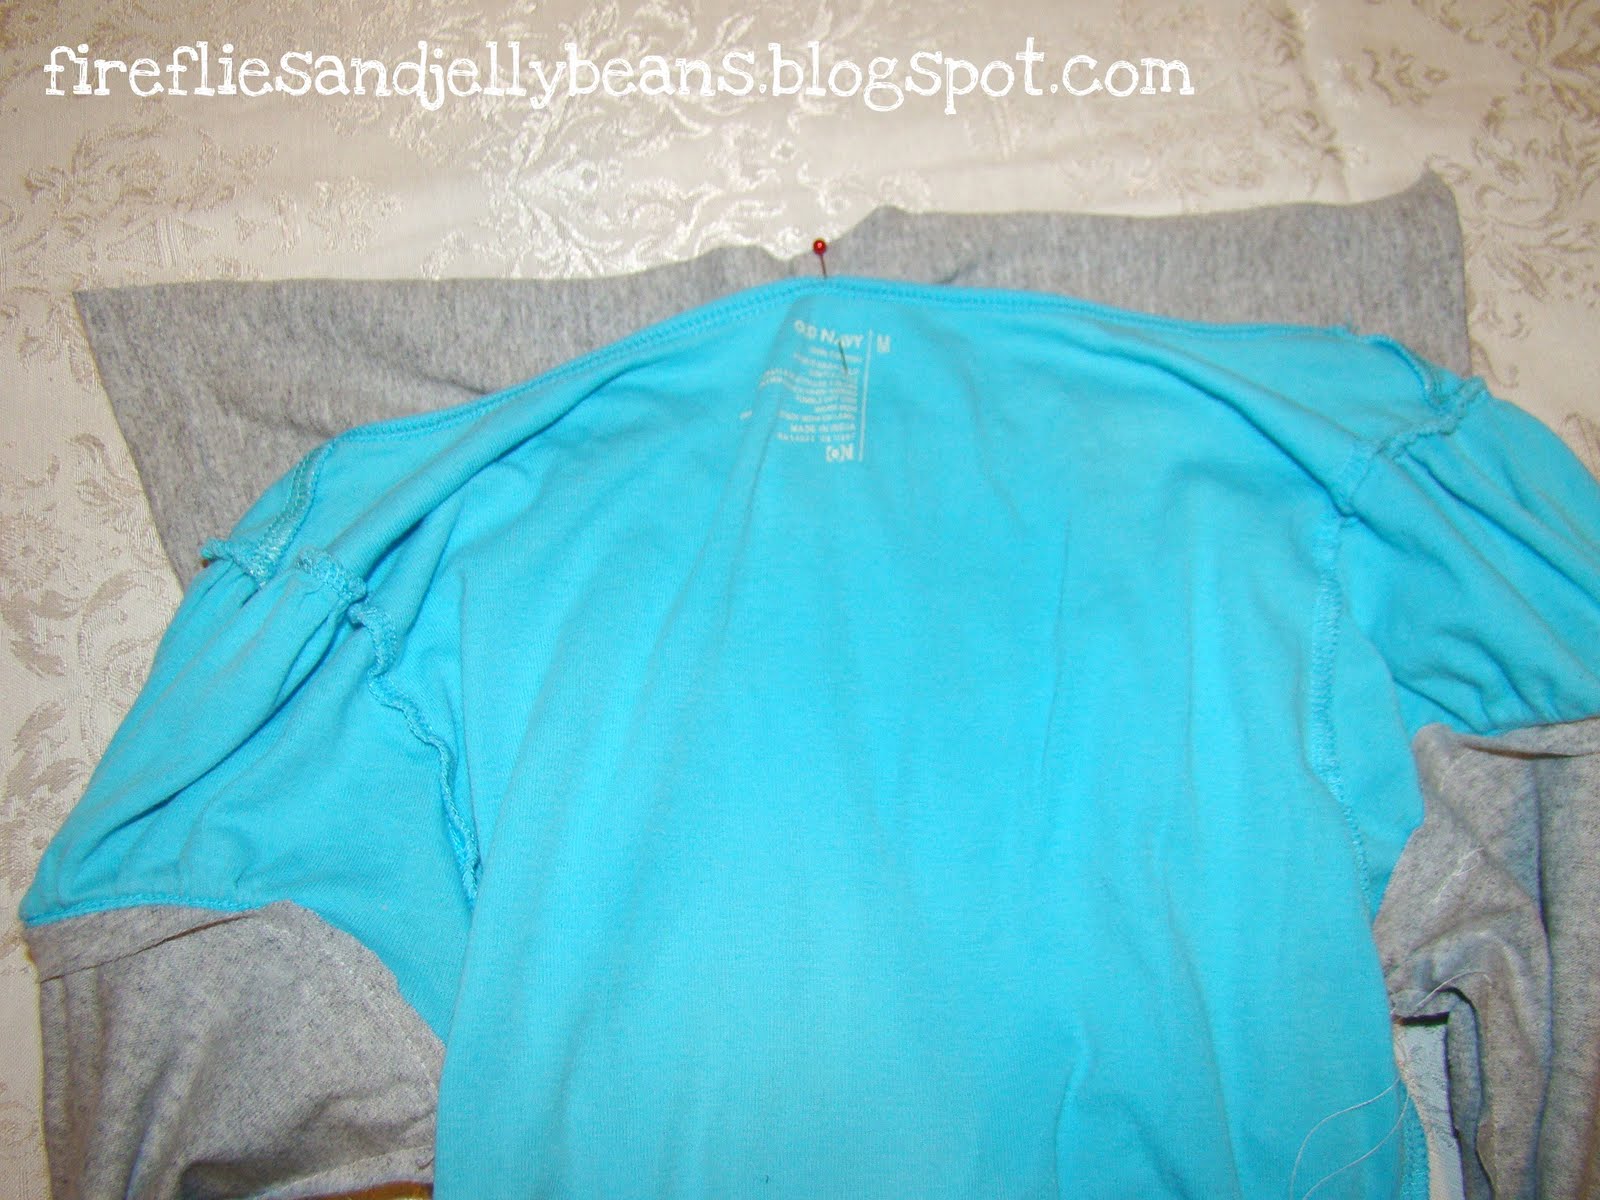
Now open the seam on the t-shirt just on the short sleeve part.   This is going to make it easier for sewing your long sleeve on.

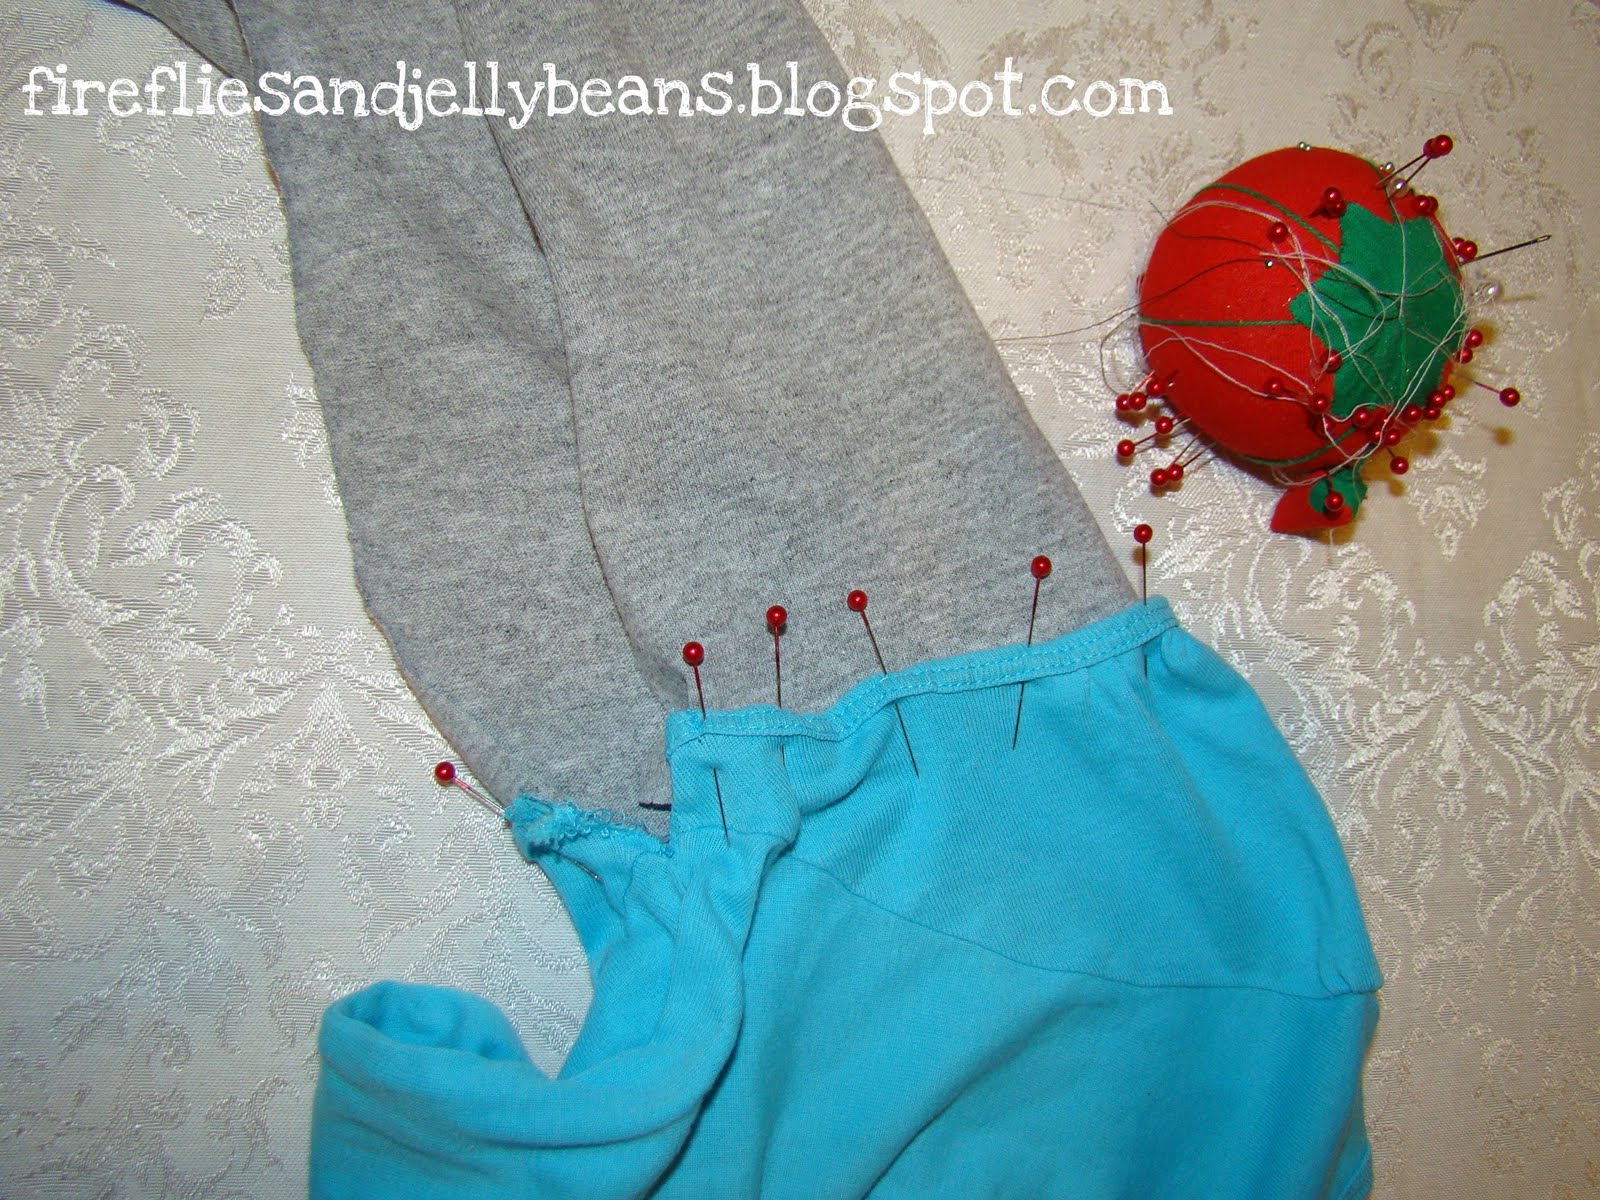
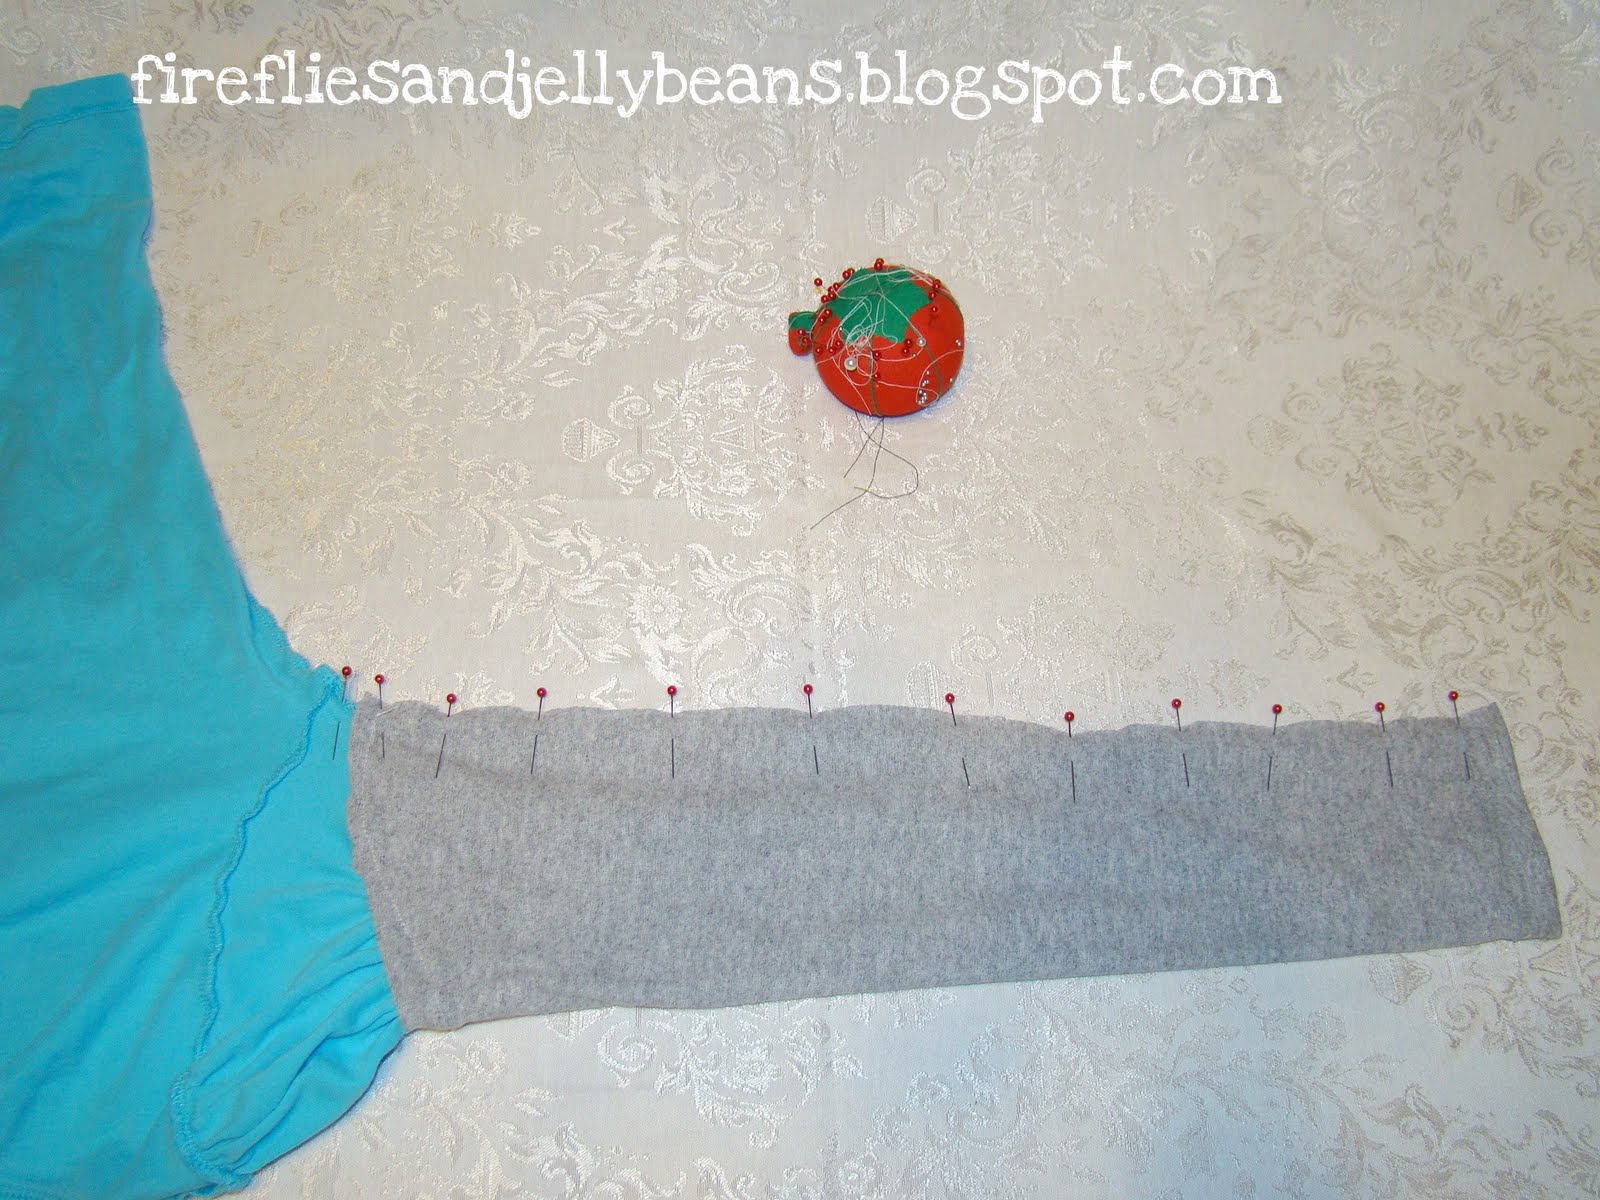
Pin your long sleeve to the short sleeve.  You want the open seam to line up on both. 
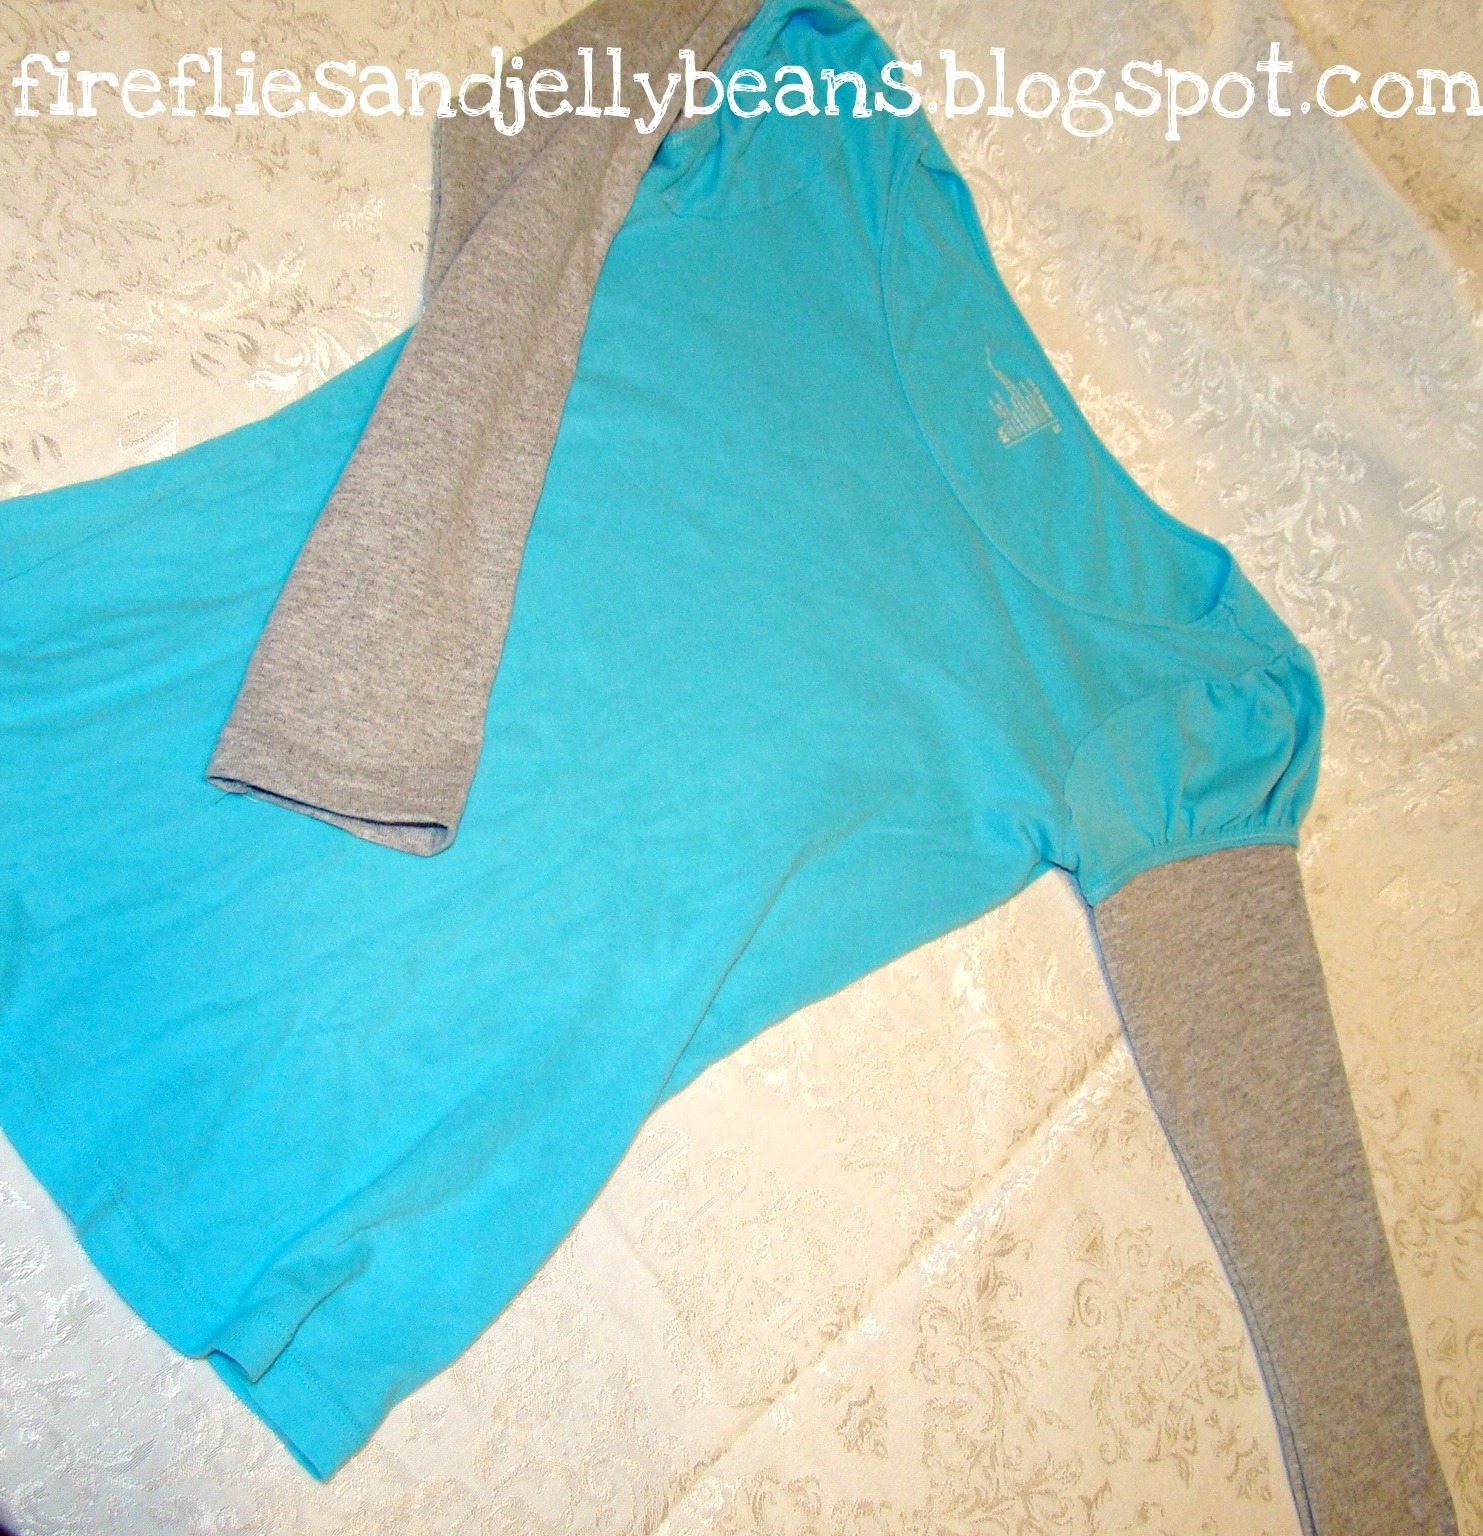
 Sew it on..  Now it should look like this. 

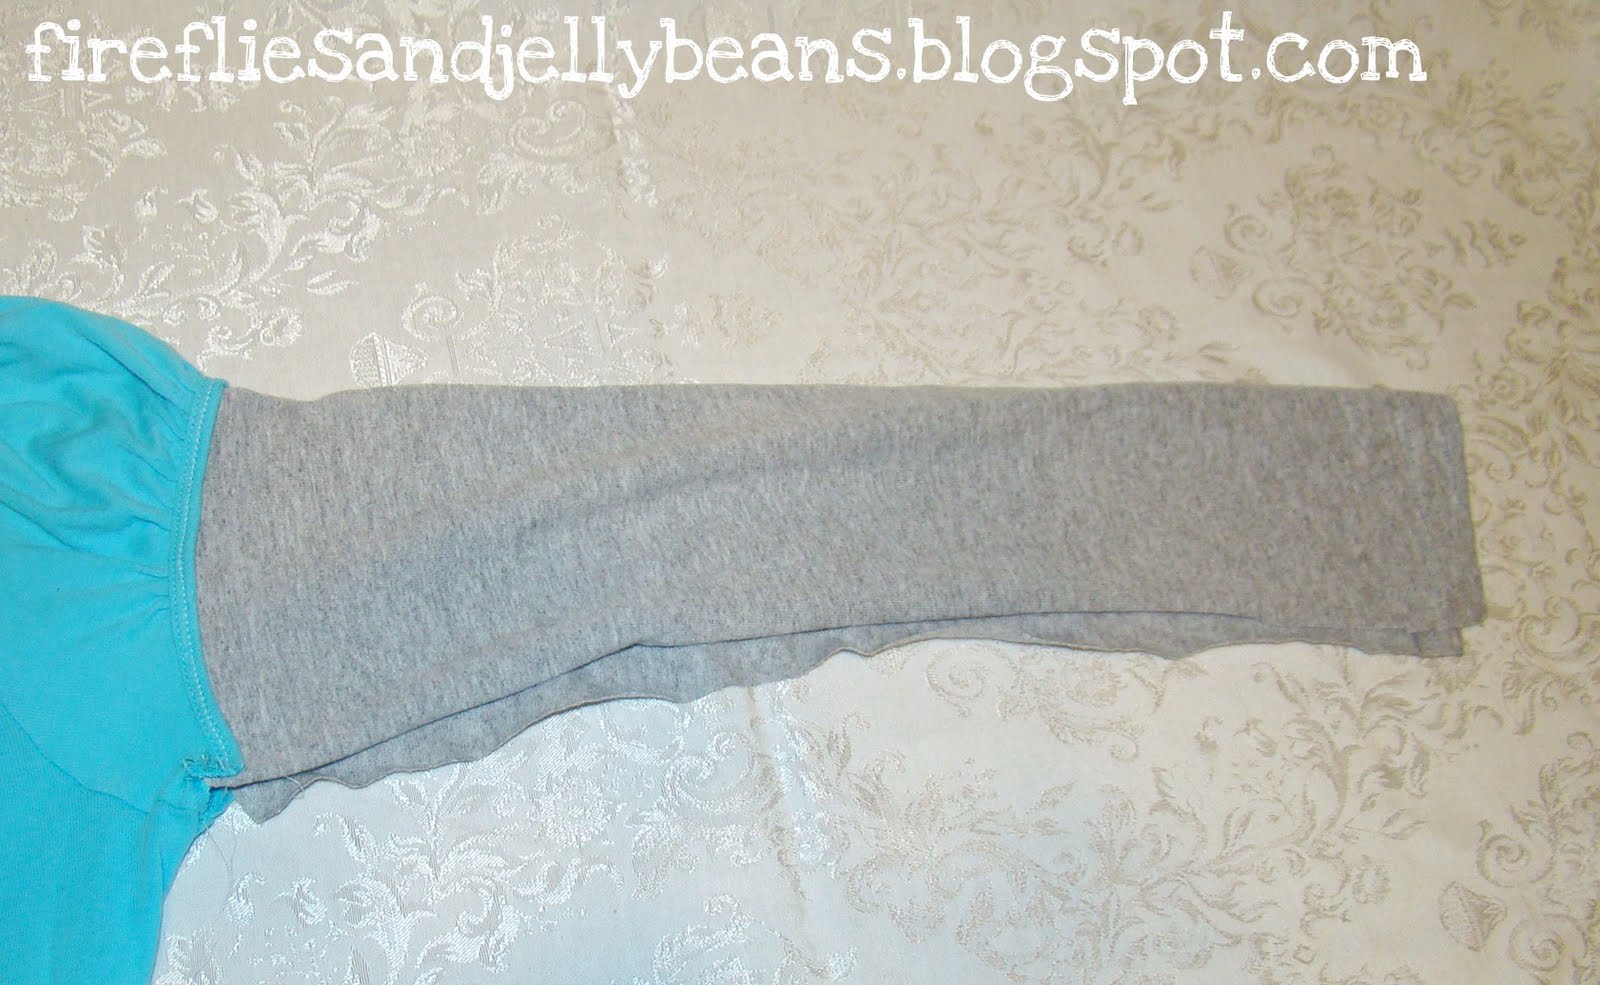
Turn your shirt inside out and pin the seam together the whole length of the sleeve.   Sew your seam together.  Repeat for the other sleeve.

Now you should have some thing like this:


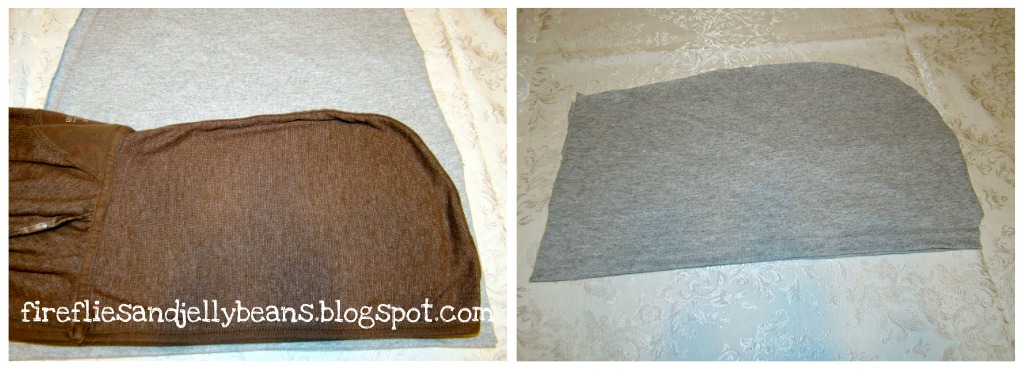
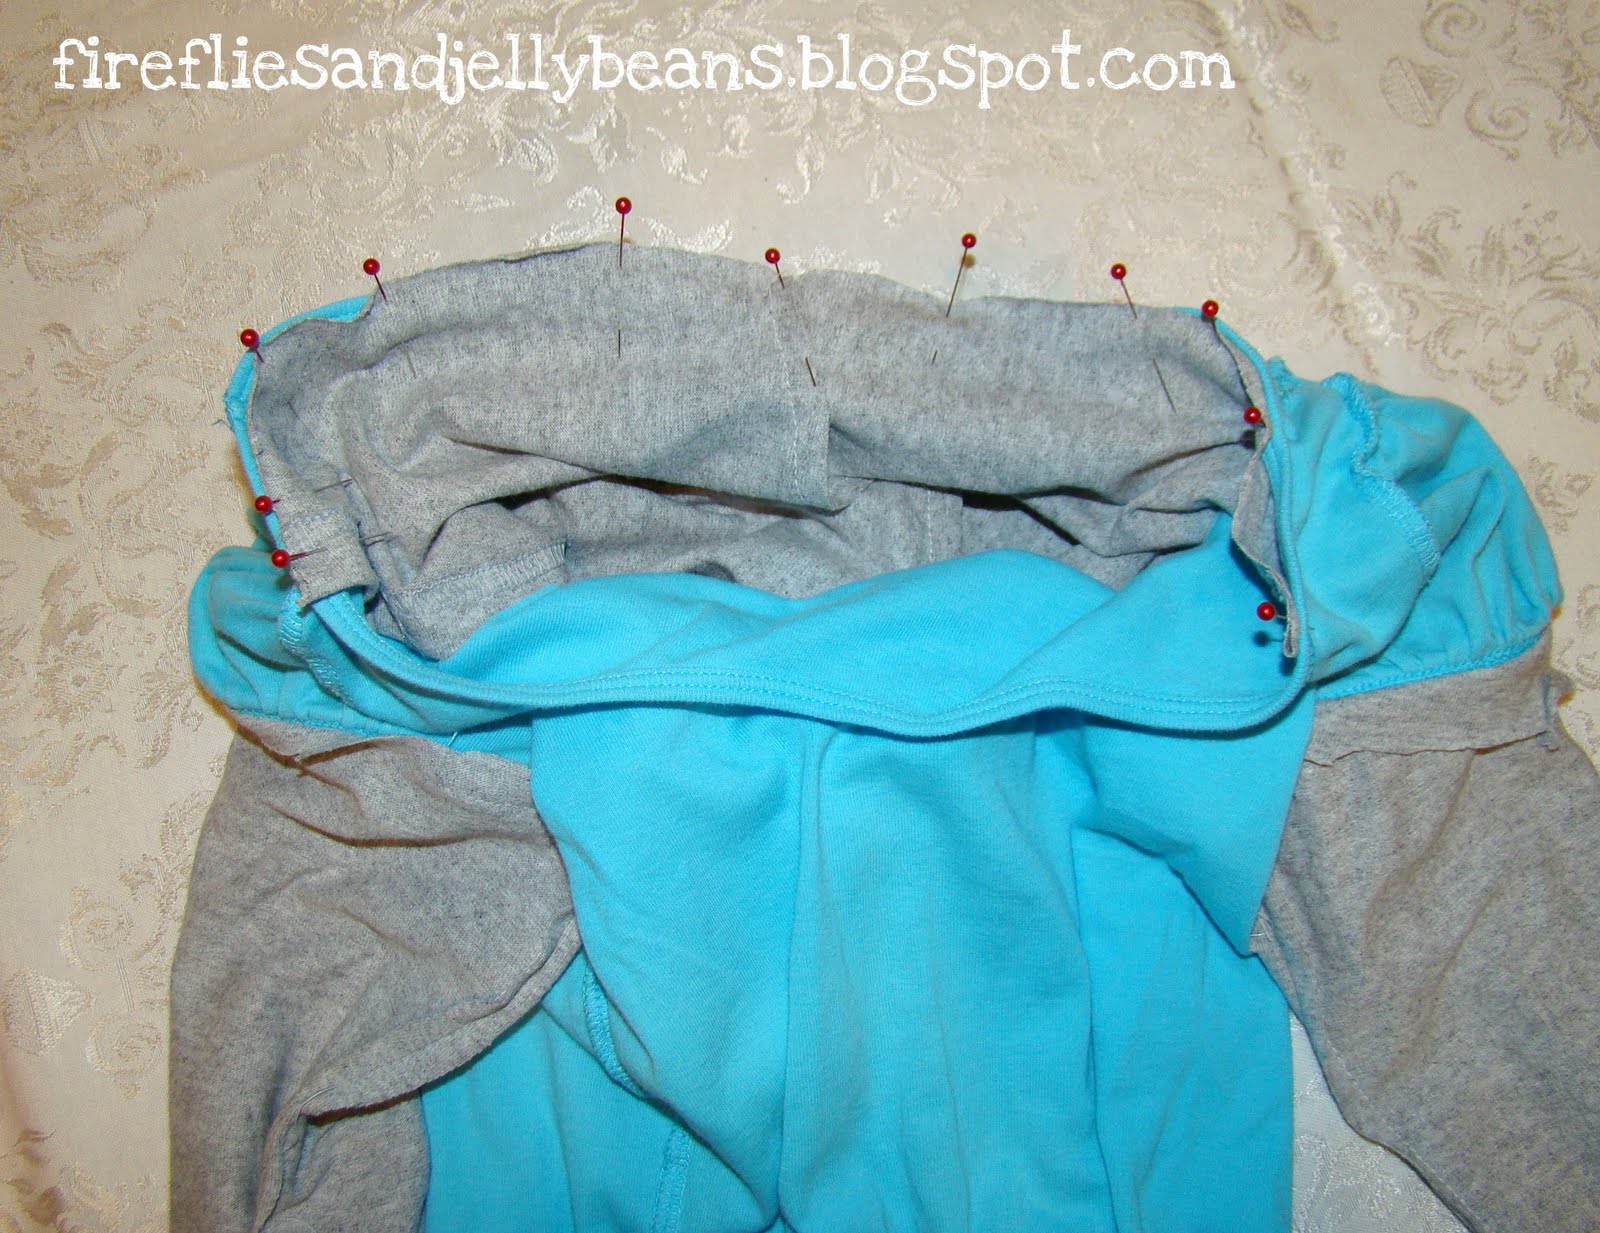
Use another hoodie from another shirt as a template and cut out the hood shape out of your extra fabric.  You should be cutting though two layers of fabric.  If you line up the outside of the hood on the bottom of the t-shirt it will be hemmed for you!

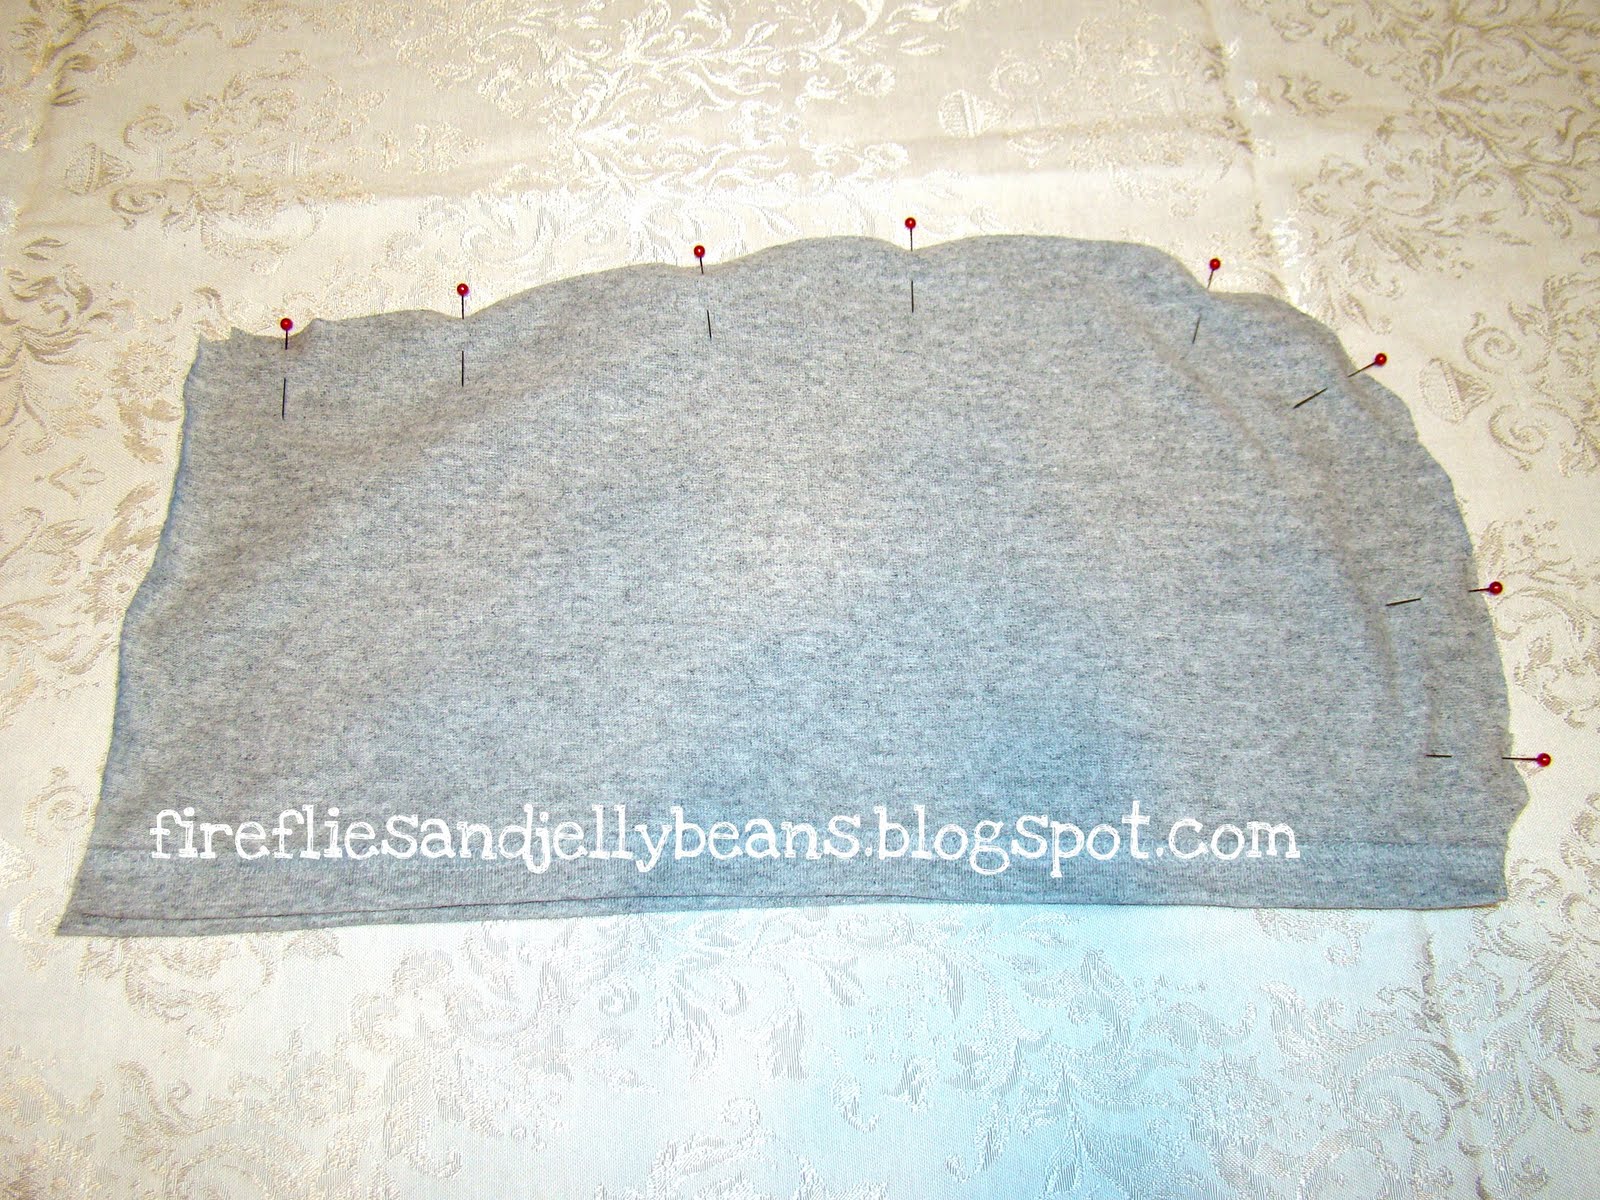
Pin right sides together and sew around the curved edge.

Turn your shirt inside out and line up the middle of the hood with the middle BACK of your shirt neck line and pin in place with right sides together.

Continue pinning all the way around the hood.  And sew it using a ZIG-ZAG stitch. 

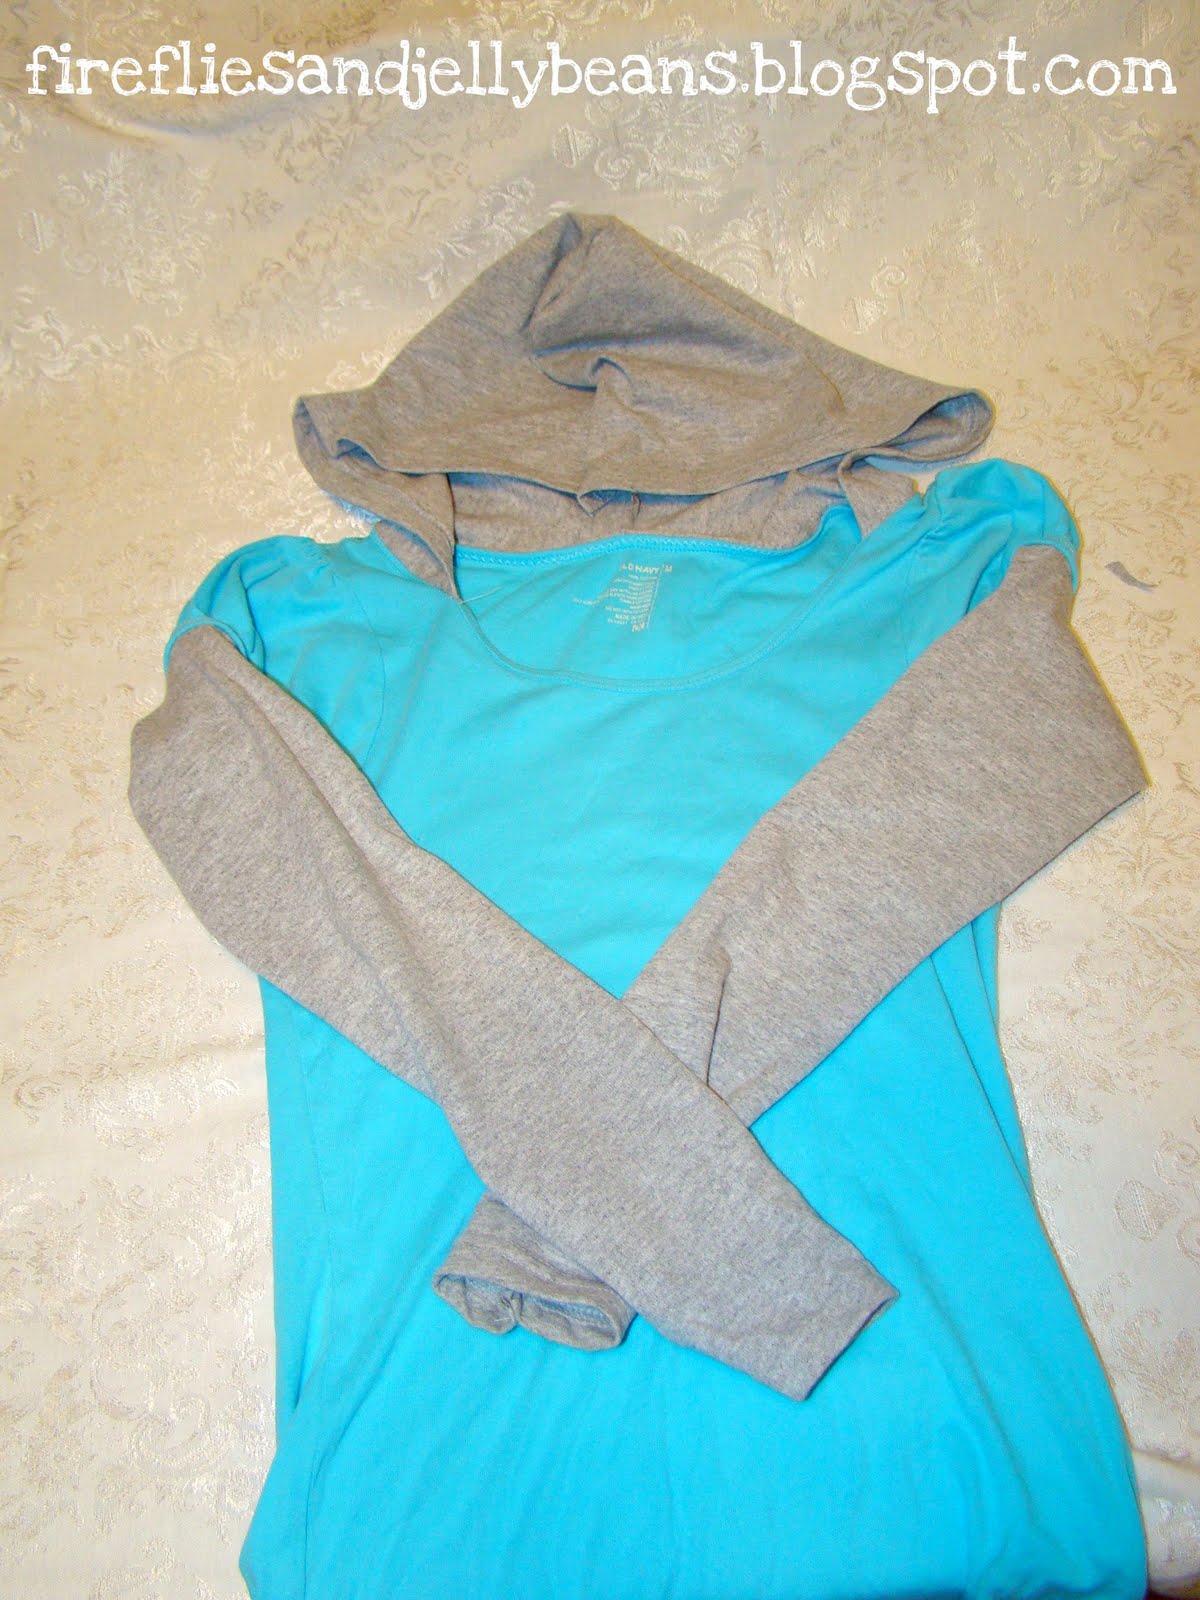
Now you should have this:

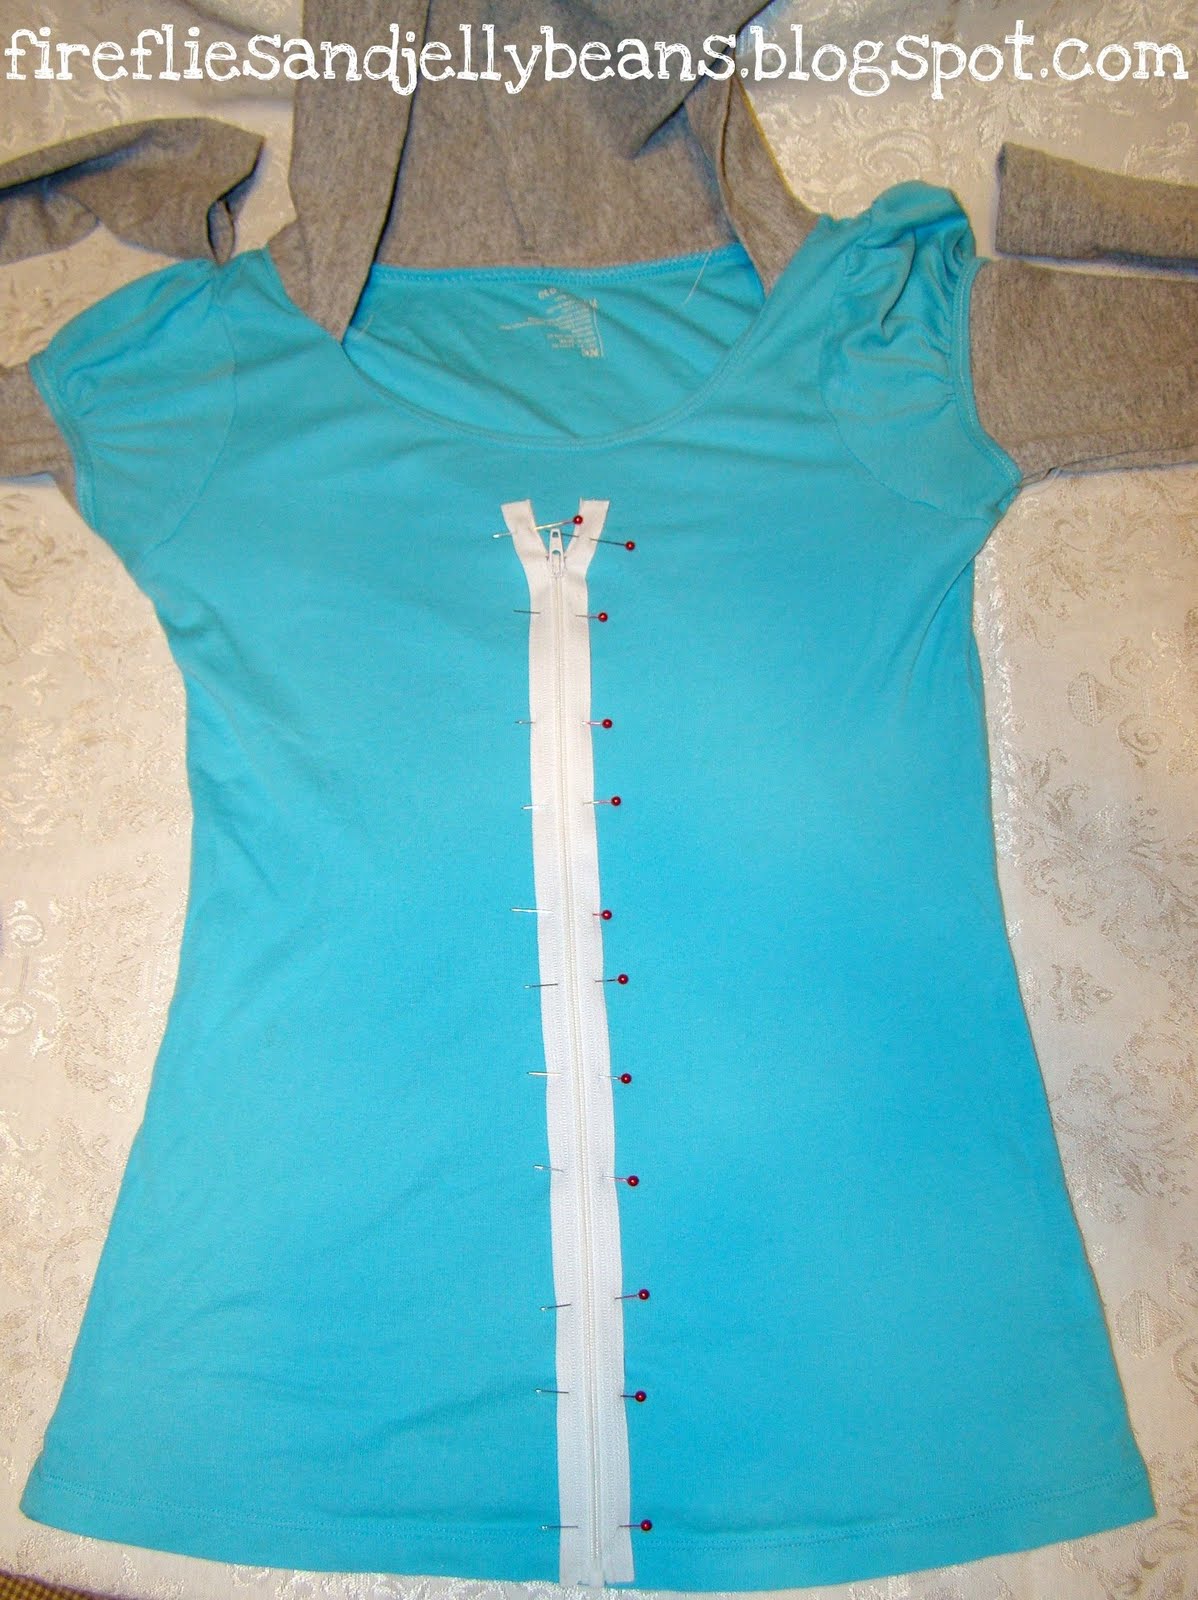
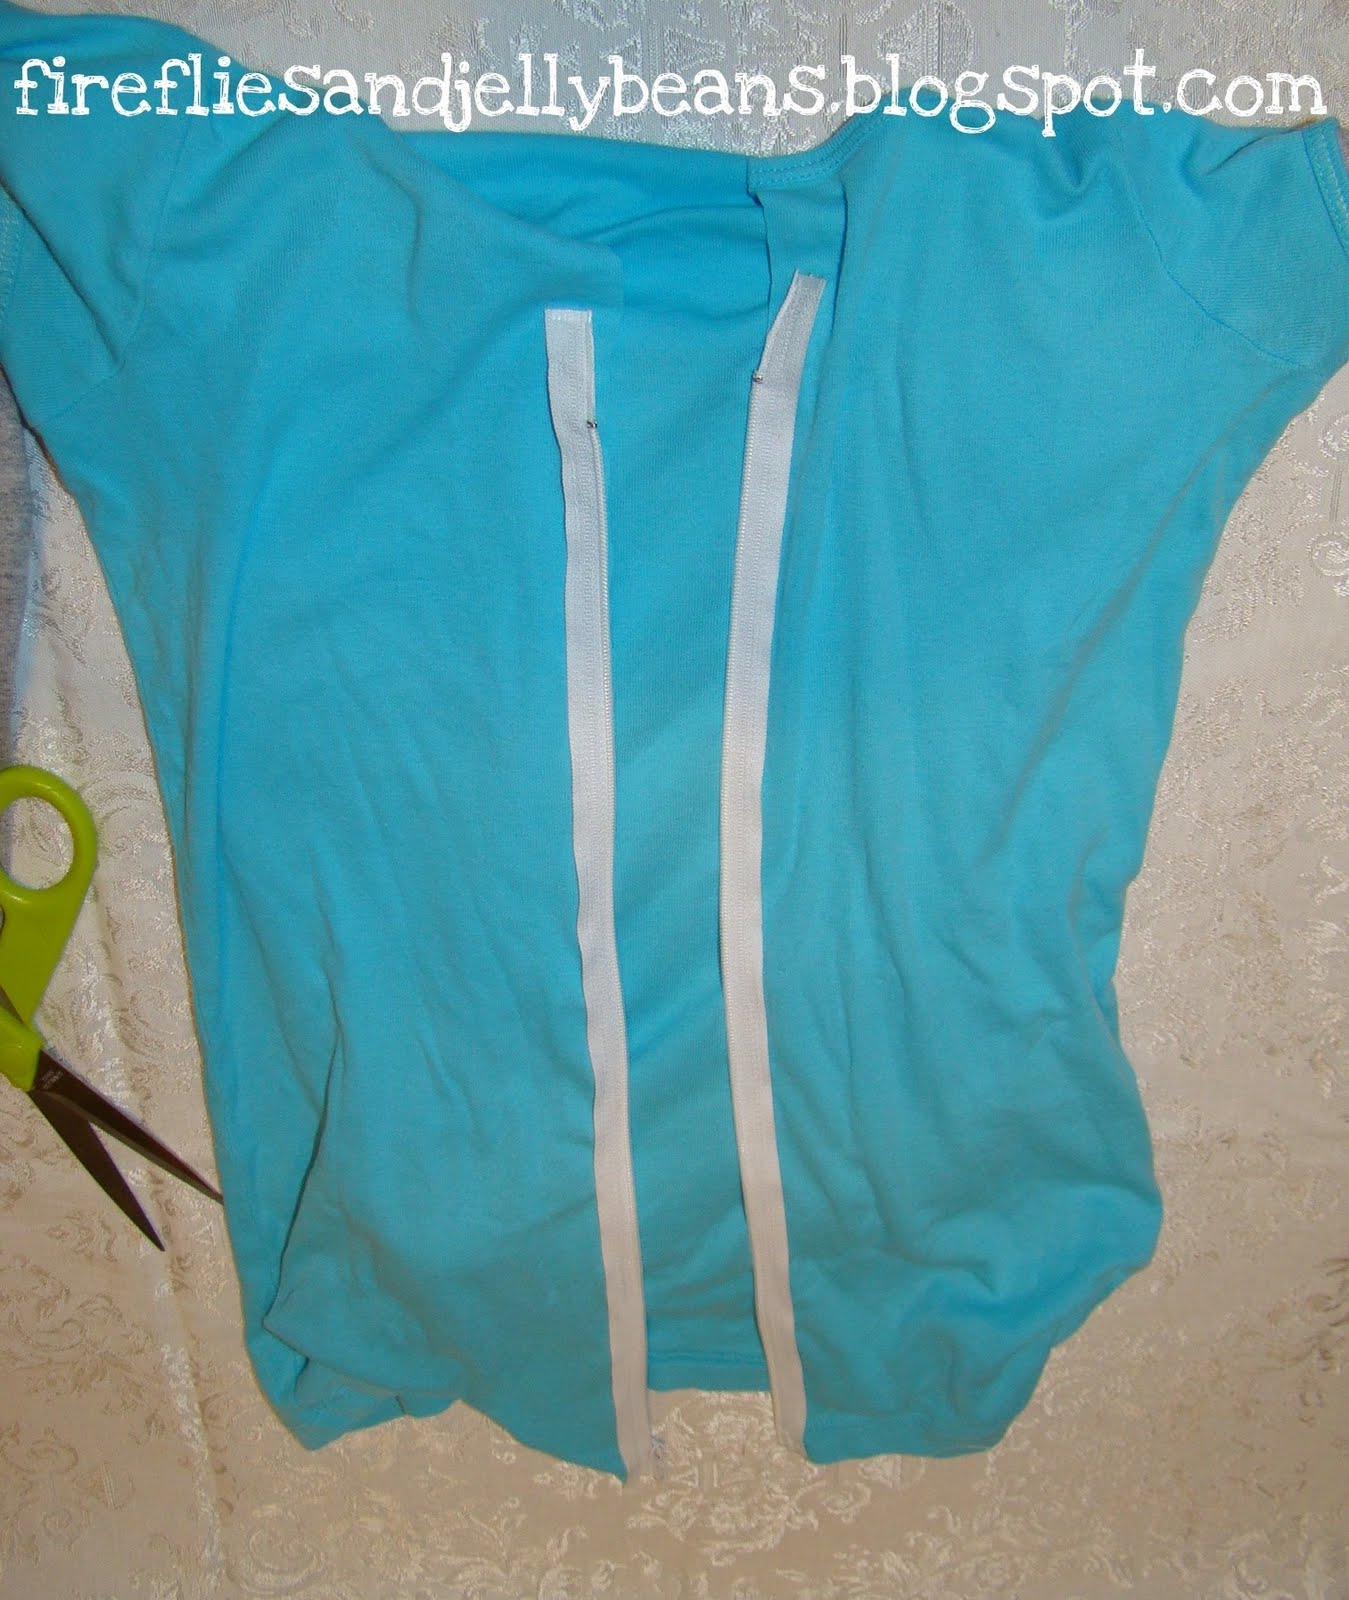
Now we are going to add the zipper:
take your zipper and place it on TOP of your shirt where you want it to be.  Exposed zippers are cool right now, so that is good!  Pin it in place and sew on both sides of the zipper.  You will want to use your zipper foot for this.

Open up your zipper and cut open your shirt.  Cut any fabric that gets in the way of the zipper.

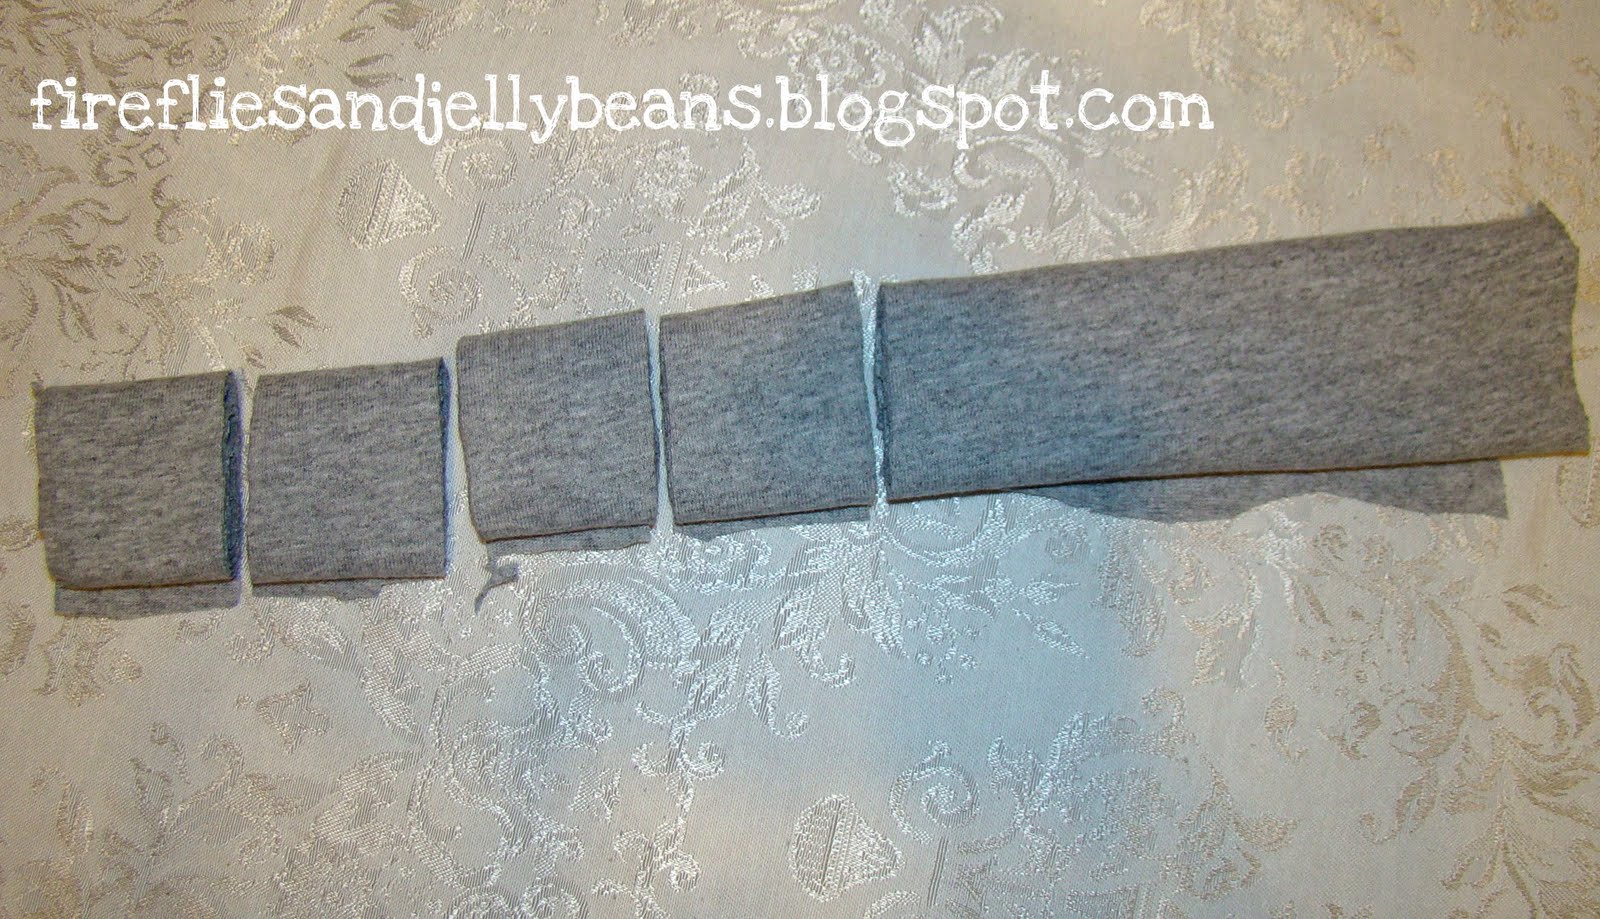
Now lets add the ruffles.  Using the extra fabric cut out 1 - 1.5 inch strips.  My trick is to roll your fabric into a tube and cut 1 inch pieces off.  This is a quick way to keep all your strips straight.

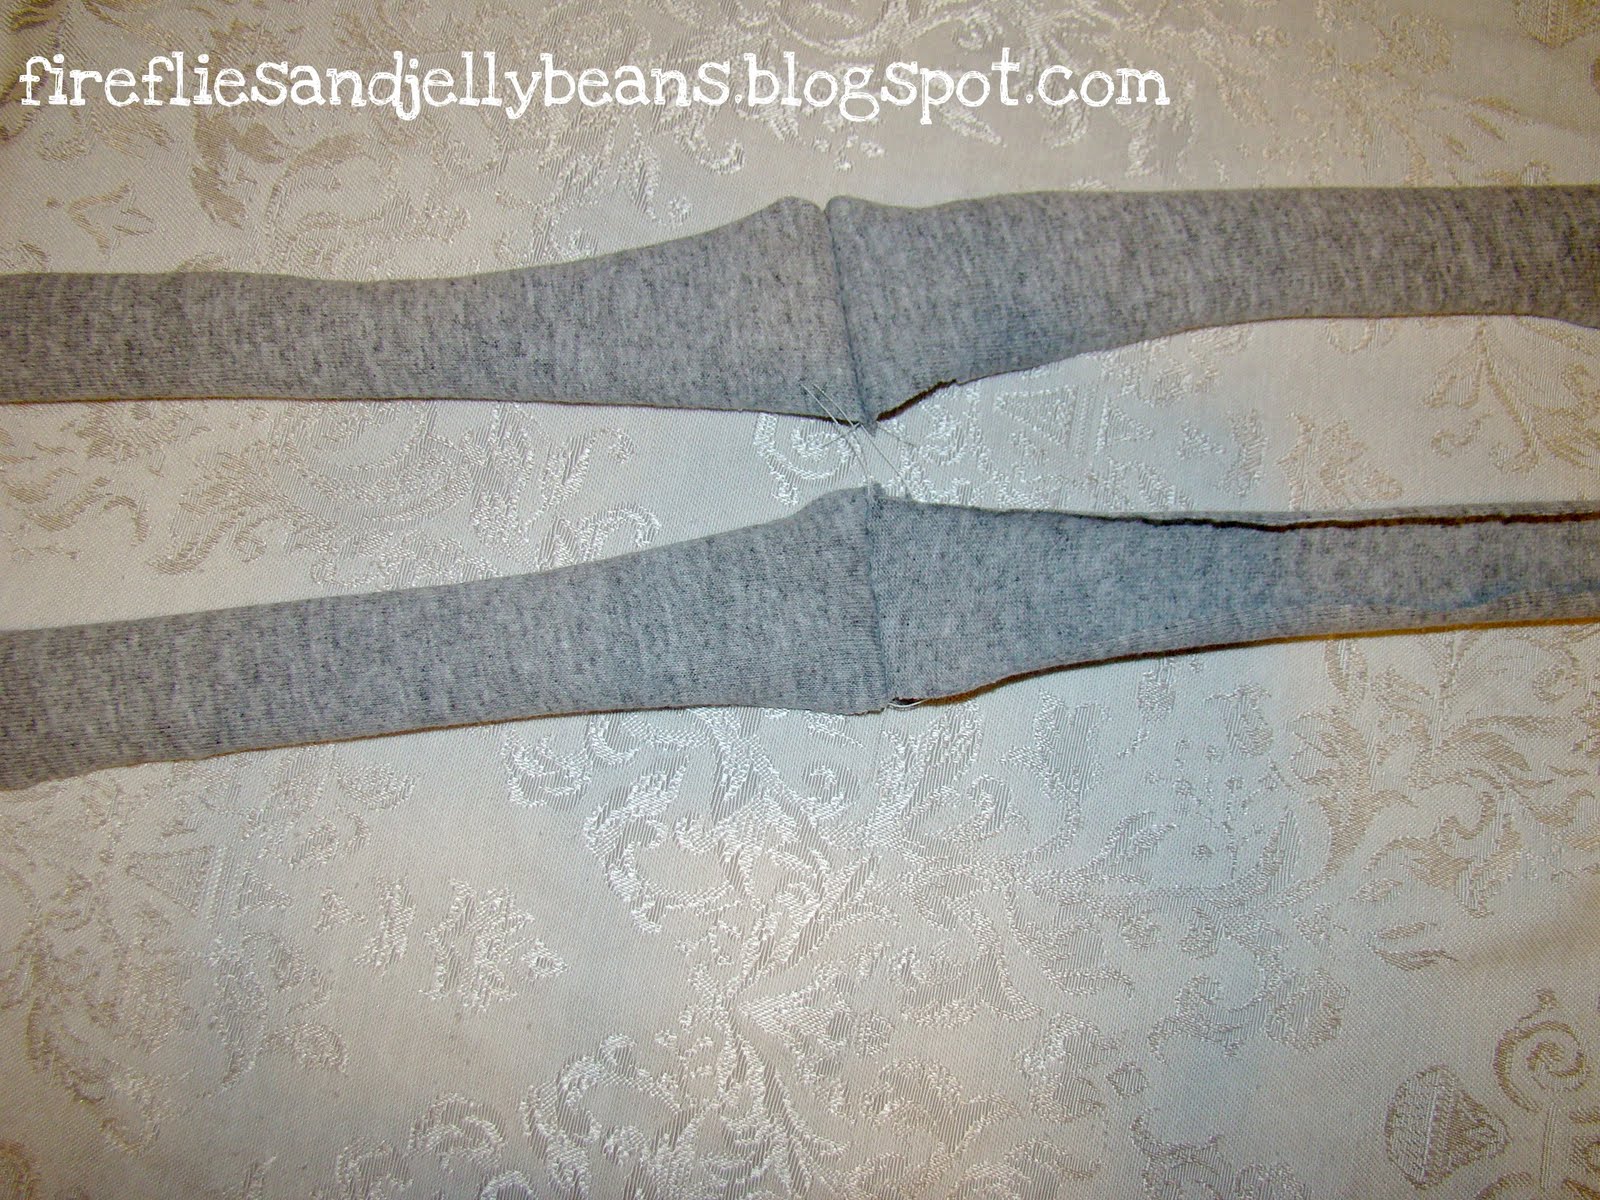
I had to sew my strips together to get them to be a long enough ruffle.  You want it to be at least 1-2 times longer then where you are sewing it to get a good ruffle.

Here is the trick that works for my machine...
Set the tension to the highest setting.... and the stitch length to the longest setting.  While you are sewing pull on the thread at the top and it will automatically make ruffles while you sew.  Try it with your machine to get the right amount of pull. 

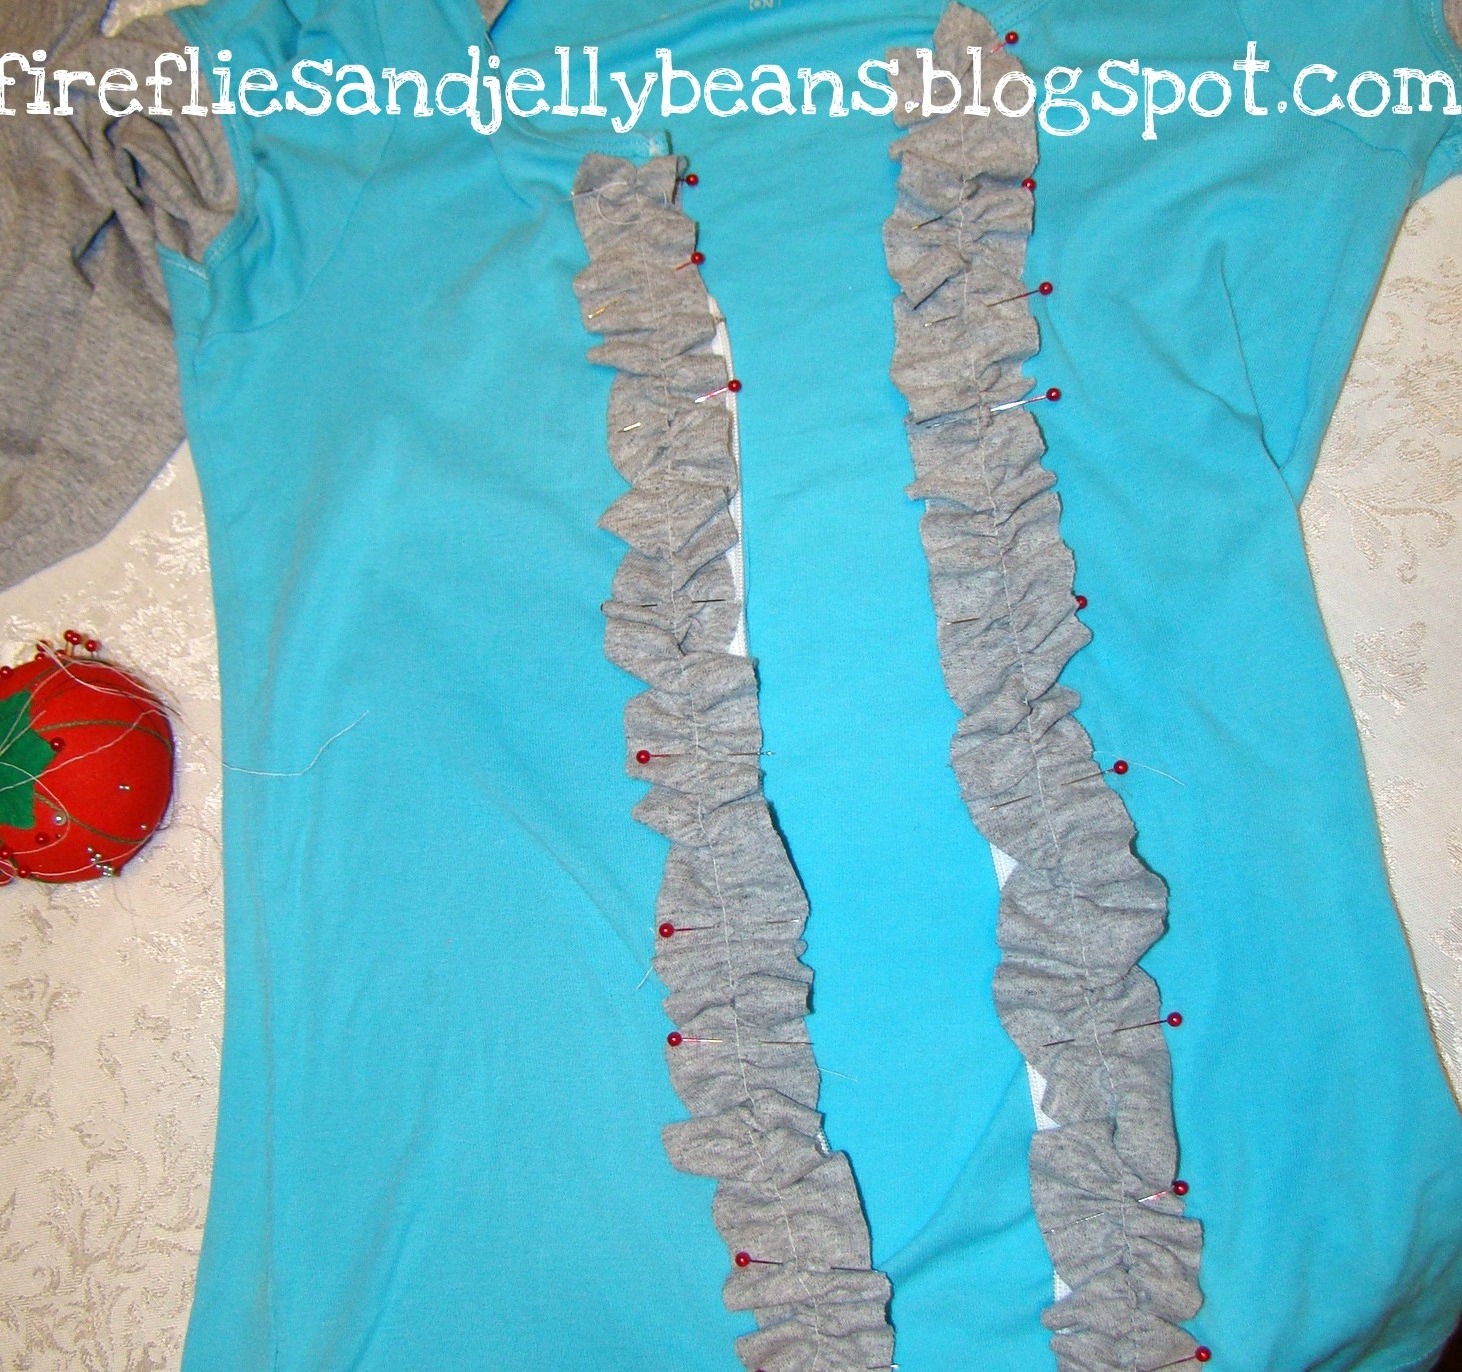
Pin your ruffles in place and sew them down!

ALL DONE! 


Tuesday, May 3, 2011

Heat Transfer Vinyl T-shirts

In the Spirit of Iron Crafter Round 8 I made an easy project with my Silhouette and their Heat transfer vinyl!

Have I mentioned how much I LOVE my Silhouette? Because I do- I really do!

Anyways- on to the very cool t-shirts I was able to create!

Here is a quick how-to (I didn't take pics because it is pretty straight forward)
1. Create your design in Silhouette. I made two different ones for each shirt.
2. Cut out your design in white and Iron on using the directions on the heat transfer vinyl box. Let cool.
3. Cut out your design for the yellow and Iron on using the direction on the heat transfer vinyl box. Let cool.
All done!

Here are some other projects that I made with vinyl:

Reuseable lunch bag with iron on vinyl

Reuseable Snack bags with iron on vinyl 

Airplane Pillow with heat transfer vinyl 

Forever Family plaque with vinyl decal 

Be sure to enter your vinyl projects into the Iron Crafter Round 8: Vinyl


Tuesday, July 27, 2010

Scribble Flower T-Shirt {Tutorial!!}

This scribble flower shirt is so fun and easy to make! It is bright, happy and summery!

I used Simply Spray again for this project. It is a fabric paint that come in a spray can. It is so MUCH fun. You can order it online HERE or buy it from a major craft store like: Joann or Micheal's {I have seen it at both of these stores}
Here is what you will need:
White T-Shirt
Fabric marker
Paper bags or card stock
1. Place your paper bags or card stock between the two layers of you shirt (to prevent bleed through to the other side) and Use the Simply Spray to spray your flowers. I started out really close to the shirt and moved it away once I started spraying. I practiced on the drop cloth before I did it on the shirt to make sure it was the way I wanted.

2. Spray different color flowers on the shirt is random spots.

Don't worry if you drip a little (like I did) you can always make it into another flower!Wait for the front of the shirt to dry and then spray your flower on the back side.


3. Once the paint has dried, use your fabric marker to make your scribble flowers. I practice a few different flowers on a piece of paper before doing them on the shirt. If you need inspiration you can Google "scribble flower images" or "doodle flower images" for ideas!

Here are some more flowers...


...and a butterfly...

...more flowers...

Here is the front of the finished T-shirt!


And this is the back!

Now, go and sit in the garden and blend in with the other flowers!

Disclaimer:
I was supplied with Simply Spray to complete this project.

Linking to:
Funky Junk's Saturday Nite Special
http://www.thethriftyhome.com Show and Tell Green

 Visit thecsiproject.com


This post Sponsored by:


A great place for shopping finds, reading/movie lists, crafts, recipes, giveaways, daily life and much much more.

Content Ad